Publish It
So far everything has stayed in Composer. In this chapter the boat goes on sale. First you meet the two ways Composer tells you something is wrong, by making each mistake on purpose, so that you know them when they are real. Then you save, publish, open the product page and read the first order.
Saving and publishing work on every plan. What you publish has to be on yours, though, so if you loaded a chapter's file rather than building it, turn off what your plan leaves out: the app refuses a PDF report on any plan but Pro, for one, and names what to change.
The project has to be linked to a product, the one you priced in the last chapter. If you left Also create a product for this configurator ticked when you made the project, it already is. If not, link one on the project's page in the app.
Starting here? On Composer's start screen press Have a saved configuration? Load a scene config or project file (.json) and pick this file. It holds everything the earlier chapters built.
Download the file this chapter starts from (53 KB)Check it and publish
-
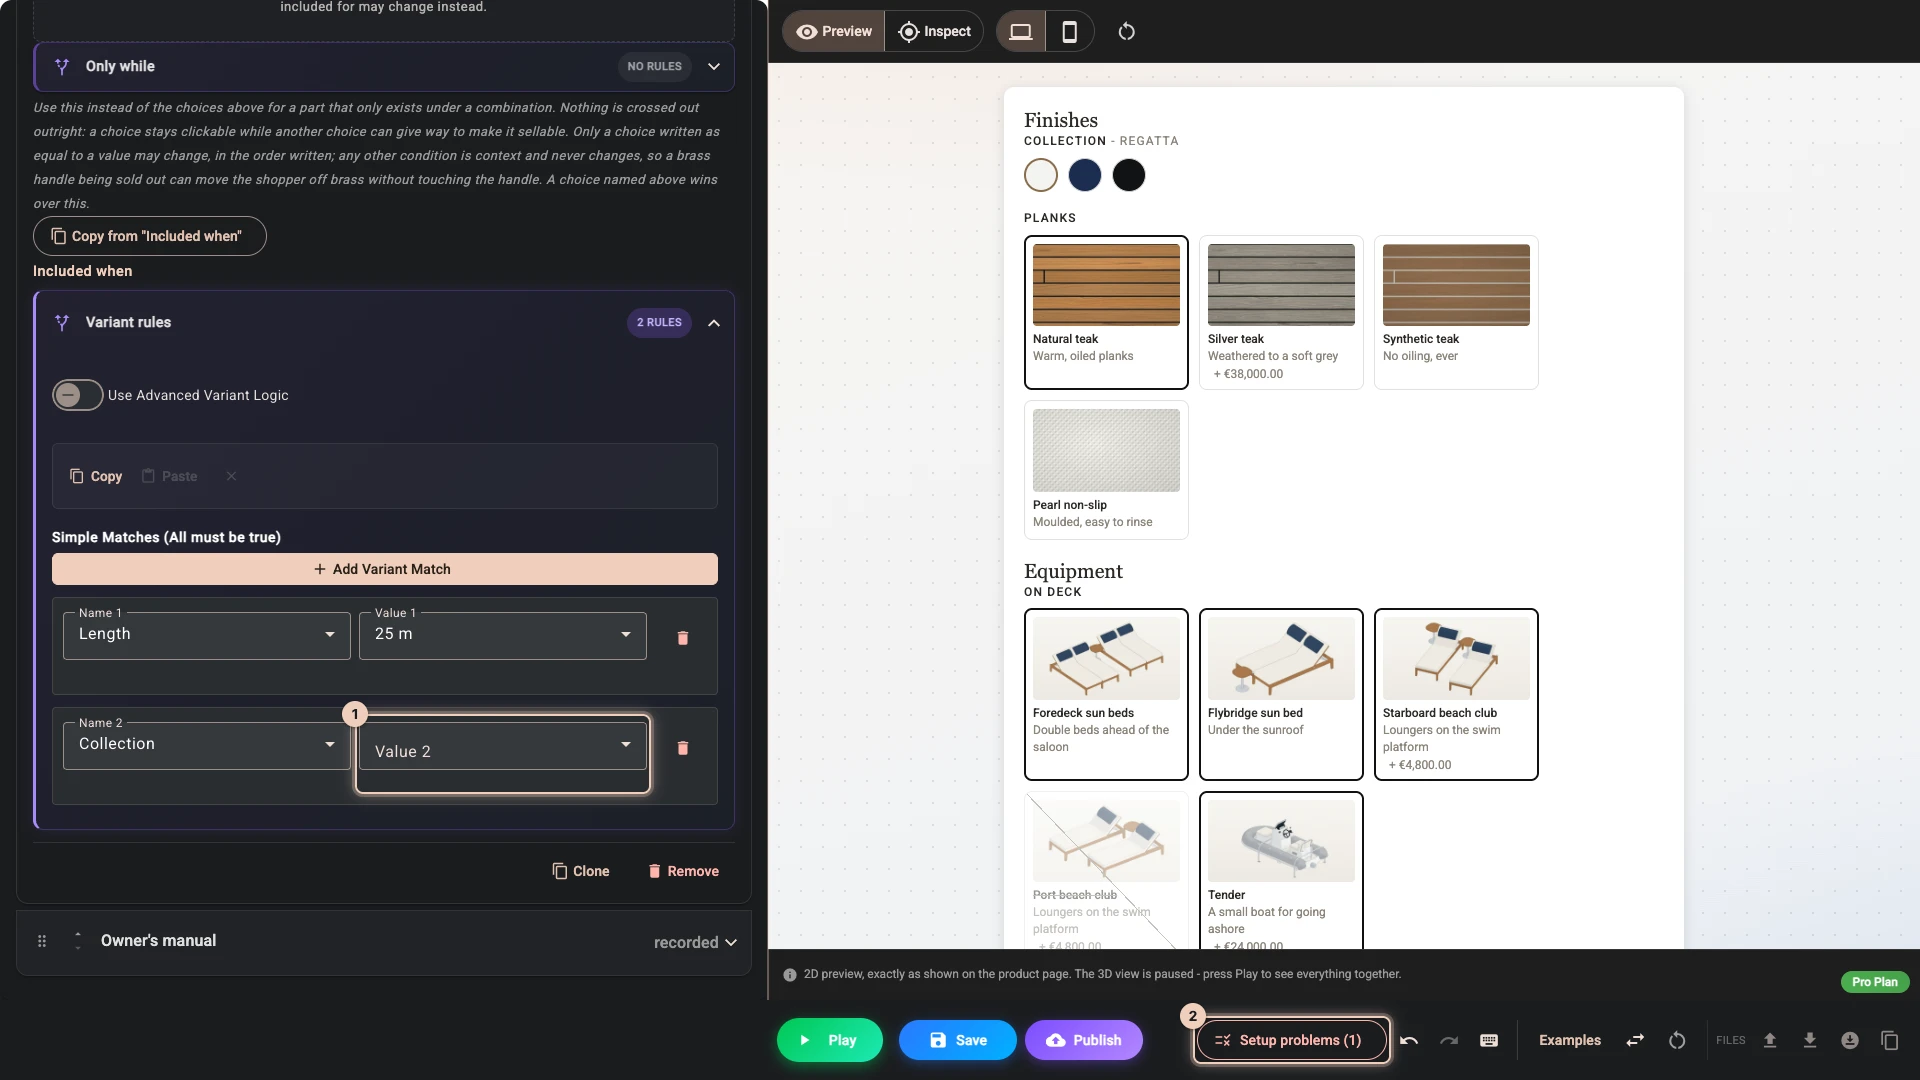
Start with a mistake, made on purpose. Open Parts and the Anchor, 40 kg part. Under Included when press Add Variant Match, set the new row's Name to Collection and leave its Value empty 1. A Setup problems button appears on the bottom bar 2.
-
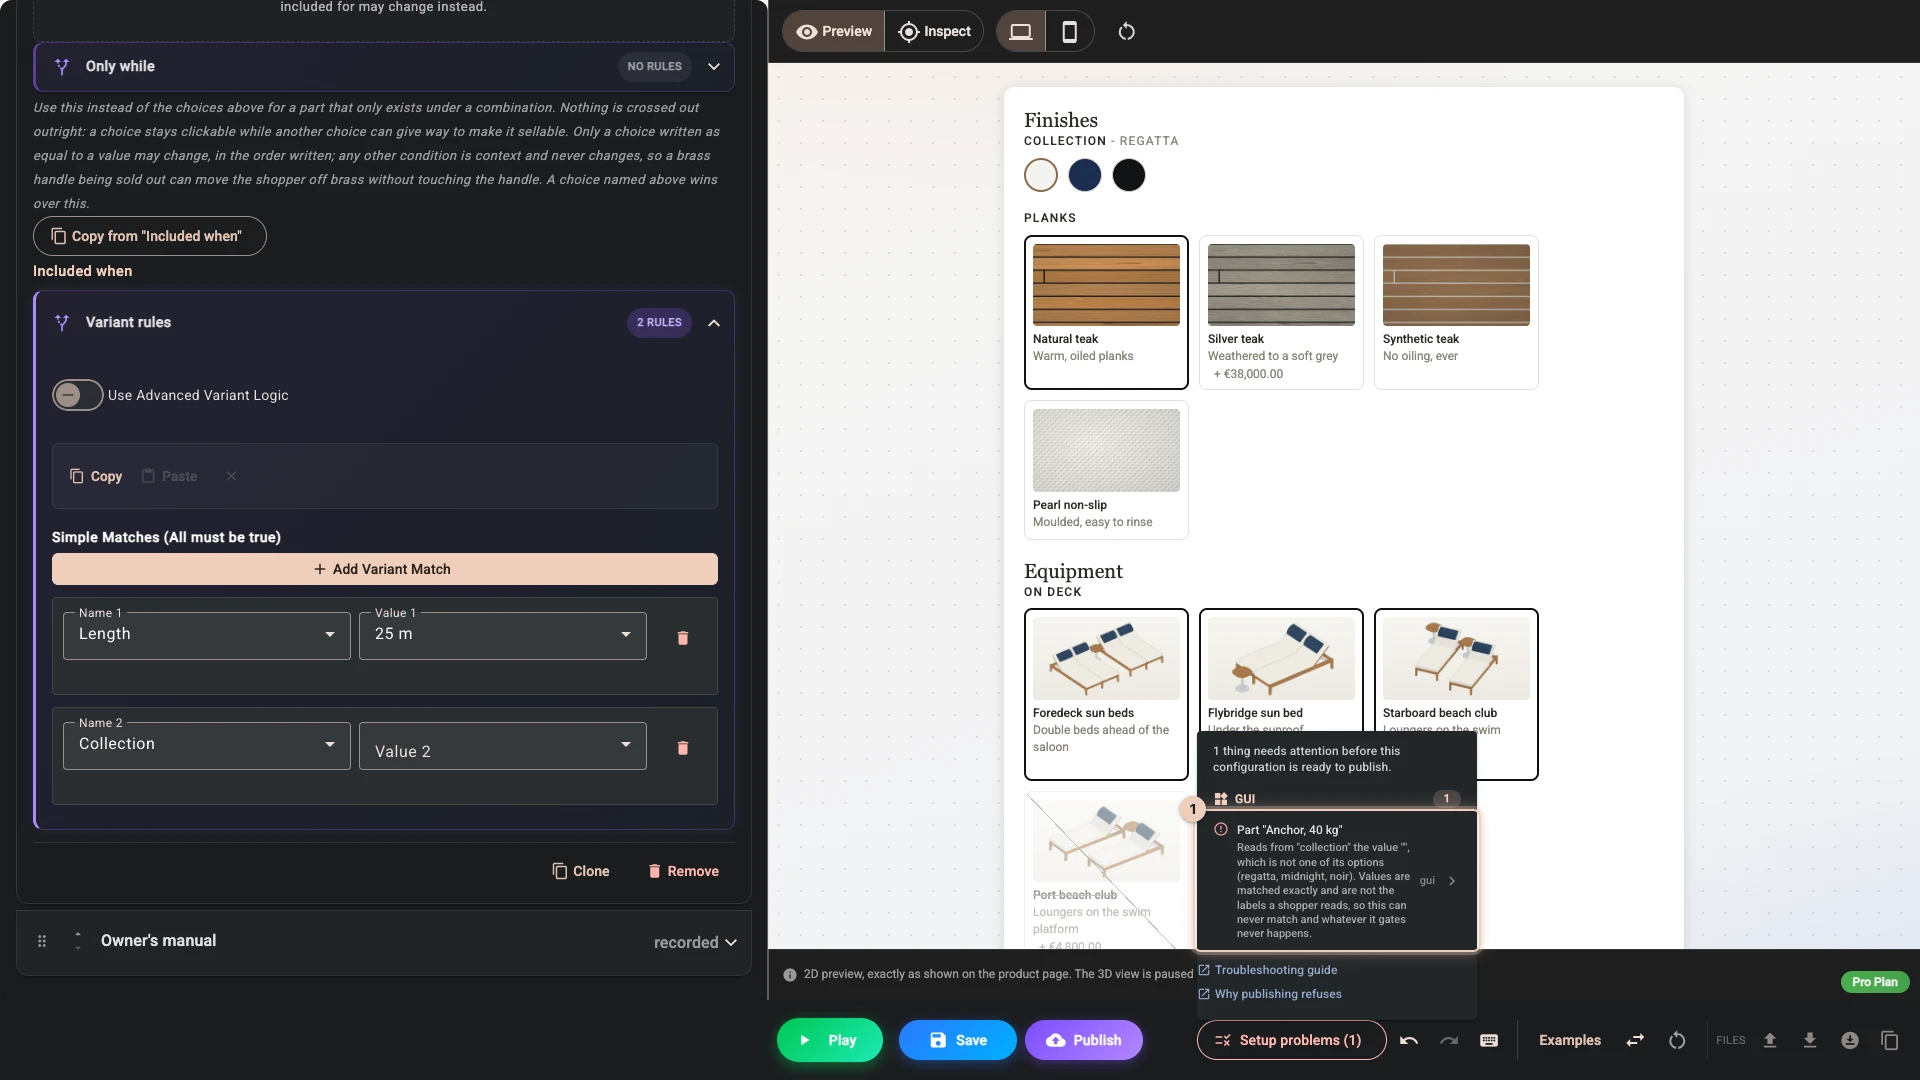
Press it. The list names the part and says what is wrong 1: an empty value is not one of the options, so this match can never hold and the anchor would never be included.
-
Close the list. Press the bin beside the second match, then Remove. The button leaves the bar with the problem.
-
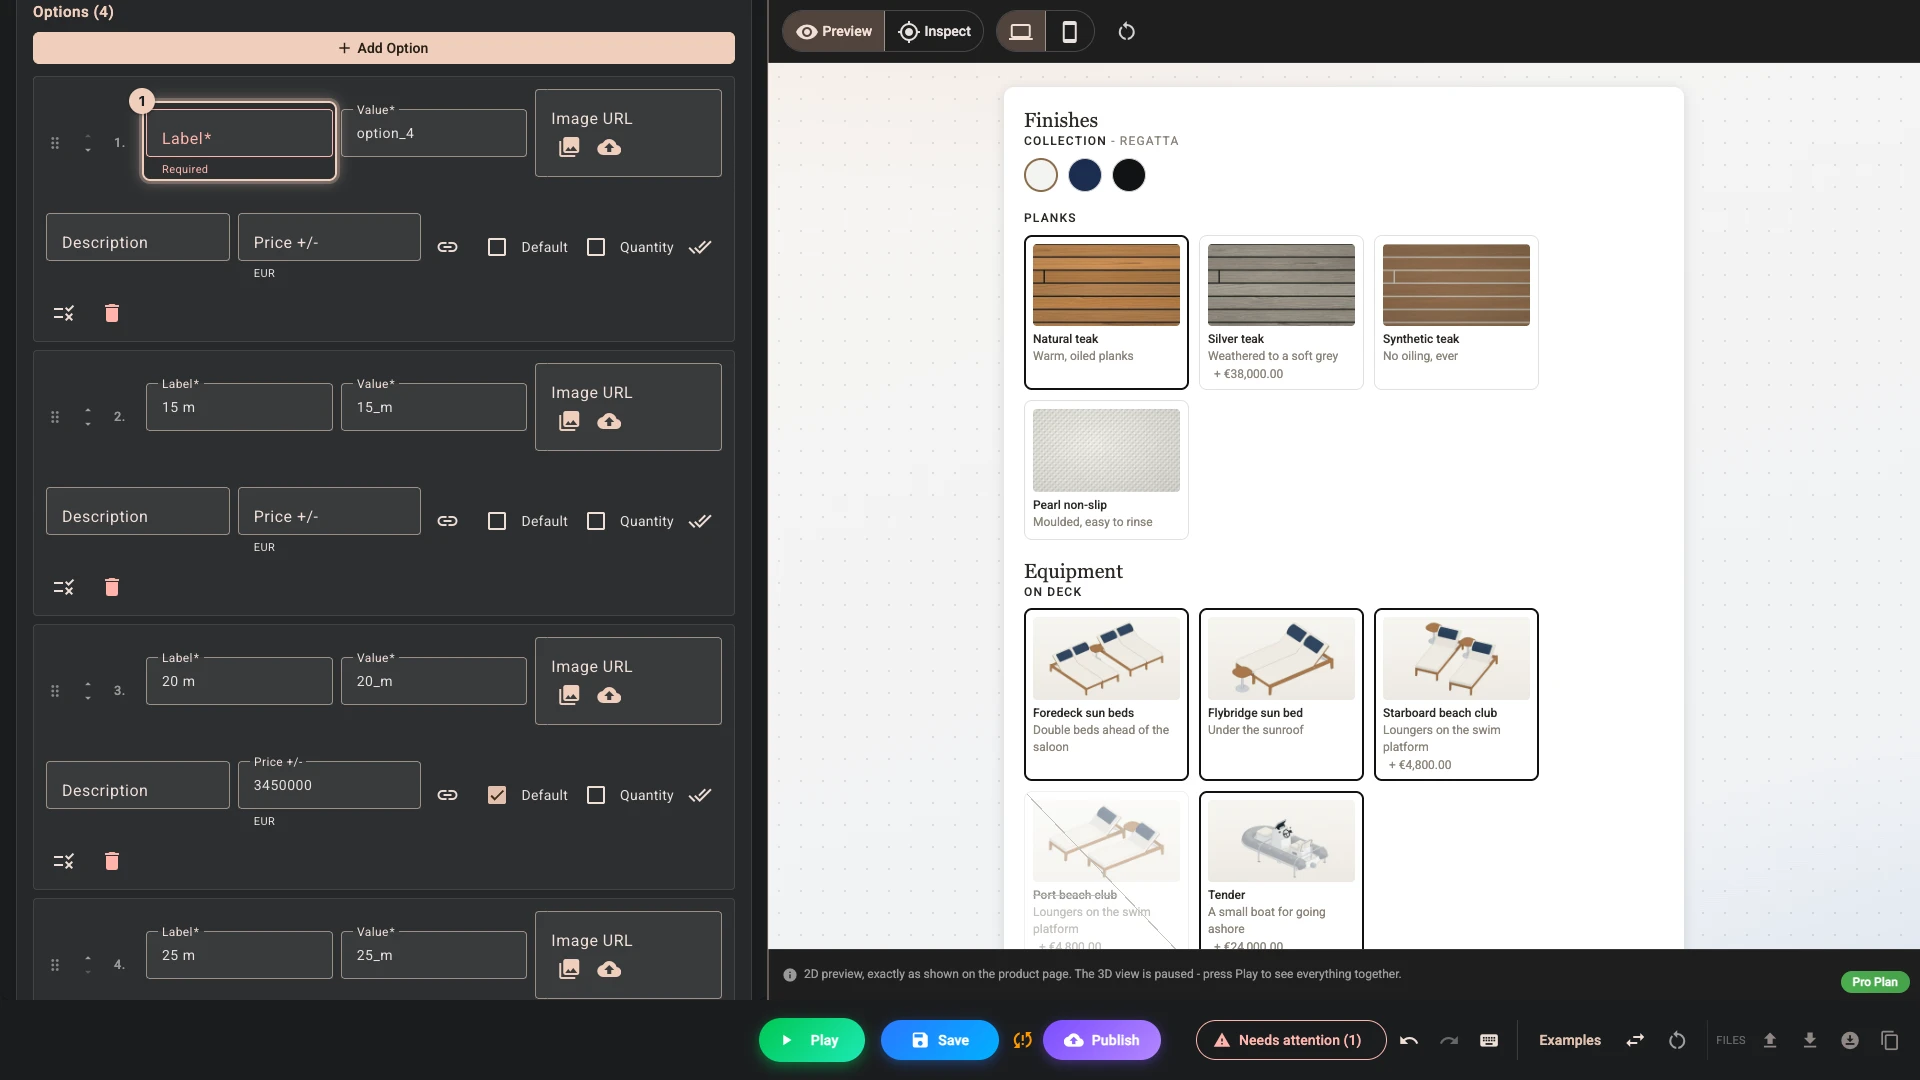
That one was a warning: Composer would still have let you publish. The next mistake stops you. Open Controls and the Length control, press Add Option and clear Label on the new row. The field turns red and says Required 1.
-
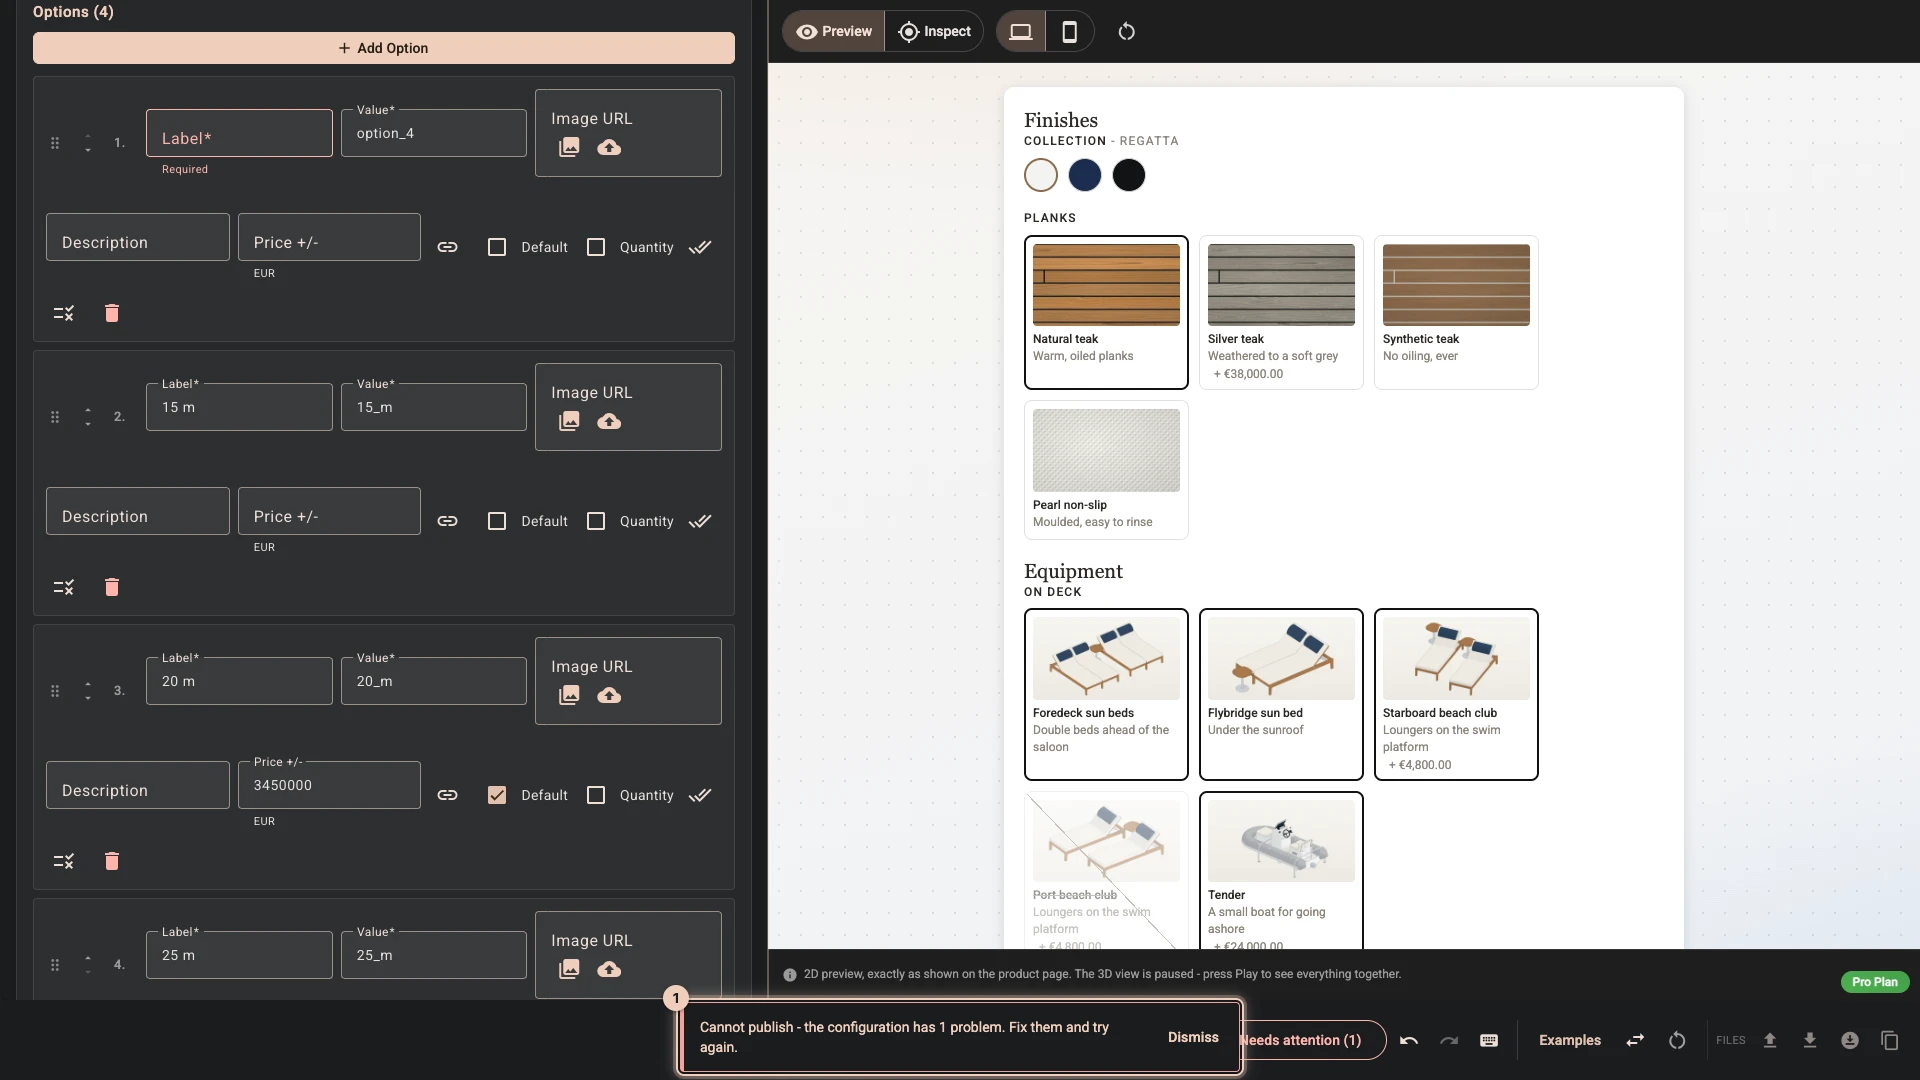
Press Publish. Composer refuses and says how many problems stand in the way 1. Nothing has left Composer, and your store has not changed.
-
Typing a label would clear the problem. Here, press the bin on the new option, then Remove.
-
Press Save. The project now holds your work, and your store is unchanged.
-
Press Publish. With nothing in the way, Composer asks once more and says what is about to happen 1.
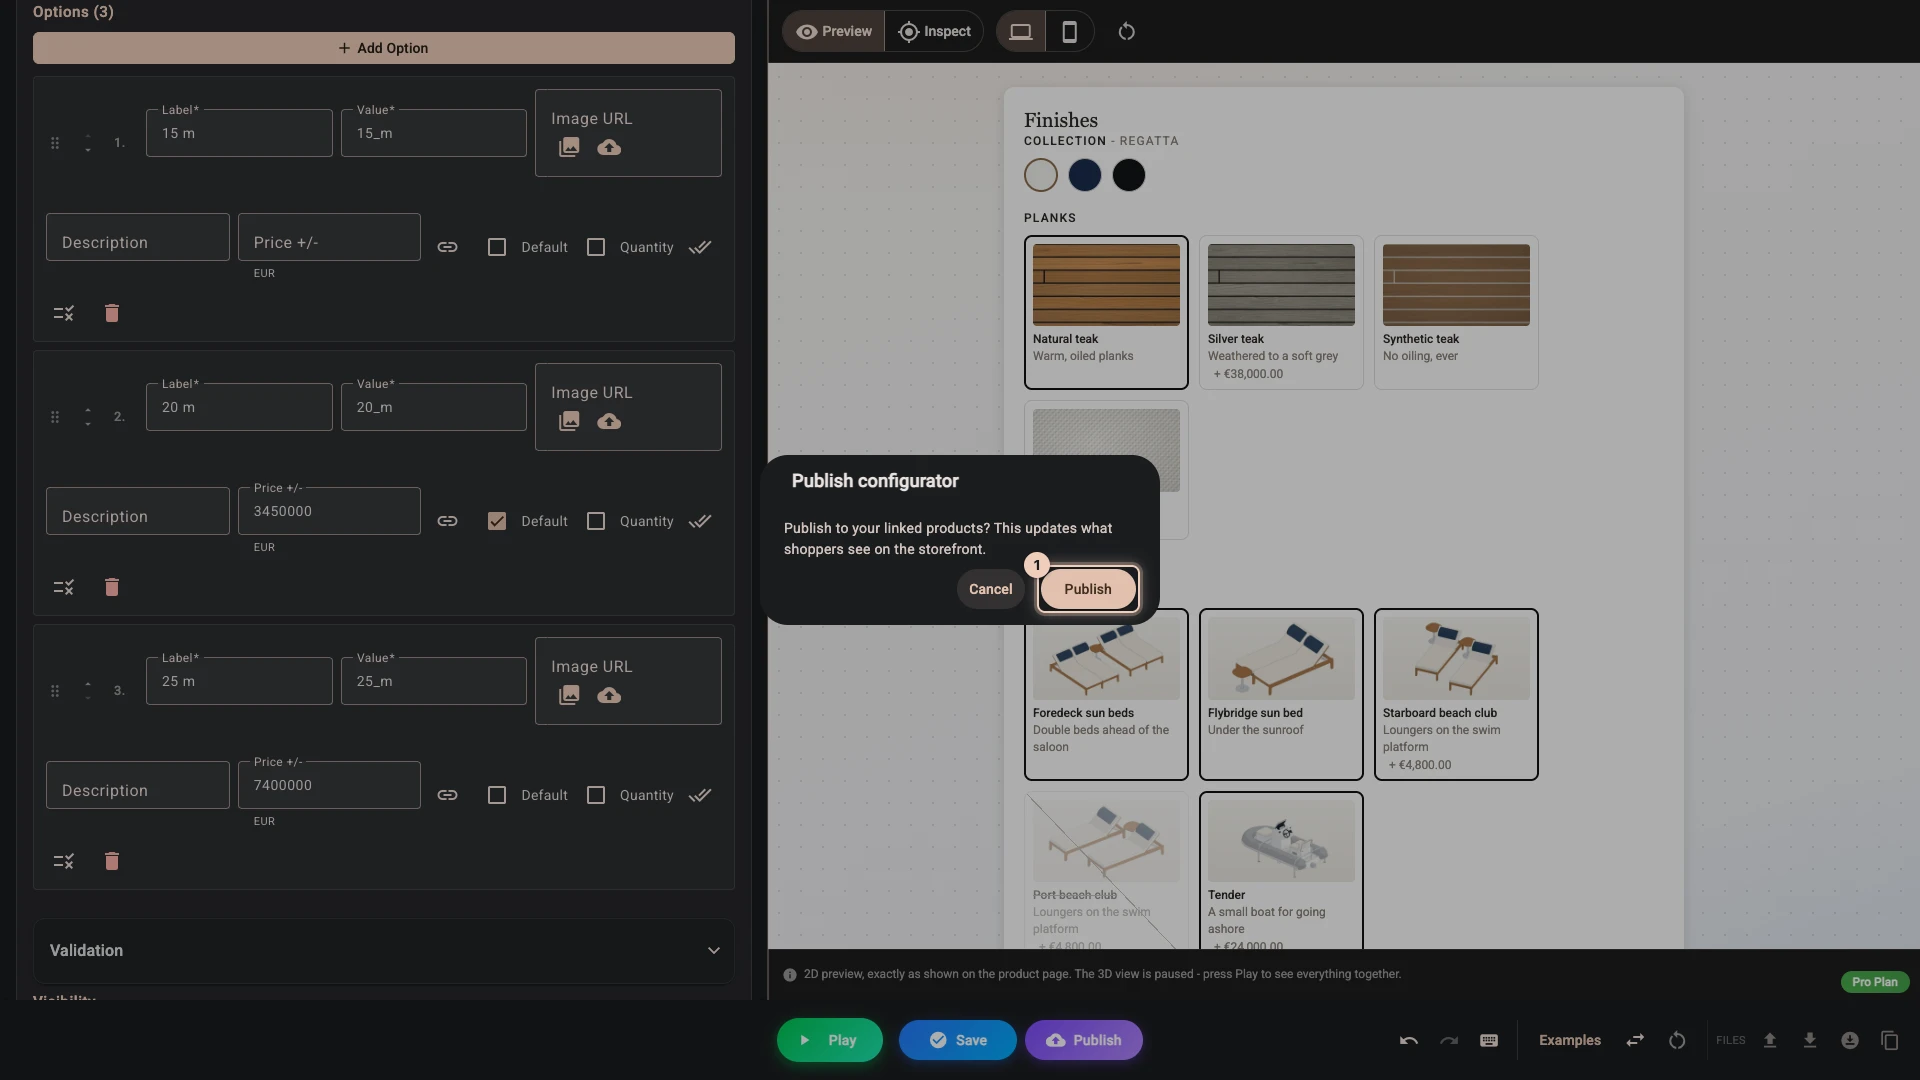
-
Press Publish in the dialog. When it is done a View on storefront button appears beside it 1.
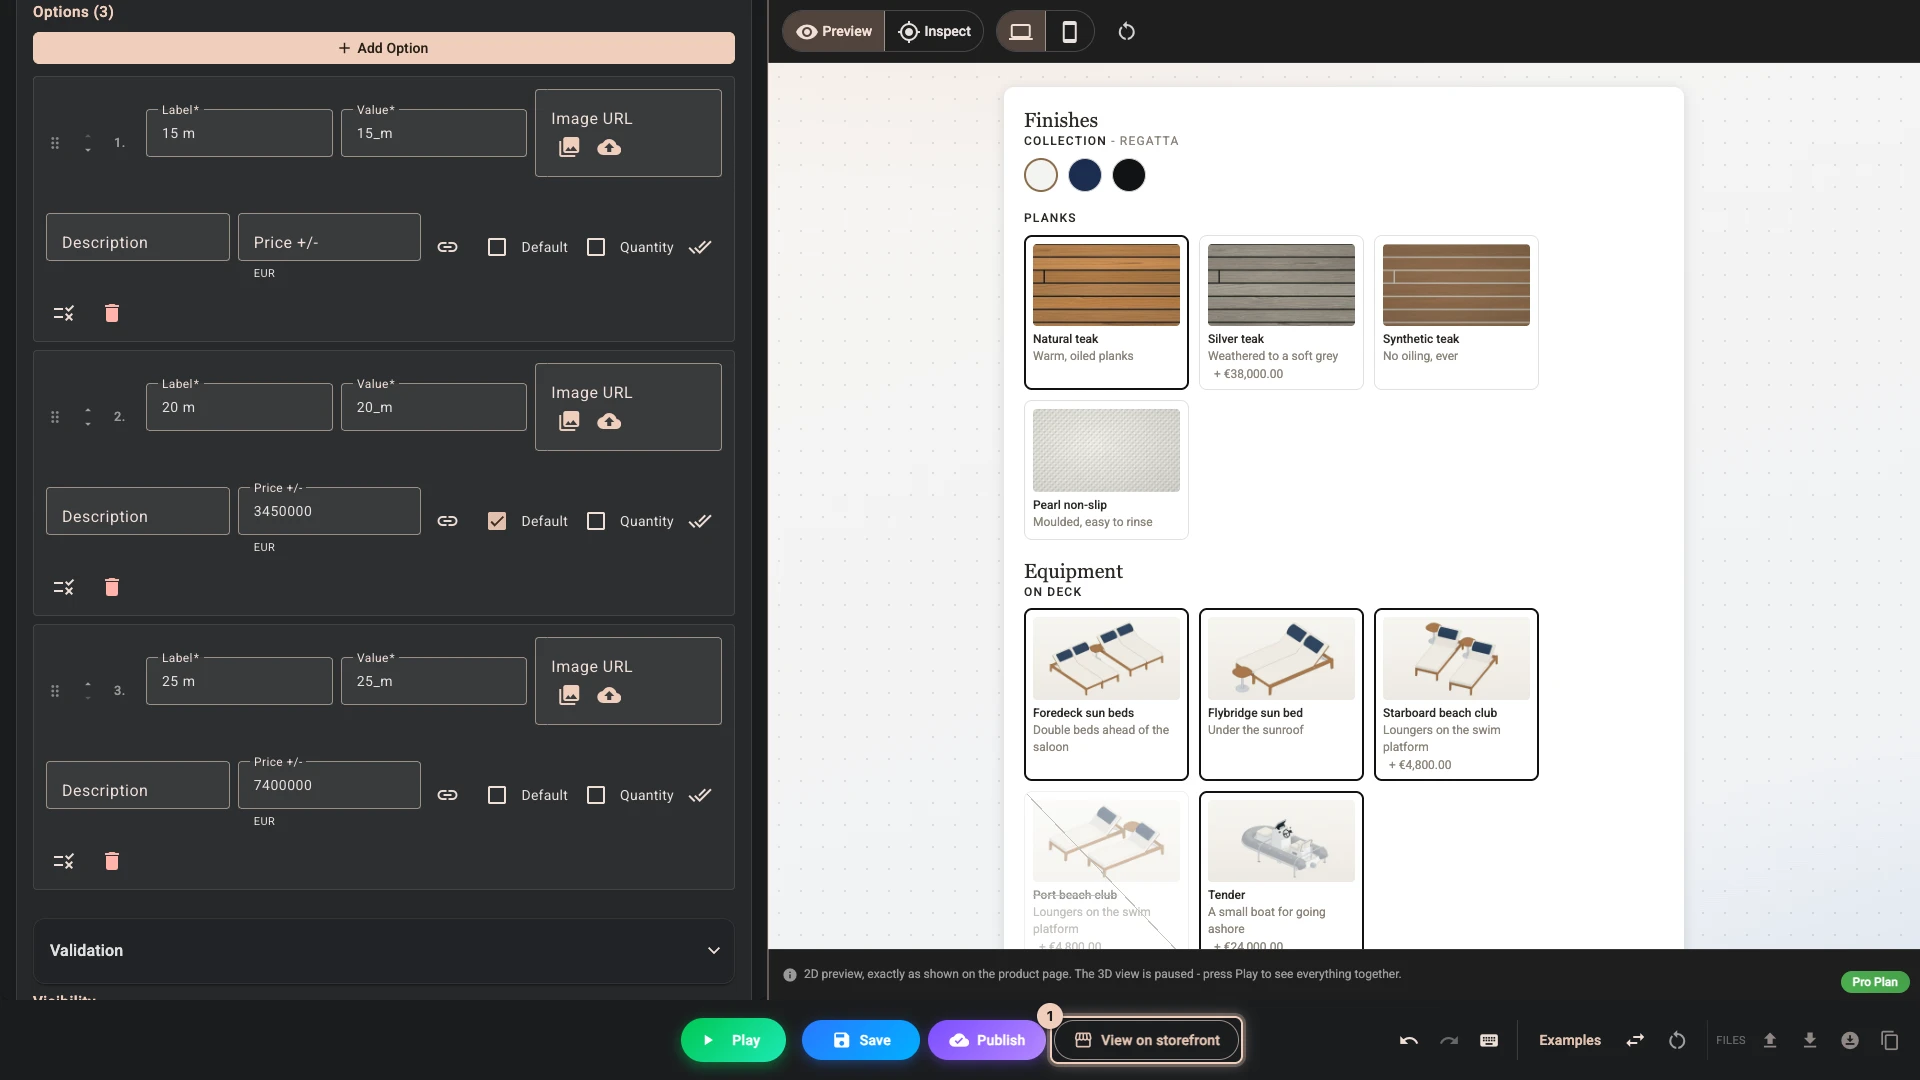
Three places a problem shows
Setup problems lists what the file allows but the configurator would get wrong, while you work. Most rows are warnings. A row labelled Blocks publishing is not: the app refuses to publish until it is gone.
A red field is one the form cannot accept, and Composer refuses before anything leaves it. Over the 3D view a Needs attention button lists every such field and takes you to each. While the GUI preview fills that space, the same button sits on the bottom bar.
Blocking Publish appears when the configuration breaks the file format itself, which a hand-edited file can do. Press a row to go to the field.
The app runs checks of its own after you confirm, against your store and your plan. A refusal there changes nothing on your store, and the message names what to change. Why publishing was refused lists every one.
On the product page
View on storefront opens the product page in a new tab. The button reads Preview while the product is not on your online store yet.
The first project in a store needs one more thing, once: open Storefront in the app, press Enable 3D on your store and save in the theme editor. Enable the app embed walks through it.
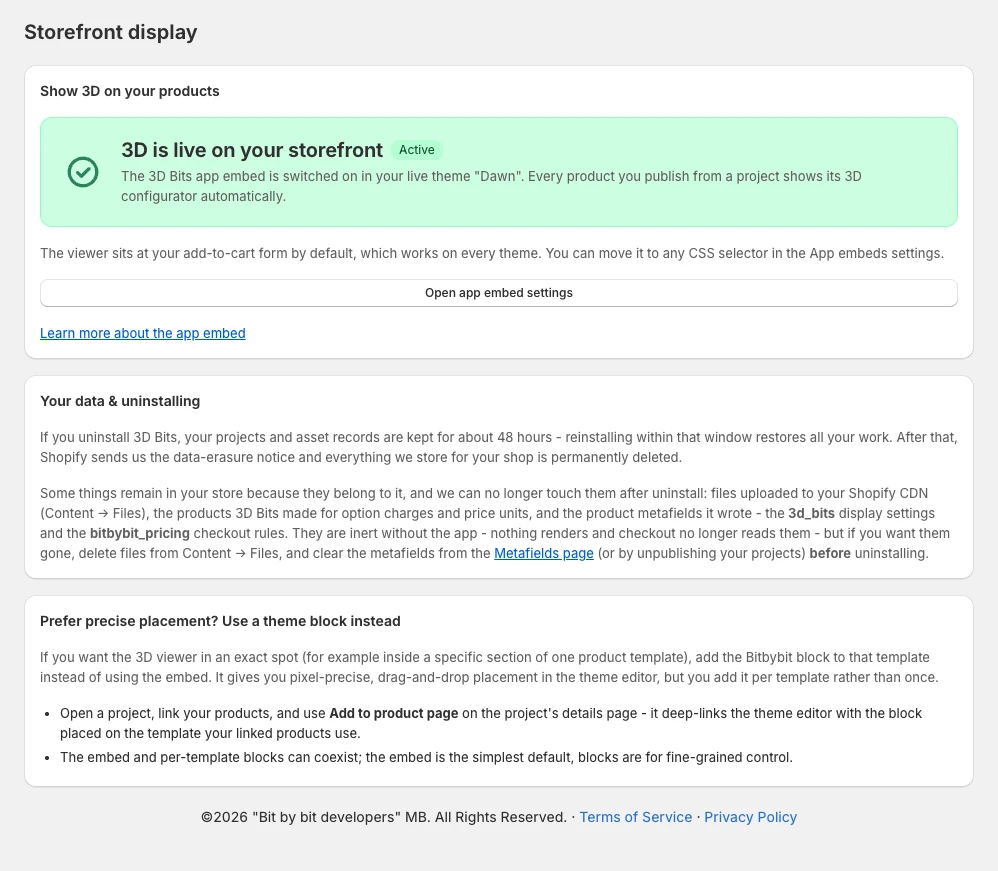
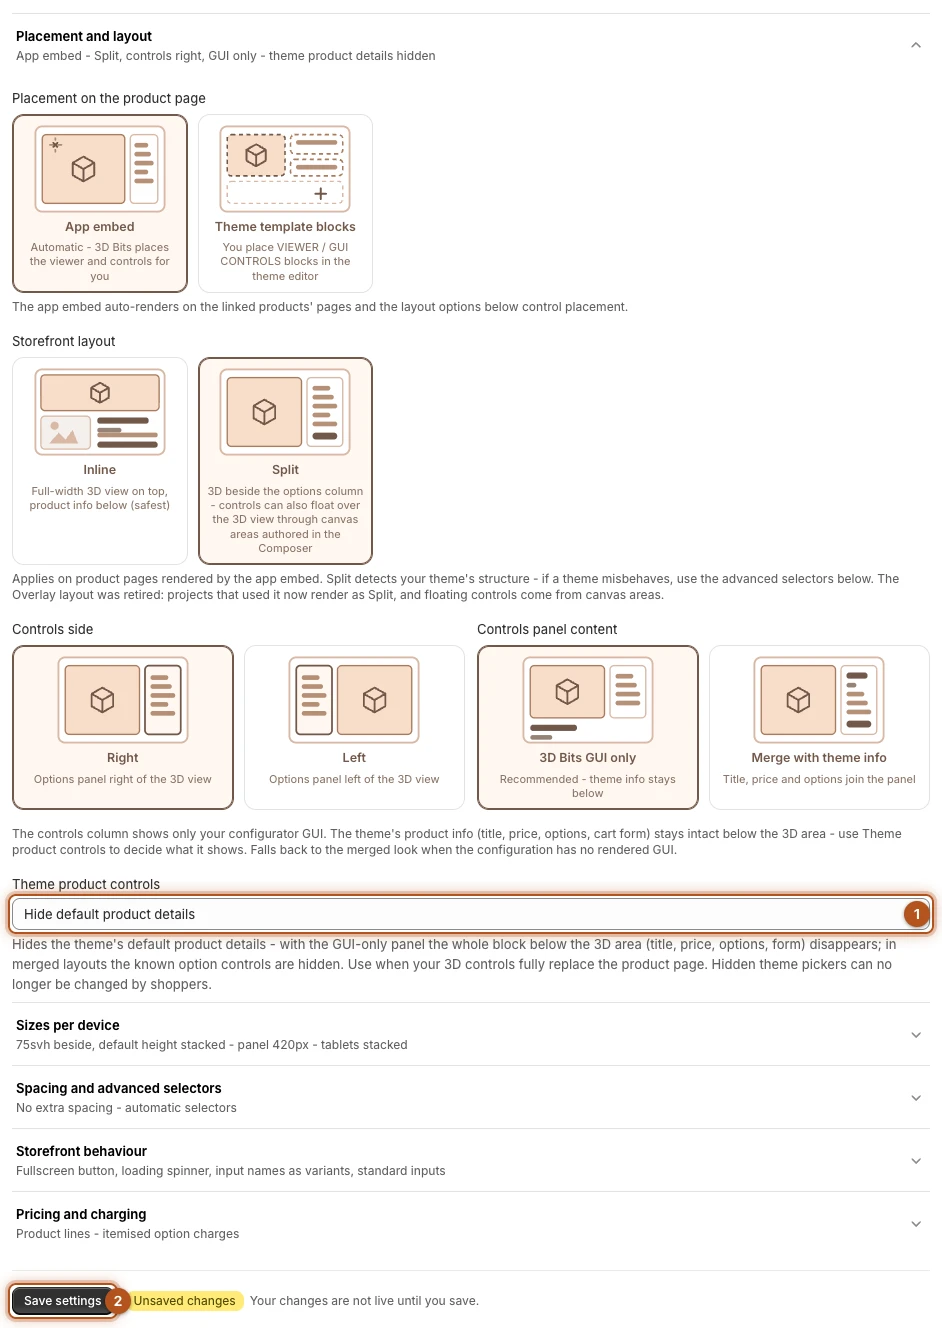
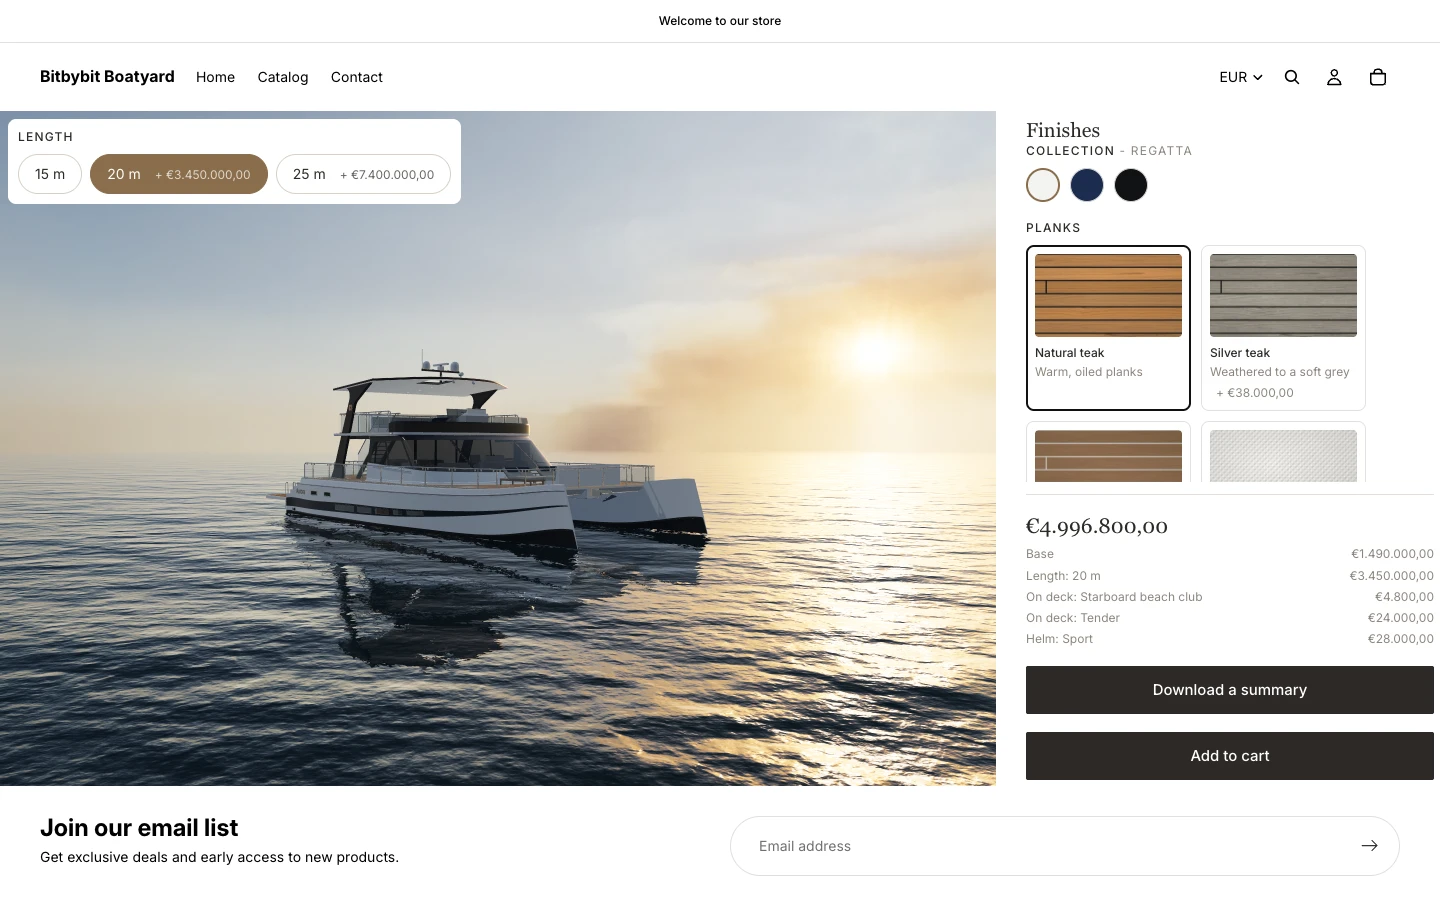
Under the 3D view and the panel, your theme still shows its own product details: the boat's title and its price. That price is the product's own, 1490000, not the total in the panel, and beside the configurator it reads as a second, wrong price. Hide it. In the app, open the project, open Placement and layout in Storefront settings, set Theme product controls 1 to Hide default product details and press Save settings 2. Saved settings reach the product page at once, with no publish.
Go through the page as a shopper: change the length, pick a finish, watch the total, download the summary and add the boat to the cart with the button under the total.
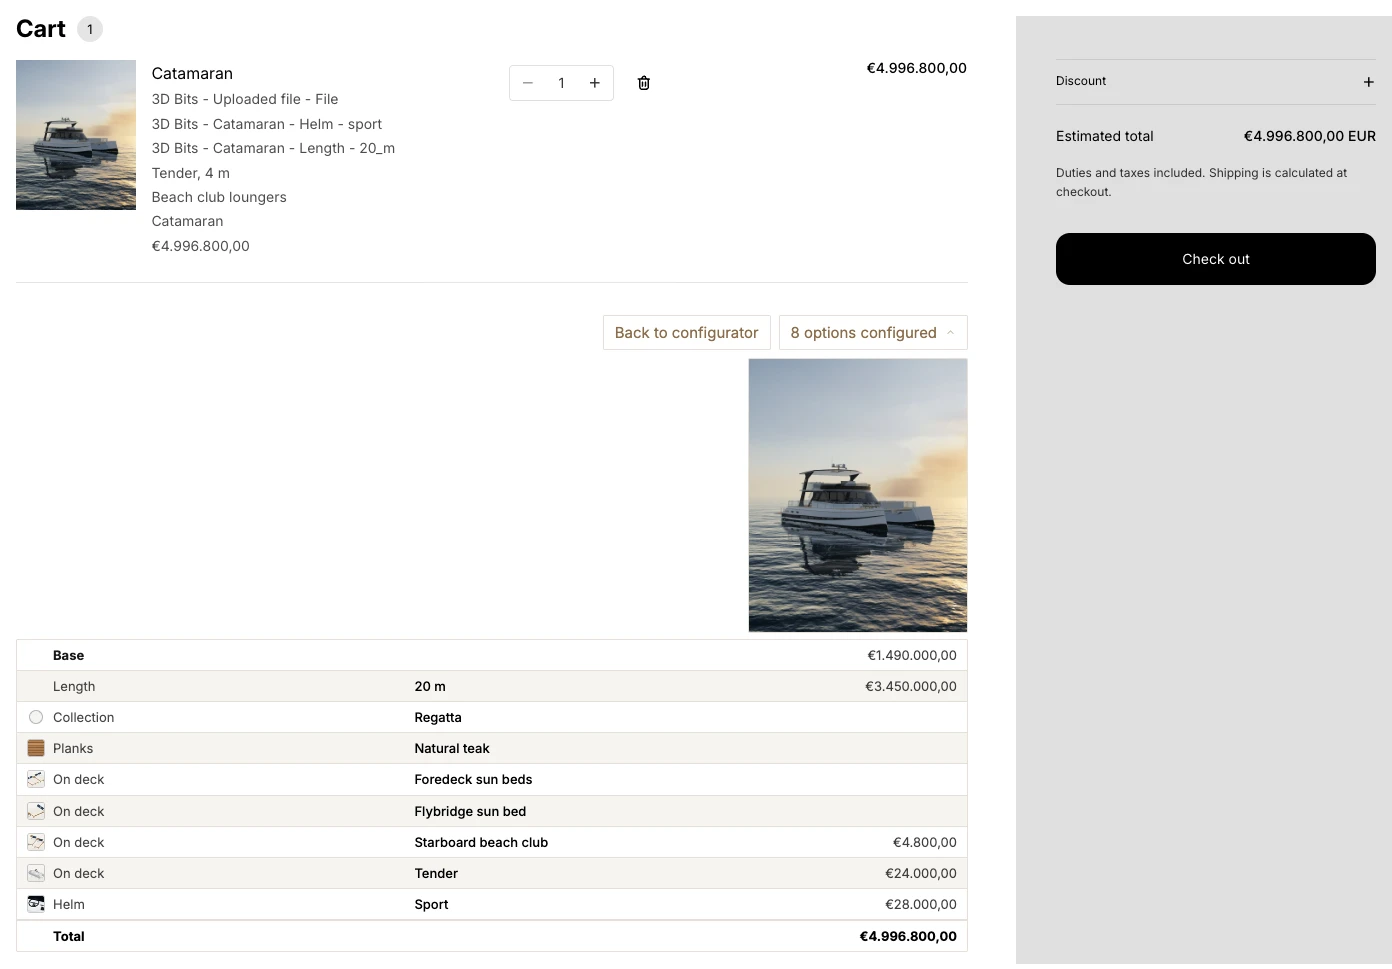
The card you designed sits under the boat in the cart, with the loungers and the tender beside it as the products they are.
Your theme and the configurator
The app embed lays out the product page for you. In the Split layout, which a new project starts with, the 3D view and your panel take the top of the product section, and what your theme shows for the product - its title, price, options and buttons - moves below them. Theme product controls decides how much of that a shopper still sees:
| Choice | What it hides |
|---|---|
| Smart - hide what the configurator replaces (recommended) | The theme's add-to-cart button, its quantity and its express checkout buttons, when your panel has an Add to cart. Without one, only the express checkout buttons, and only when the configuration puts something on the order, such as its price or a picture. |
| Hide buy buttons and quantity | The theme's add-to-cart, quantity and express checkout buttons, whatever your panel holds. |
| Hide default product details | All of that, the theme's own option pickers, and in the Split layout the whole column under the configurator, title and price included. The boat uses this. |
| Show everything | Nothing. |
Two things hold whichever you pick. If your panel's Add to cart is hidden on some size of screen, the theme's own button stays on that screen, so a shopper can always buy. And while a configurator is paused, every buy button is hidden.
Why the panel needs its own Add to cart. The boat is charged through Product lines, the default: Shopify charges the boat at its own price, and every choice that costs more through a line of its own, which the cart shows together with the boat. Only the panel's Add to cart puts the boat and those lines in the cart together, in one step, so either all of them go in or none does. Your theme's own button would add the boat alone, and the cart refuses it. That is why Price it added one, and why Smart hides the theme's. The theme's cart form stays on the page whatever you pick: the panel's button reads it first, and does not add a boat the theme shows as sold out.
Why the express checkout buttons go. Shop Pay, Apple Pay and the other express buttons skip the details that carry a configuration onto the order, so an order placed through them would arrive without the shopper's choices. Theme buy buttons has the rest.
To keep the theme's details, leave Theme product controls on Smart: the theme's price stays with them. Bottom margin, in Spacing and advanced selectors, sets the space between the configurator and whatever follows it.
The first order
Buy the boat yourself before you tell anyone about it. Check that the total you paid is the total the page showed, and that your choices are on the order. Going live covers how to test it and what else to try.
Then open Order review in the app. It lists your configured orders, and on each one shows what the shopper configured and whether they paid the right amount. Download parts (CSV) on the order's page gives the yard its parts list, with the owner's manual on it.
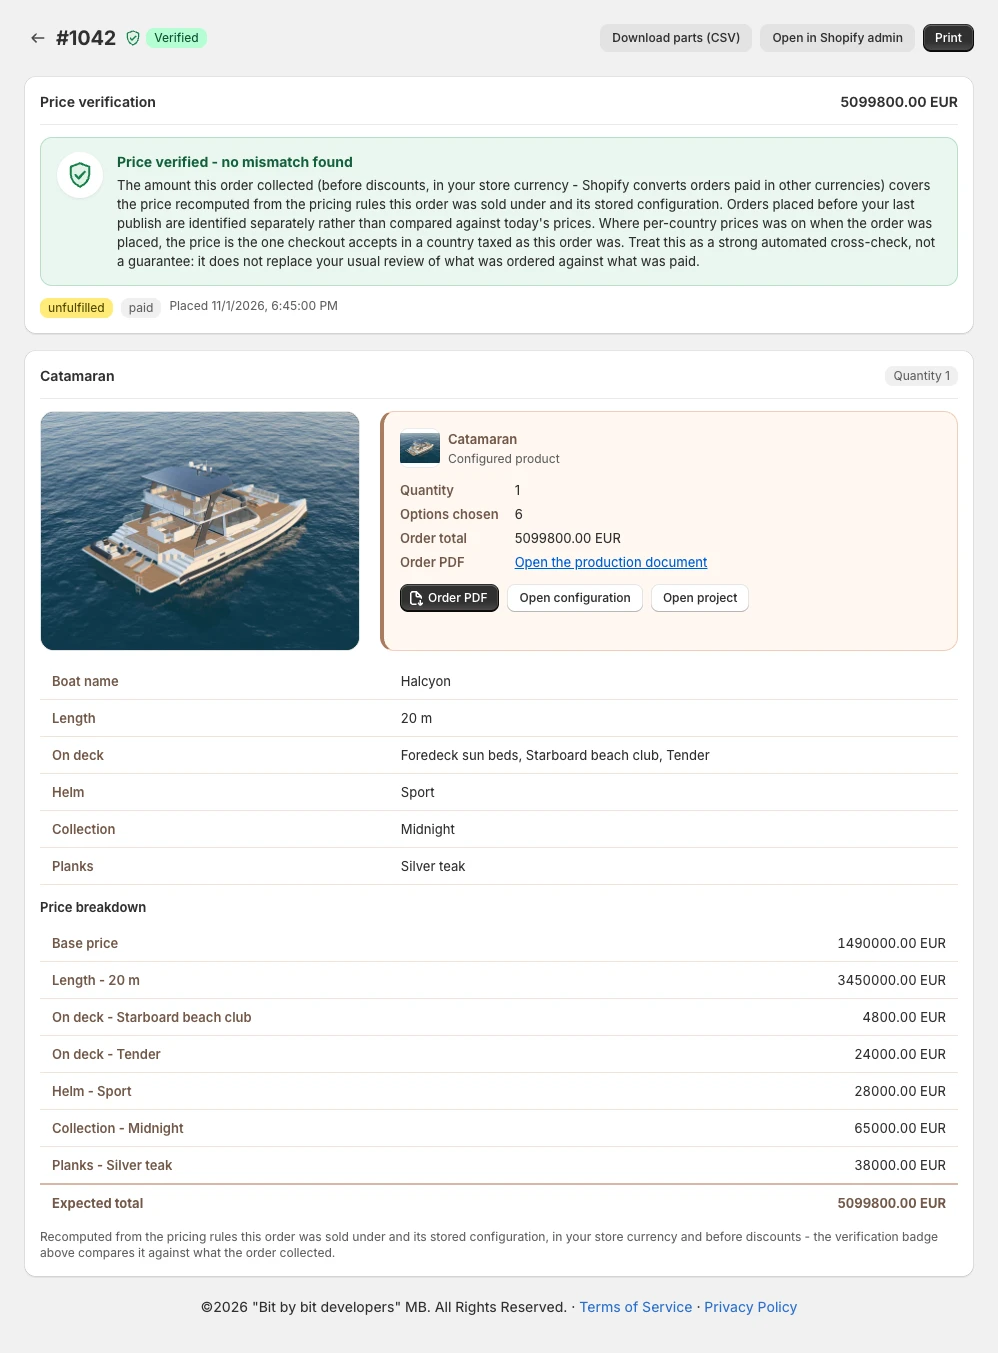
Make this part of your routine: look at the list before you fulfil an order.
From here
That is the whole configurator: one file became a boat a shopper can size, finish, price and buy. Changing it later is the same loop. Edit in Composer, press Save as often as you like, and nothing reaches shoppers until you press Publish.
To compare yours with ours, load the finished configurator the way you would load a chapter's file.
Download the finished configurator (53 KB)Composer and Pricing go deeper into everything you used here.
Verified against the product in November 2026