Show It Off
A shopper spending this much wants to look the boat over. Here they get a choice of scene and a look inside, the camera follows what they pick, the boat measures itself, and their name goes on the hull.
Starting here? On Composer's start screen press Have a saved configuration? Load a scene config or project file (.json) and pick this file. It holds everything the earlier chapters built.
Download the file this chapter starts from (37 KB)Each part needs a different plan, and the steps run from the lowest up, so go as far as yours allows:
| Part | Where it lives | Plan it needs |
|---|---|---|
| Scene and View | Scene variants, and rules on parts | Base |
| The camera | Navigation | Standard |
| Measurements | Dimensions | Standard |
| The name on the hull | Personalization | Pro |
Composer keeps those sections closed below their plan, and the product page does not draw what they hold. Play applies the same limits, so it shows what your plan puts on the product page.
The Scene and View cards use scene-sunset.jpg, scene-daytime.jpg, scene-studio.jpg, view-whole-boat.jpg and view-saloon.jpg from the download. Upload them through each option's Image URL, as in the last chapter.
-
Open GUI, then Controls, and add a control with the key
boat_scene, the label Scene and the type Radio. Give it cards as in the last chapter, Wide (16:9). Its options 1 are Sunsetsunset, the default, withscene-sunset.jpgand Warm low sun on open water, Daytimedaytimewithscene-daytime.jpgand Clear sky and a high sun, and Studiostudiowithscene-studio.jpgand No water, true colours. Untick Save the selected value on the order (line item property): this choice changes the view, not the boat.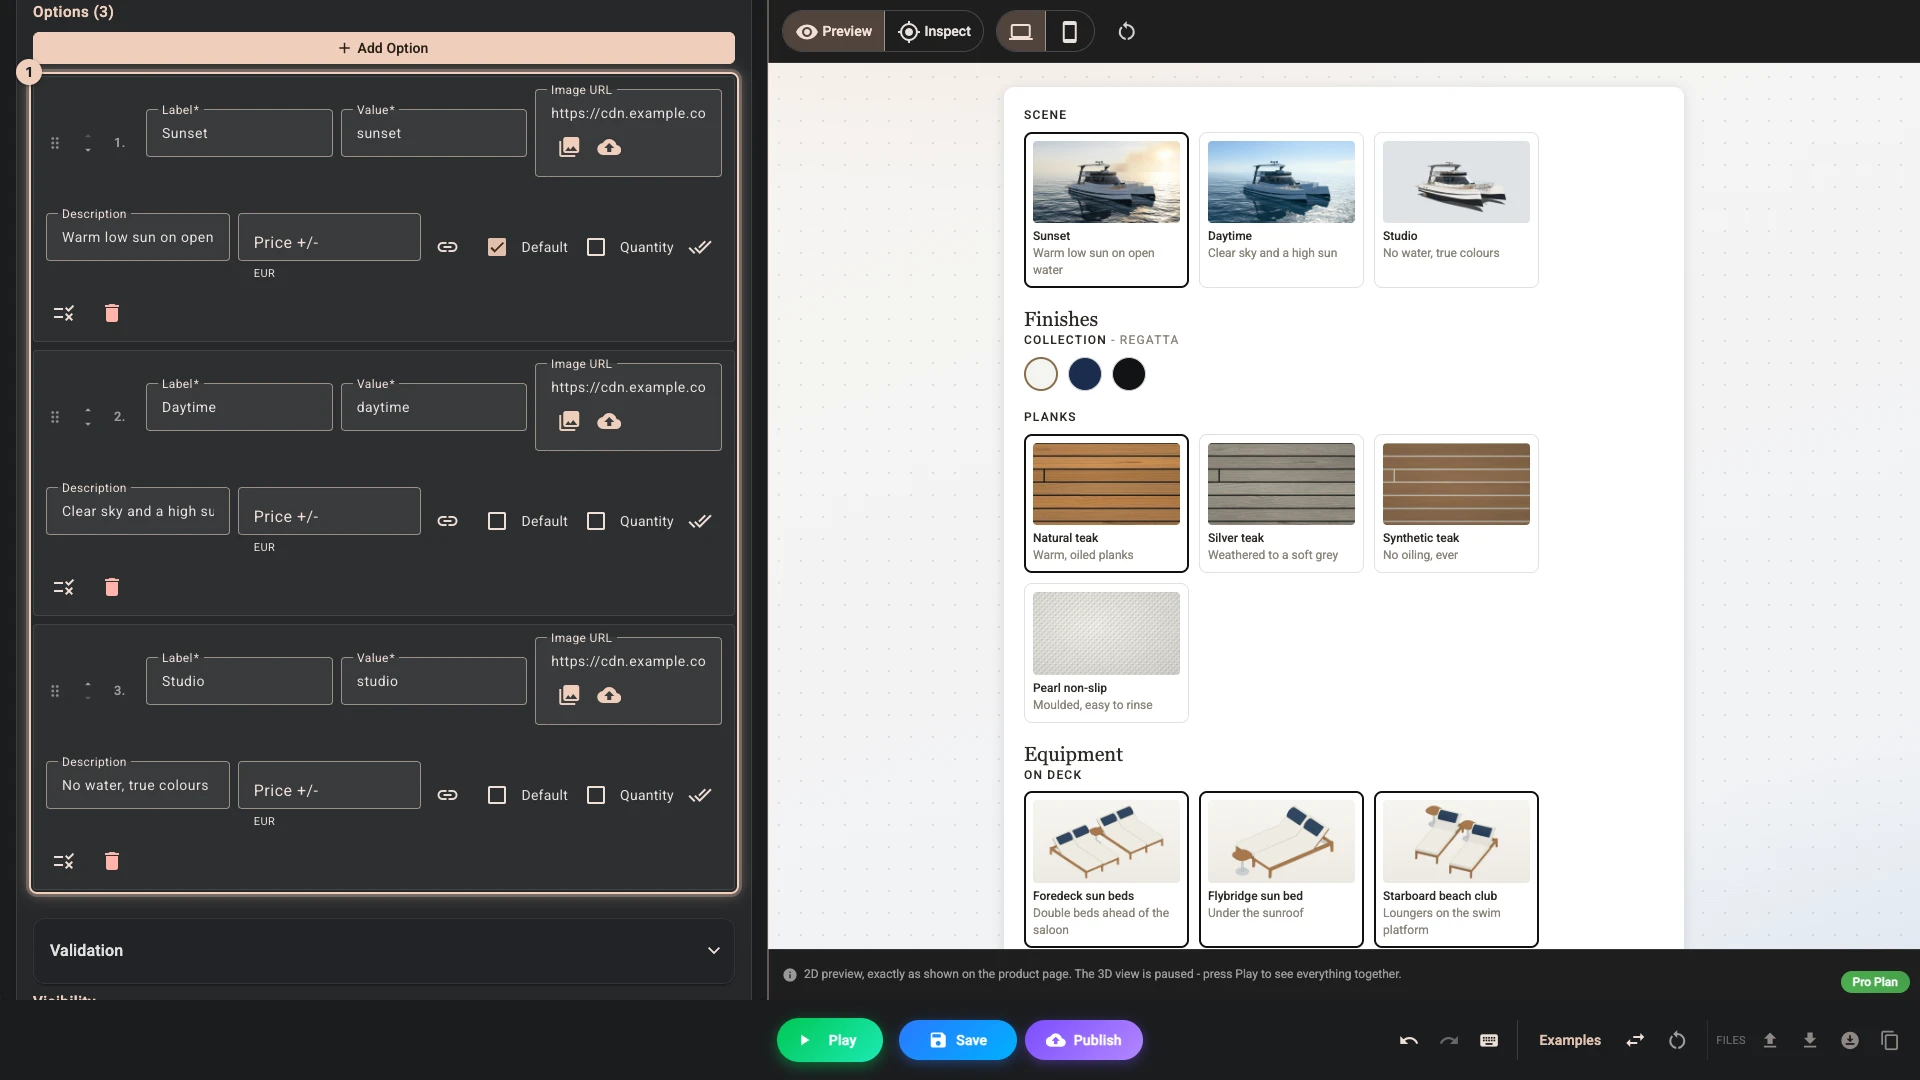
-
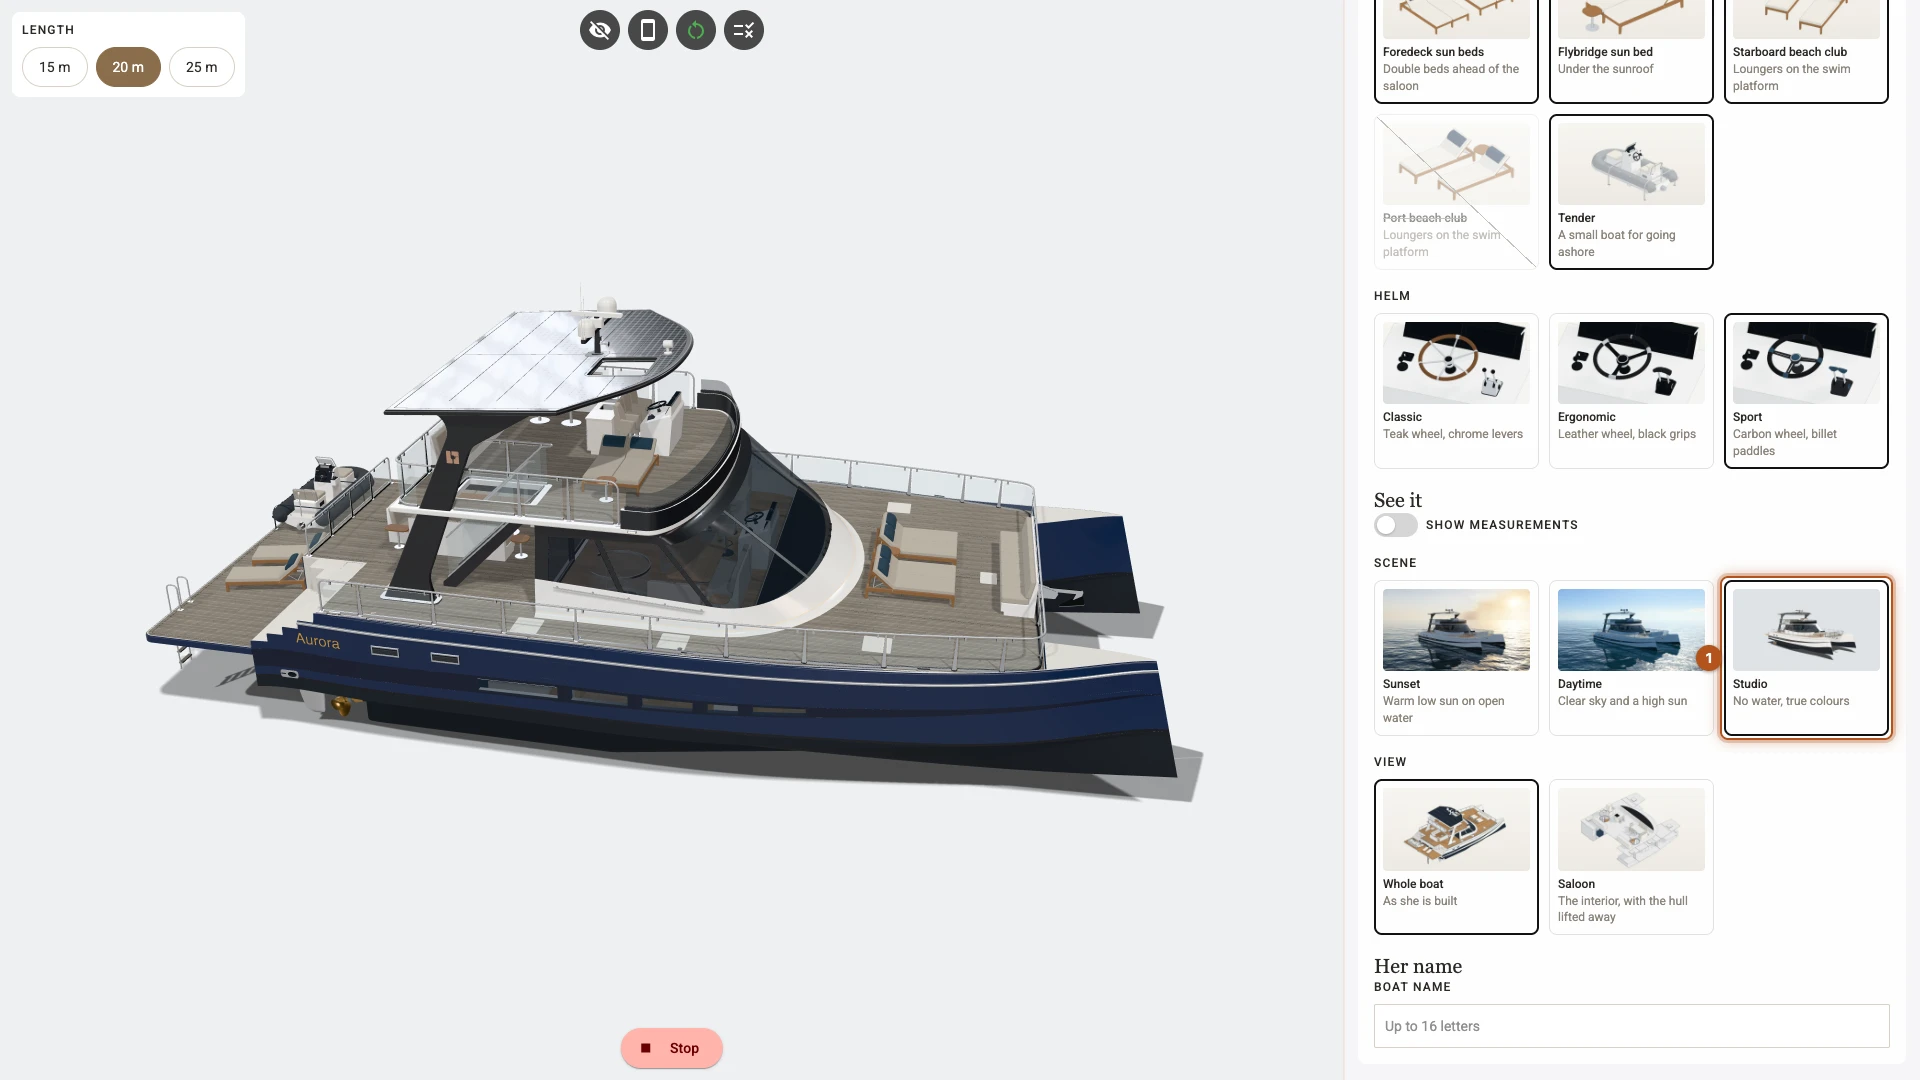
Open Scene, Environment and Scene variants, and press Add Scene Variant. Set Name to Daytime, Look to Outdoor day and Sky to Clear day. Under When to show it add a match: Scene, Daytime.
-
Add a second variant called Studio, with Look Studio soft 1, Sky Plain, Ground Shadow only, Background color
#eef0f22 and the match Scene, Studio 3. Sunset needs no variant: with no match the scene stays as you built it.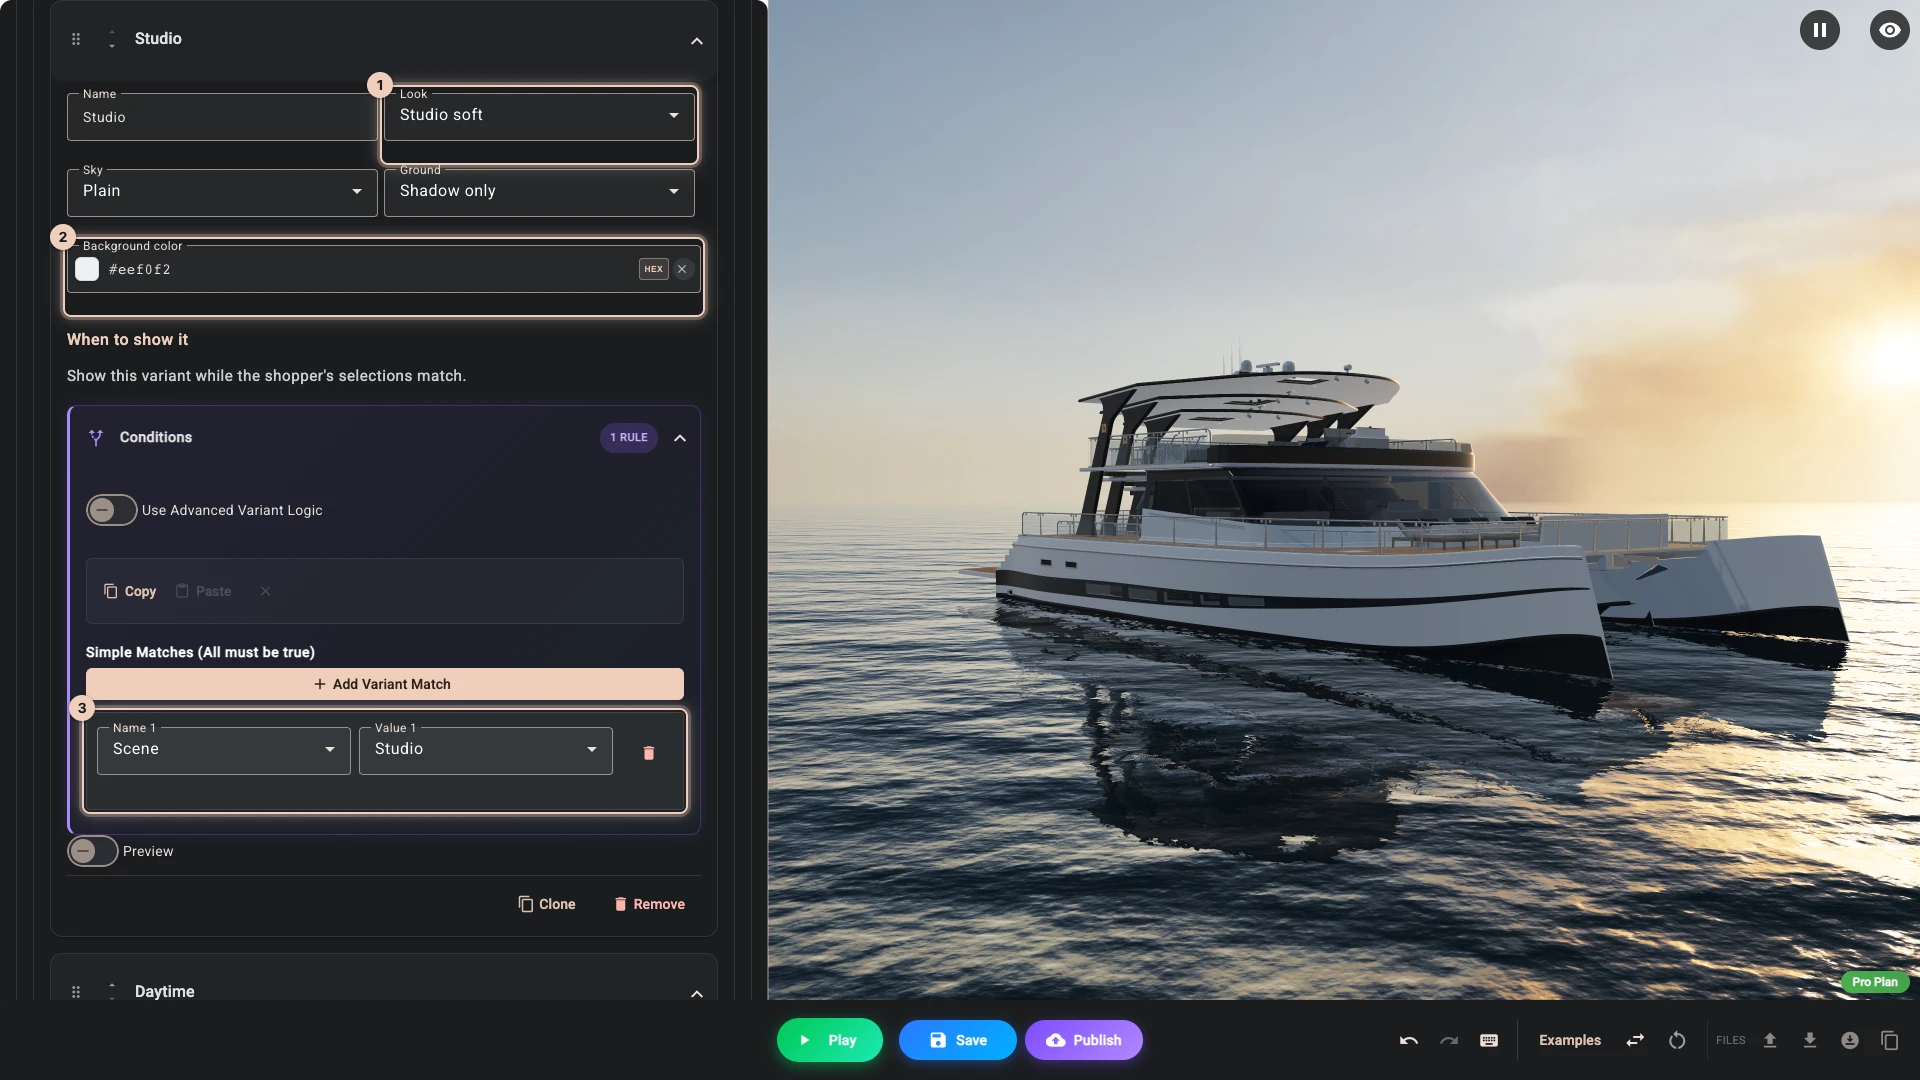
-
Back in GUI, add a control with the key
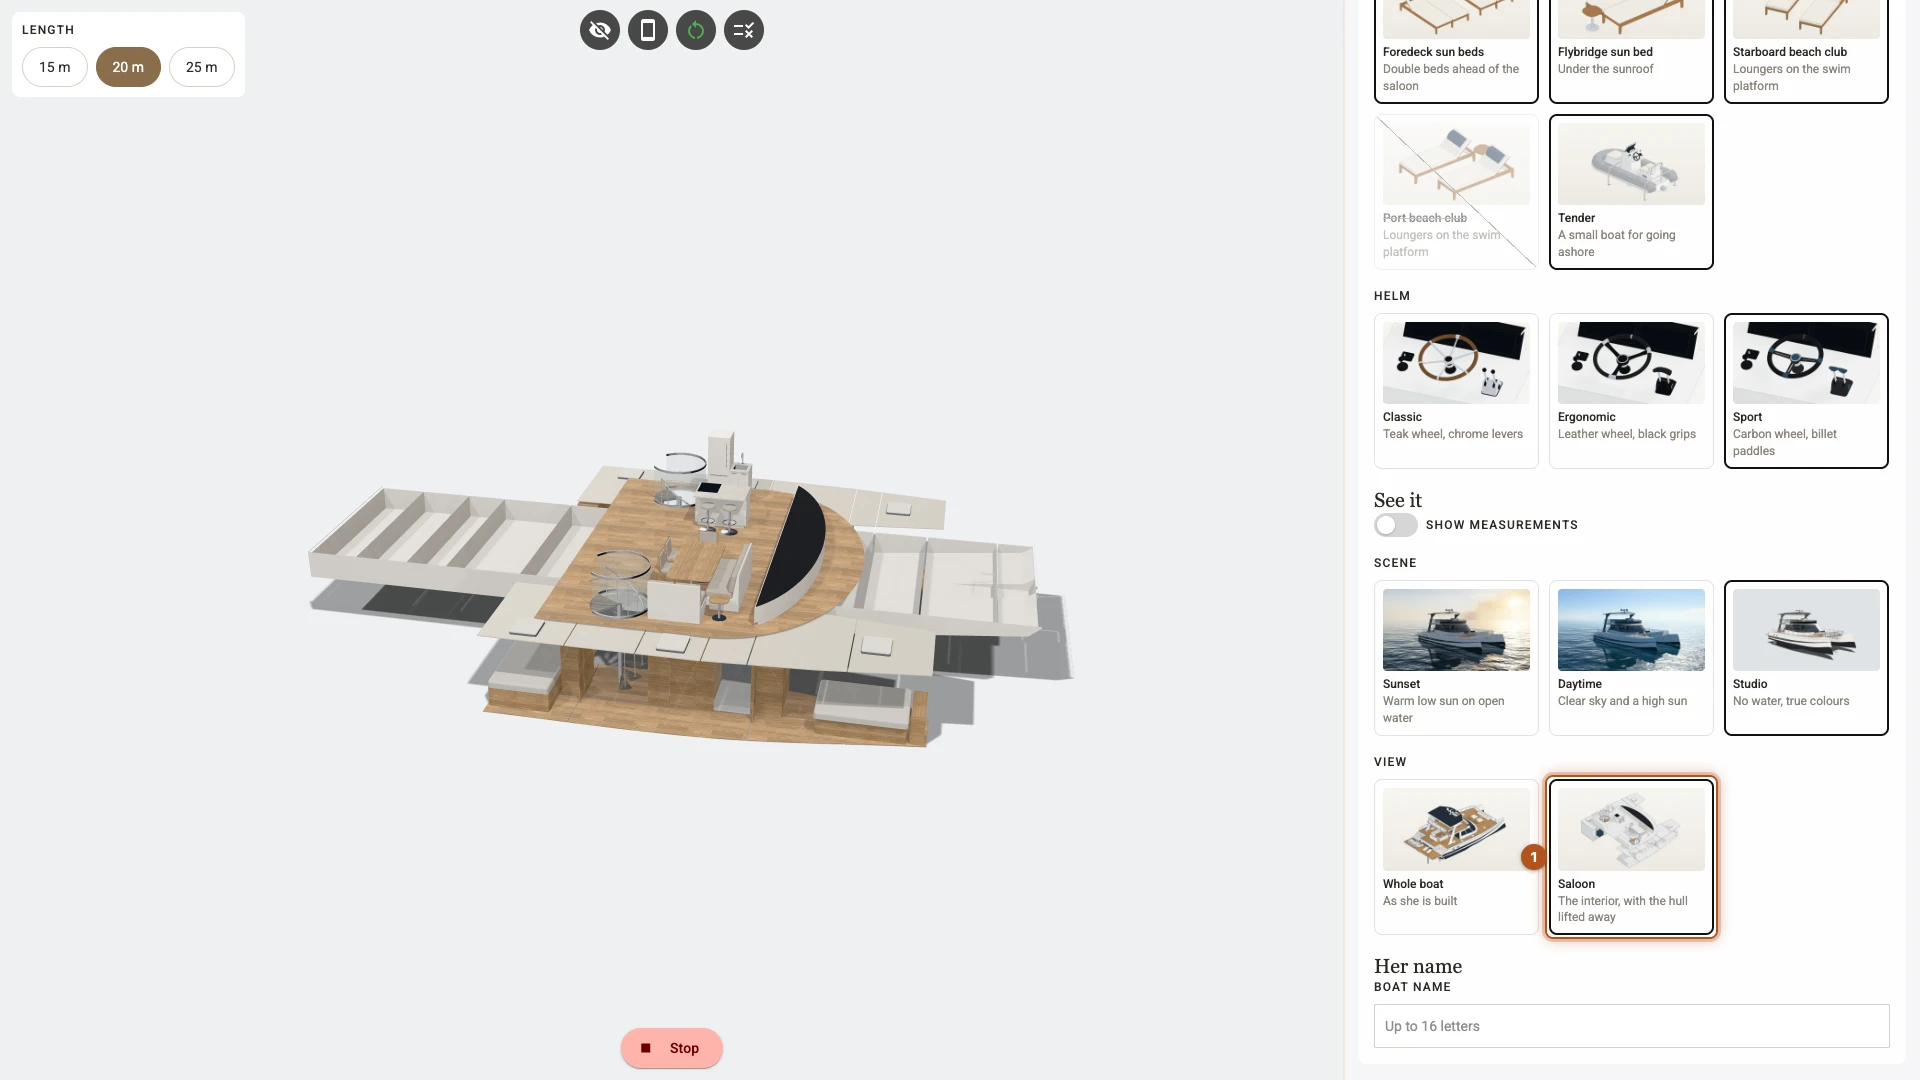
boat_view, the label View and the type Radio, with the same cards. Its options are Whole boatwhole, the default, withview-whole-boat.jpgand As she is built, and Saloonsaloonwithview-saloon.jpgand The interior, with the hull lifted away. Untick the order option here too. -
Open Models, the boat's row and Nodes, then open
unit scaleandCatamaran. Three groups stand round the saloon:Option - Shell,OptionsandOption - Structure1. On each one press the tune button at the end of the row, add a match 2, View, Whole boat, and press Save 3. Each boat holds its own rules, so do the same in the rows ofcatamaran-25mandcatamaran-15m.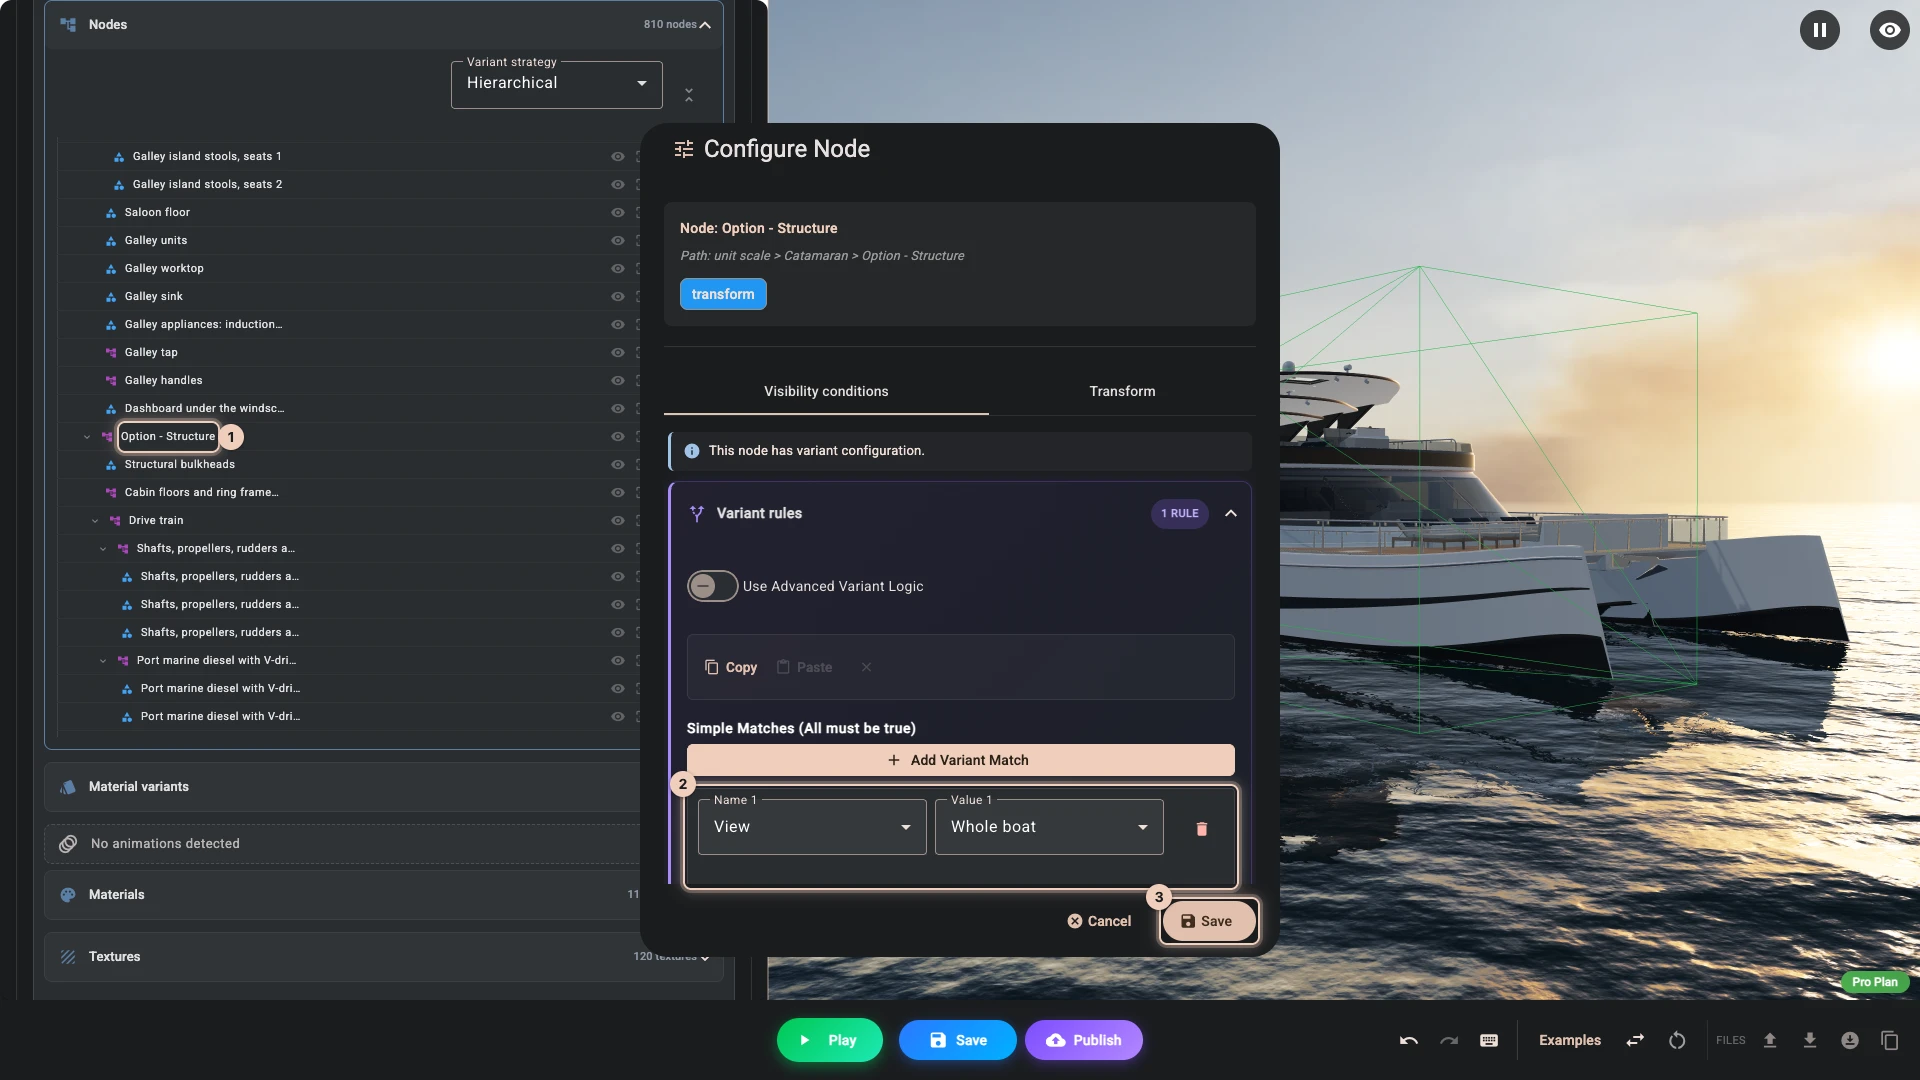
-
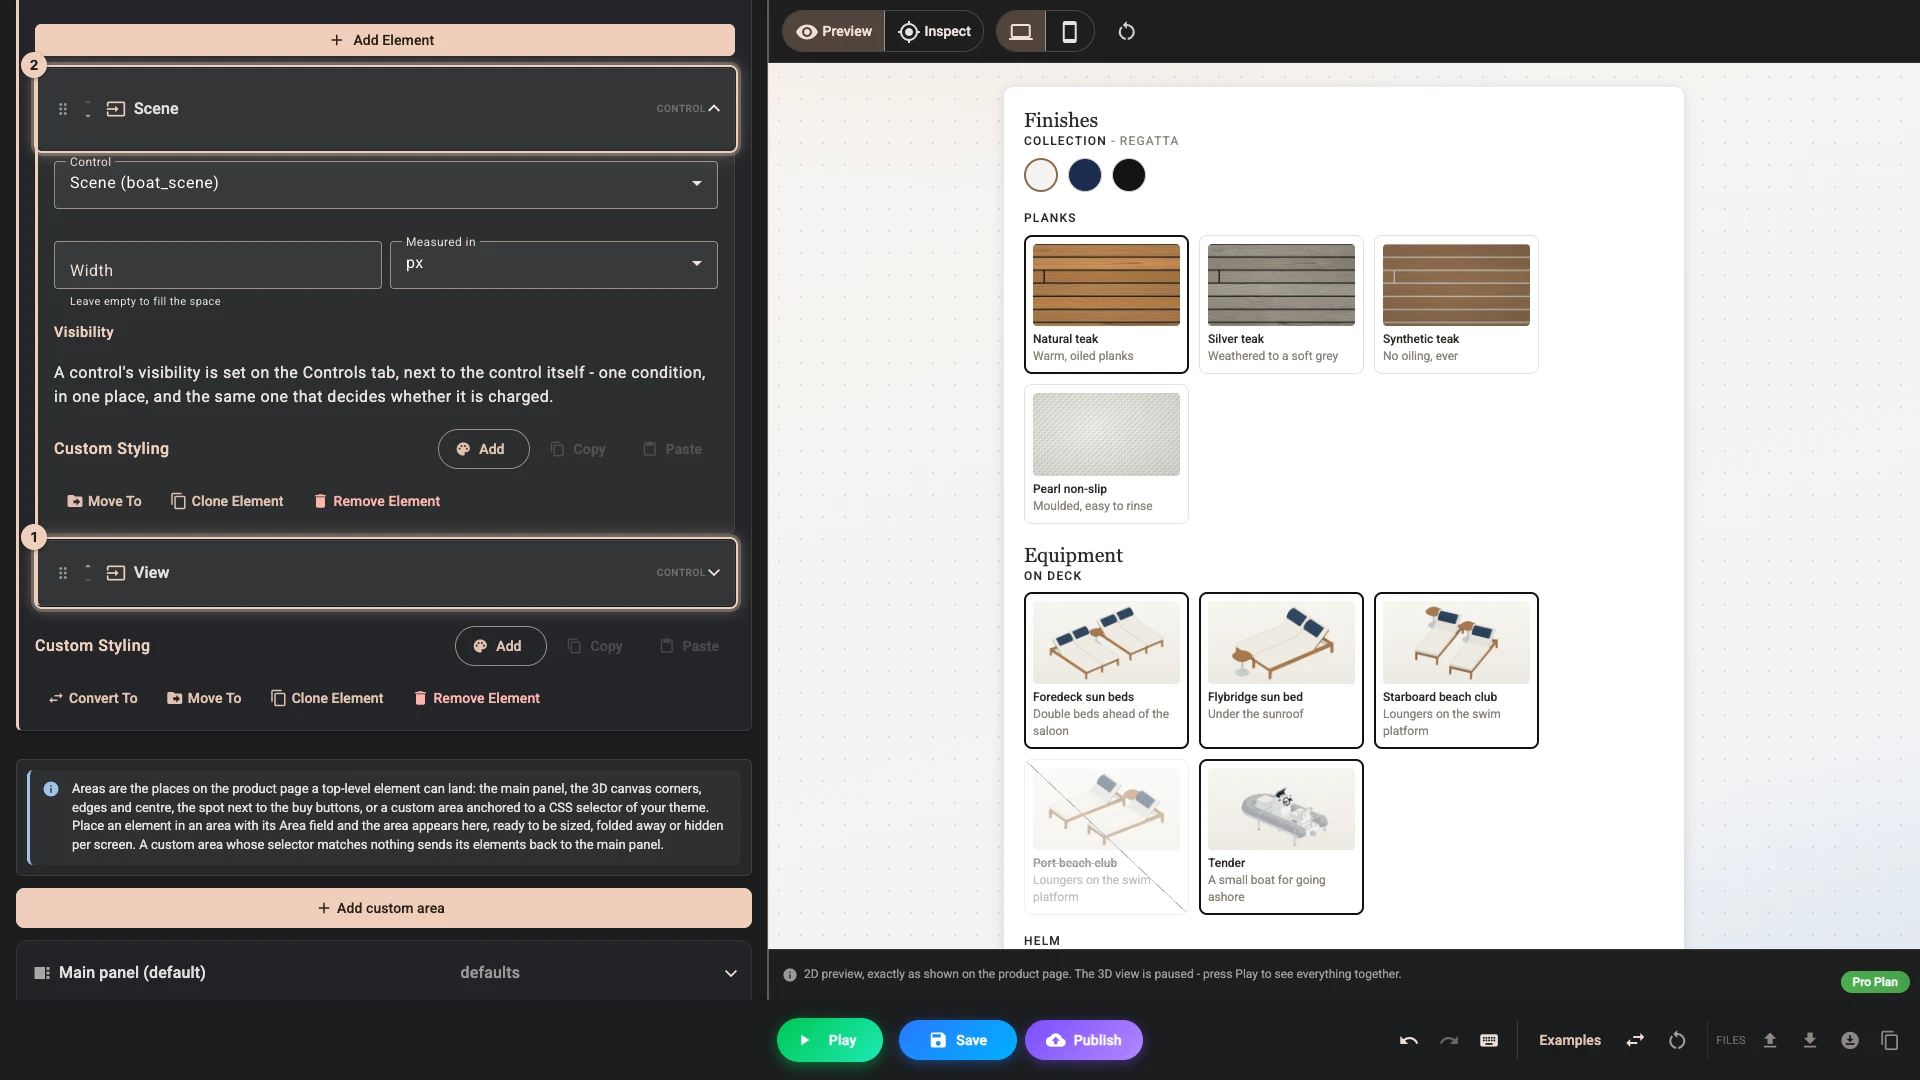
Open GUI and Layout, and add a Section called See it with View 1 and then Scene 2 in it. Press the down arrow at the start of its row until it is last in the list.
-
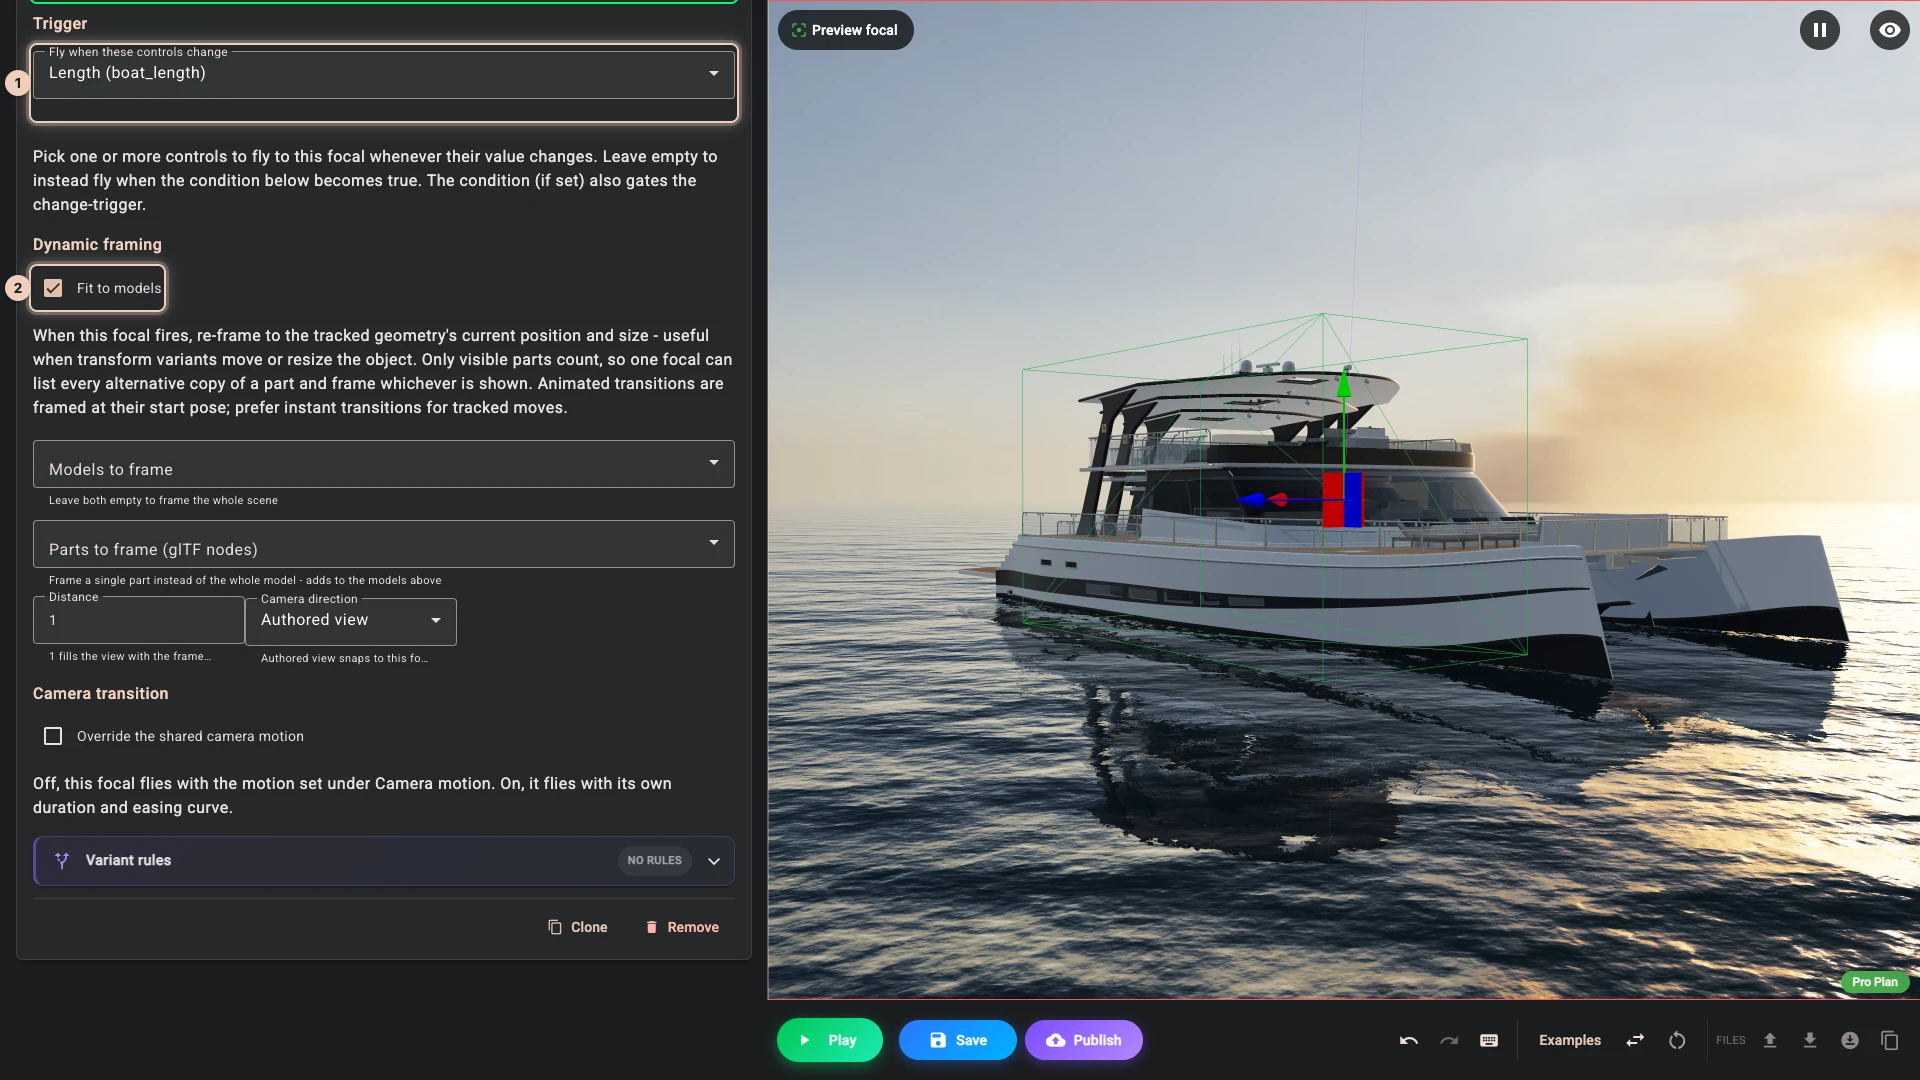
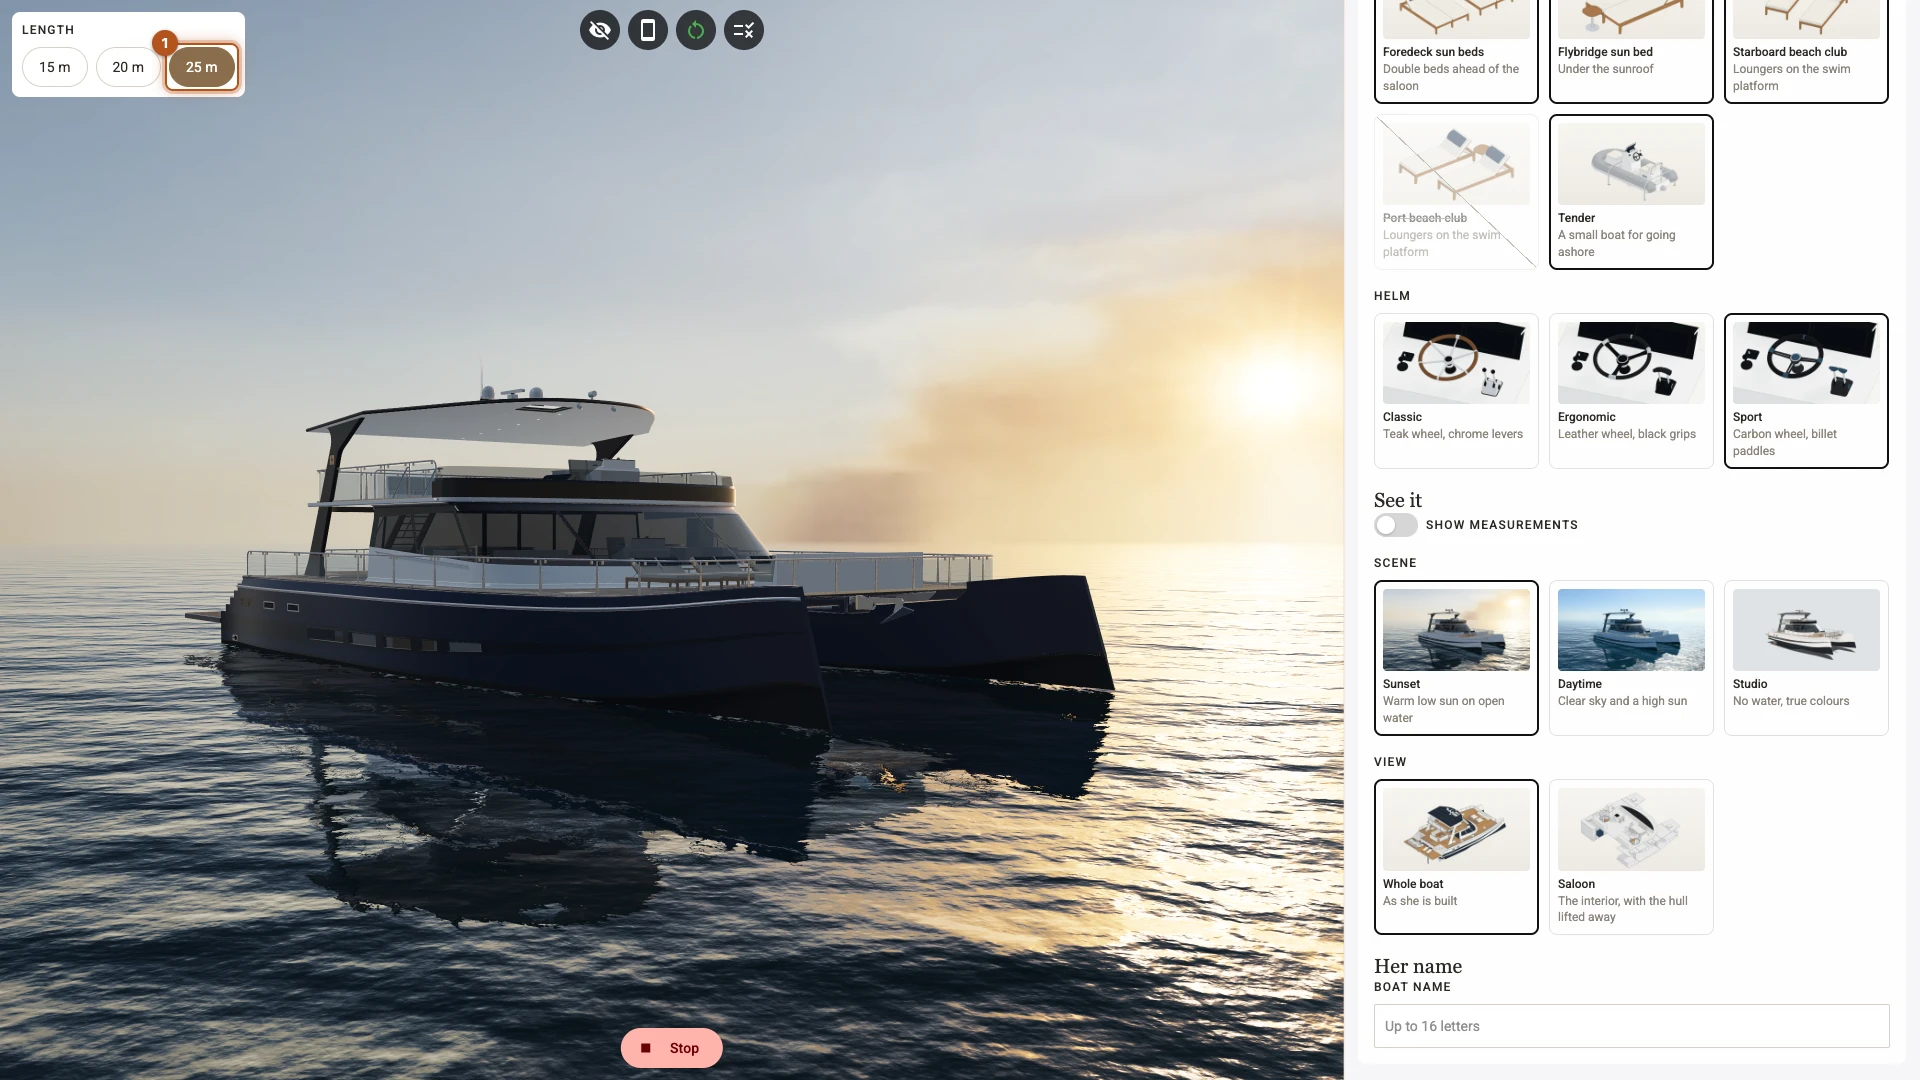
From here on you need the Standard plan. A focal flies the camera to a view when something changes. Open Navigation, then Focals, and press Add Focal. Set Focal name to The whole boat, Camera Position to -39.3, 3.6, 23.3 and Camera Target to -9.7, 3.4, -1.3, the opening view. Set Fly when these controls change 1 to Length and tick Fit to models 2, which keeps this direction and frames whichever boat is showing.
-
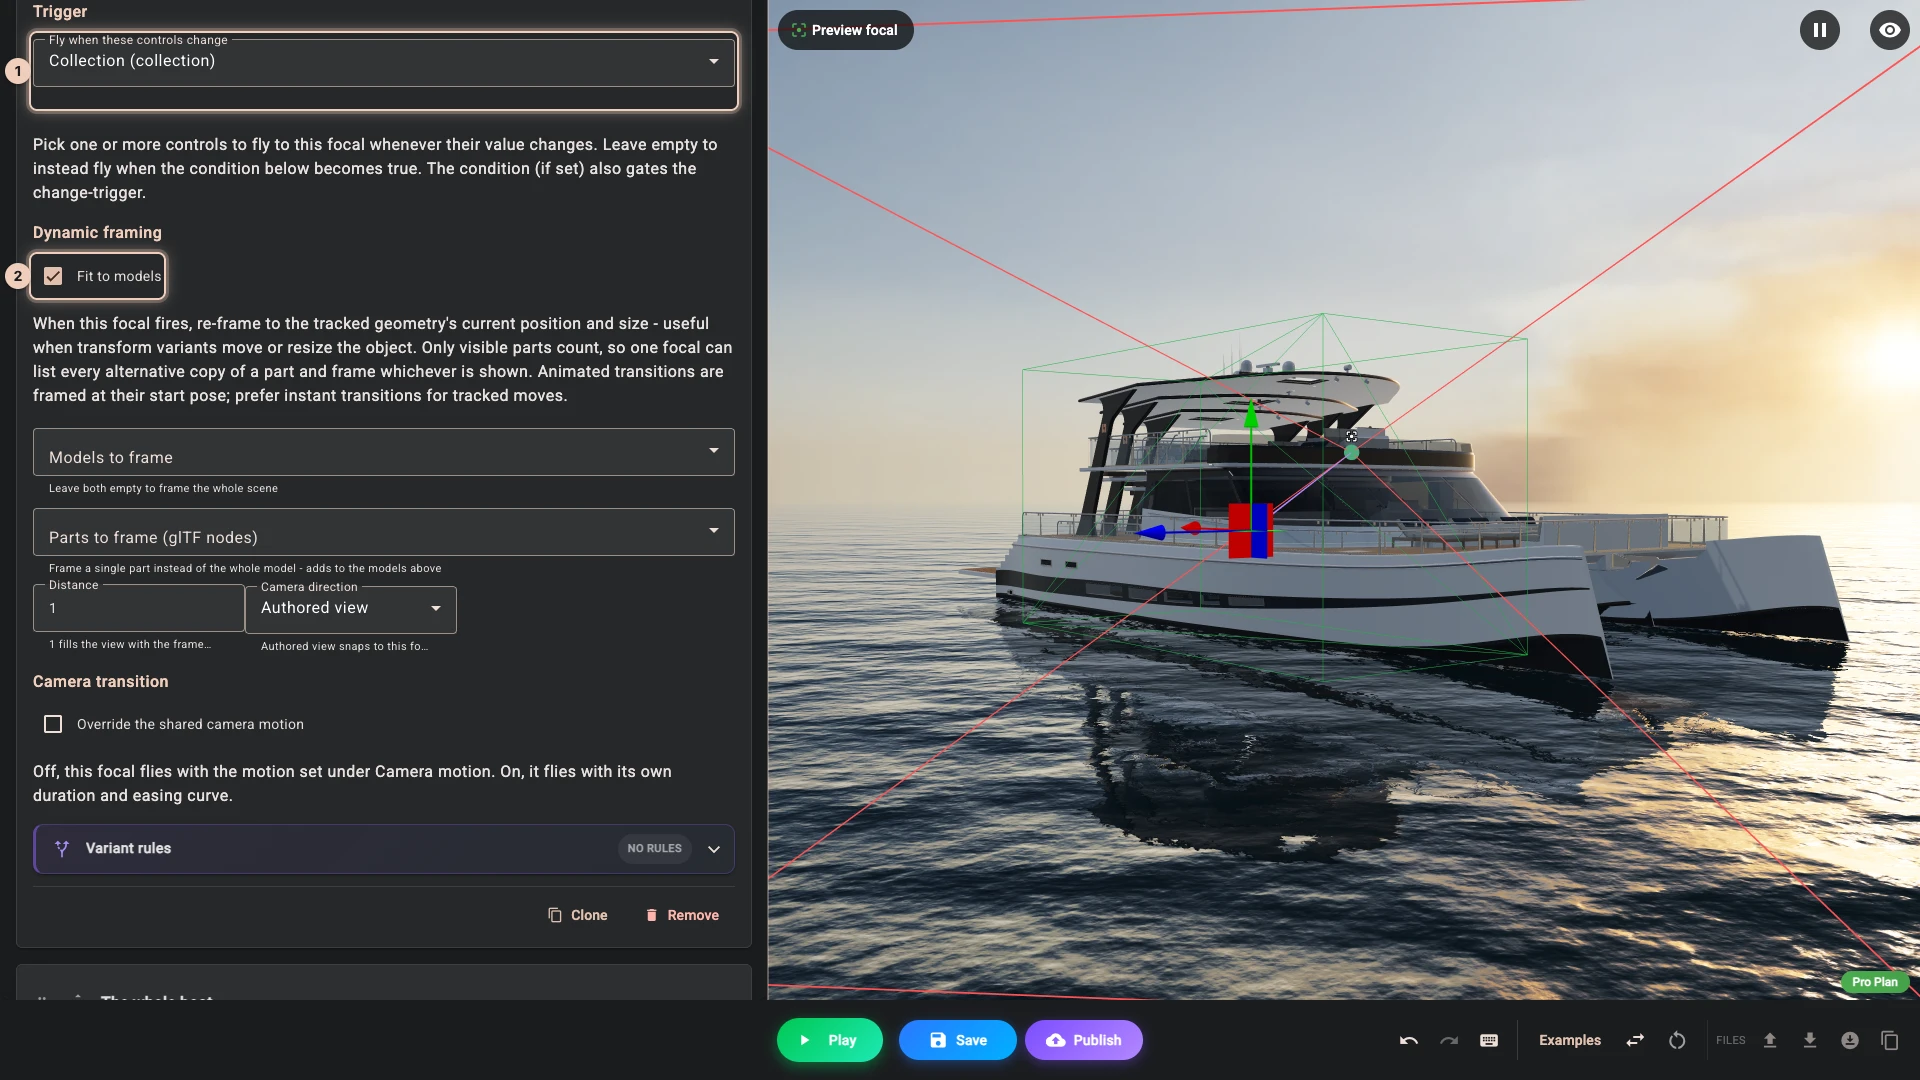
Add a focal called The hull in the sun in the same way, with Camera Position 19.6, 6.3, -26.3, Camera Target -7.6, 2.4, 0.9, Collection 1 and Fit to models 2.
-
Add a focal called The decks from above in the same way, with Camera Position -13.7, 11, 19.8, Camera Target -9.2, 1.5, -0.2, Planks and Fit to models.
-
Dimensions need the Standard plan too. In GUI and Controls, add a control with the key
show_sizes, the label Show measurements and the type Switch, and untick the order option. -
In Layout open See it, press its Add Element, pick Control and set Control to Show measurements.
-
Open Dimensions, then Bounding Box, and press Add Bounding Box Dimension. Set Dimension name to Length and beam. In Parts to measure (glTF nodes) tick
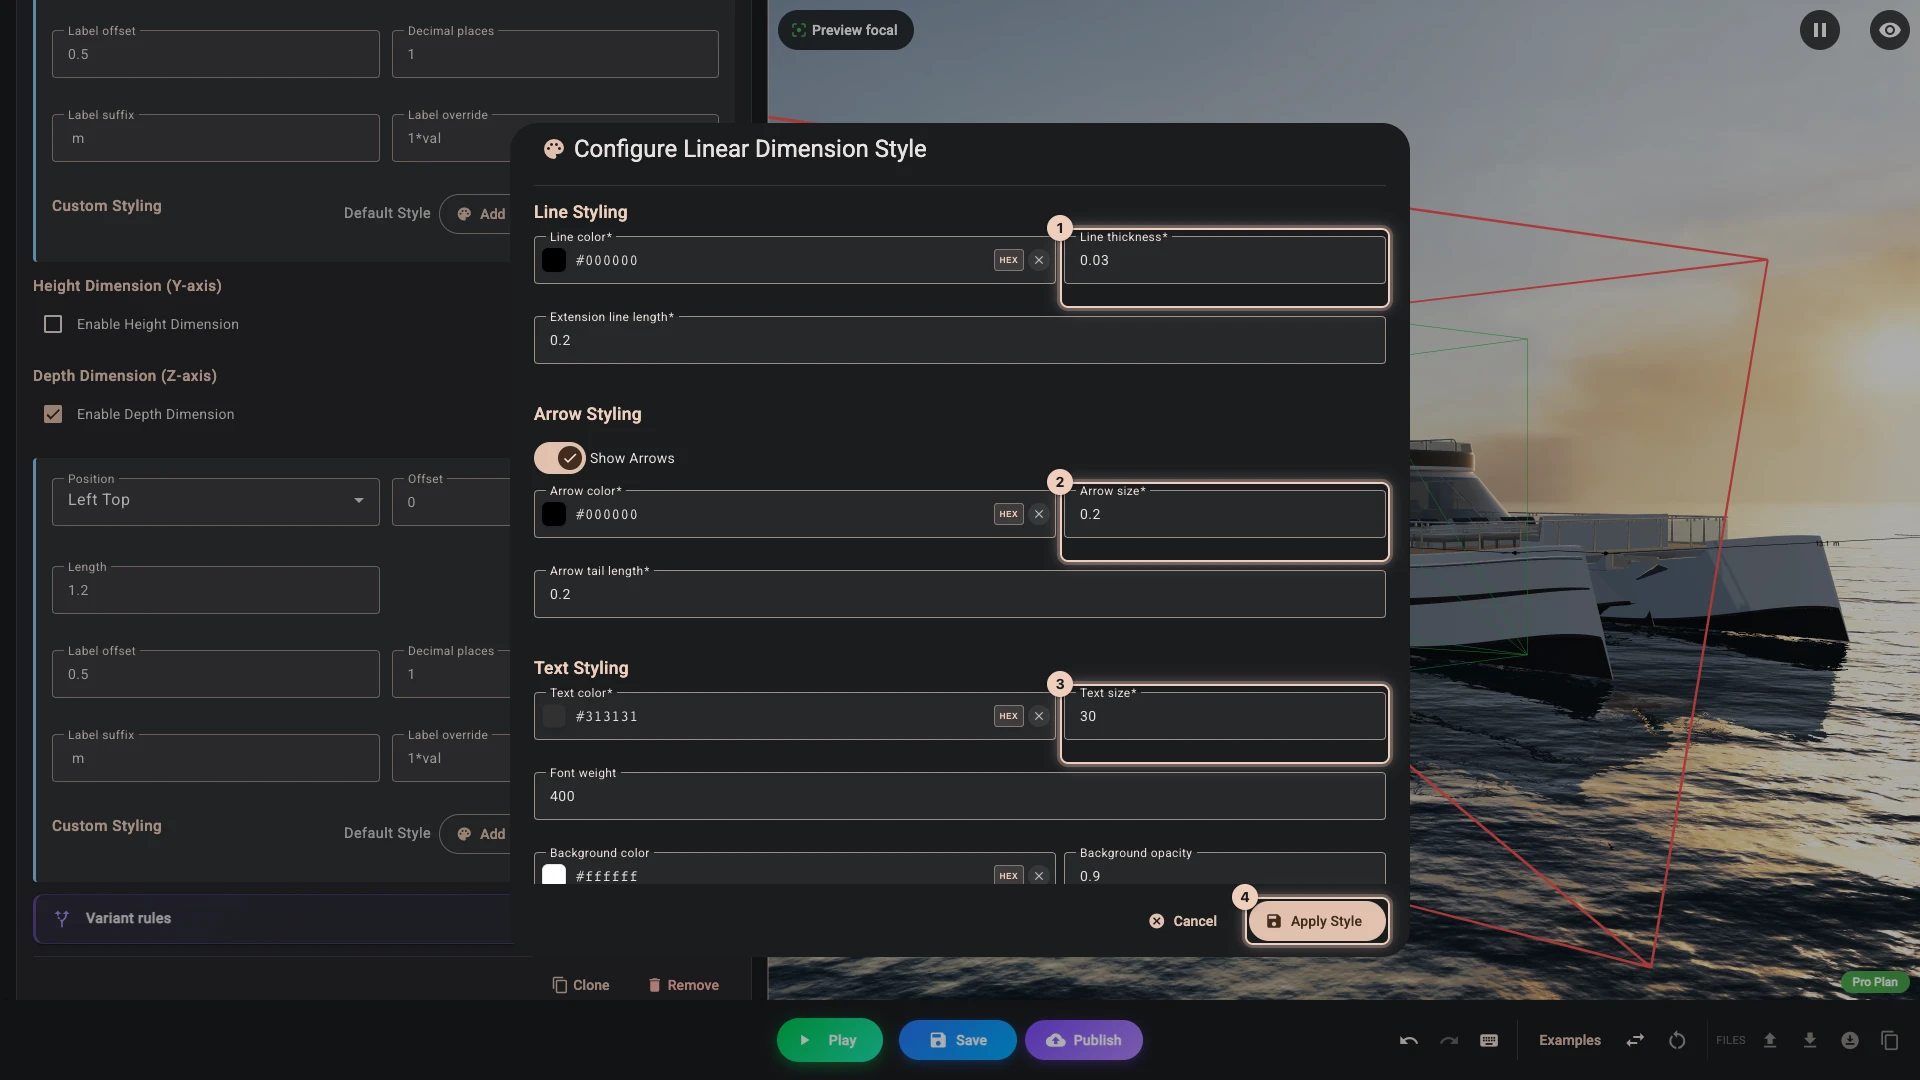
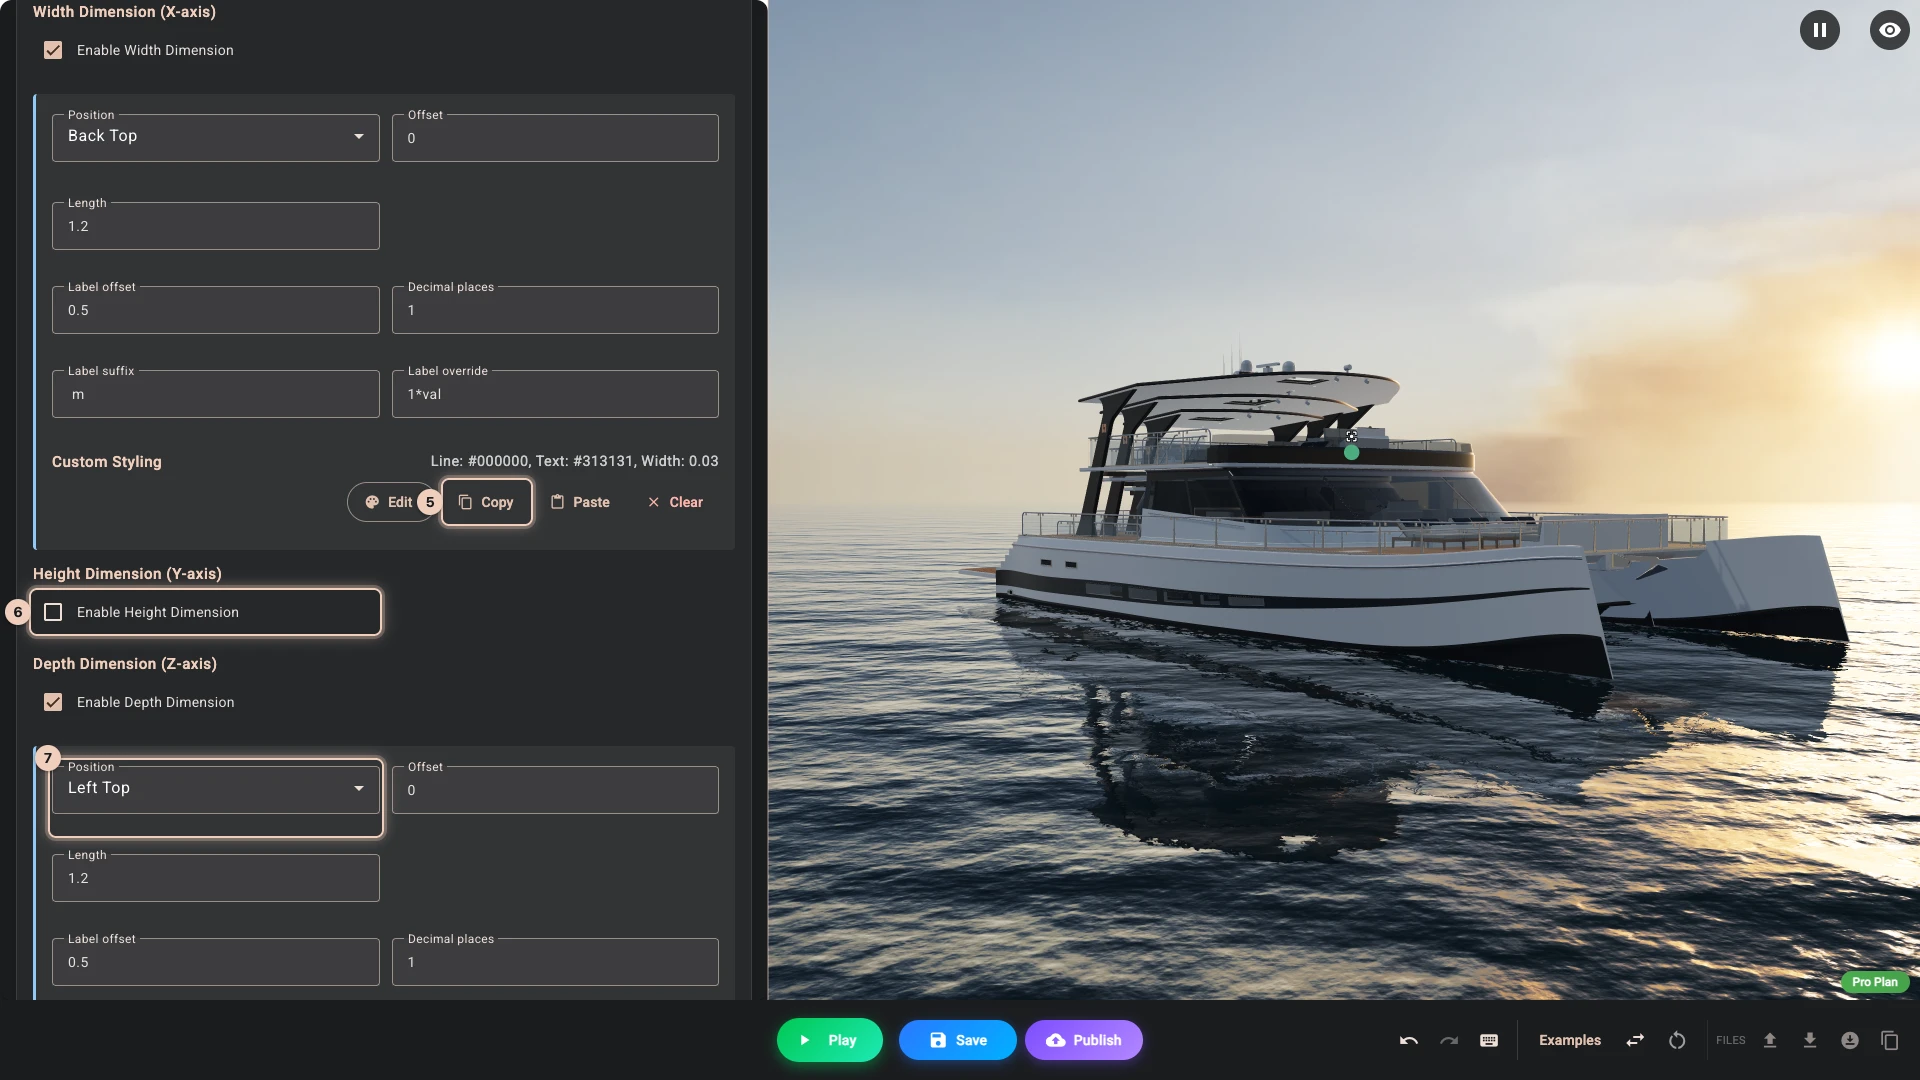
Hull platform, underOption - Shell, on all three boats. Width runs along the boat here, so under Width Dimension (X-axis) set Position to Back Top, Length to 1.2, Label offset to 0.5, Decimal places to 1 and Label suffix to a space and m. Under Custom Styling press Add, set Line thickness 1 to 0.03, Arrow size 2 to 0.2, Text size 3 to 30 and Background opacity to 0.9, and press Apply Style 4, then Copy 5. Untick Enable Height Dimension 6. Depth is the beam: give Depth Dimension (Z-axis) Left Top 7 and the same numbers, and press Paste under its Custom Styling. Add a match: Show measurements, Checked.
-
Back in Navigation, add a focal called Side on, with Camera Position -14.3, 14.5, 39.8, Camera Target -8.3, 2.5, -0.2, Show measurements, Fit to models and the match Show measurements, Checked.
-
The name needs the Pro plan. In GUI and Controls, add a control with the key
boat_name, the label Boat name and the type Text. Set Placeholder to Up to 16 letters and, under Validation, Max length to 16. This one stays on the order, as it has to reach the sign writer. -
In Layout add a Section called Her name with Boat name in it, and move it to the bottom of the list.
-
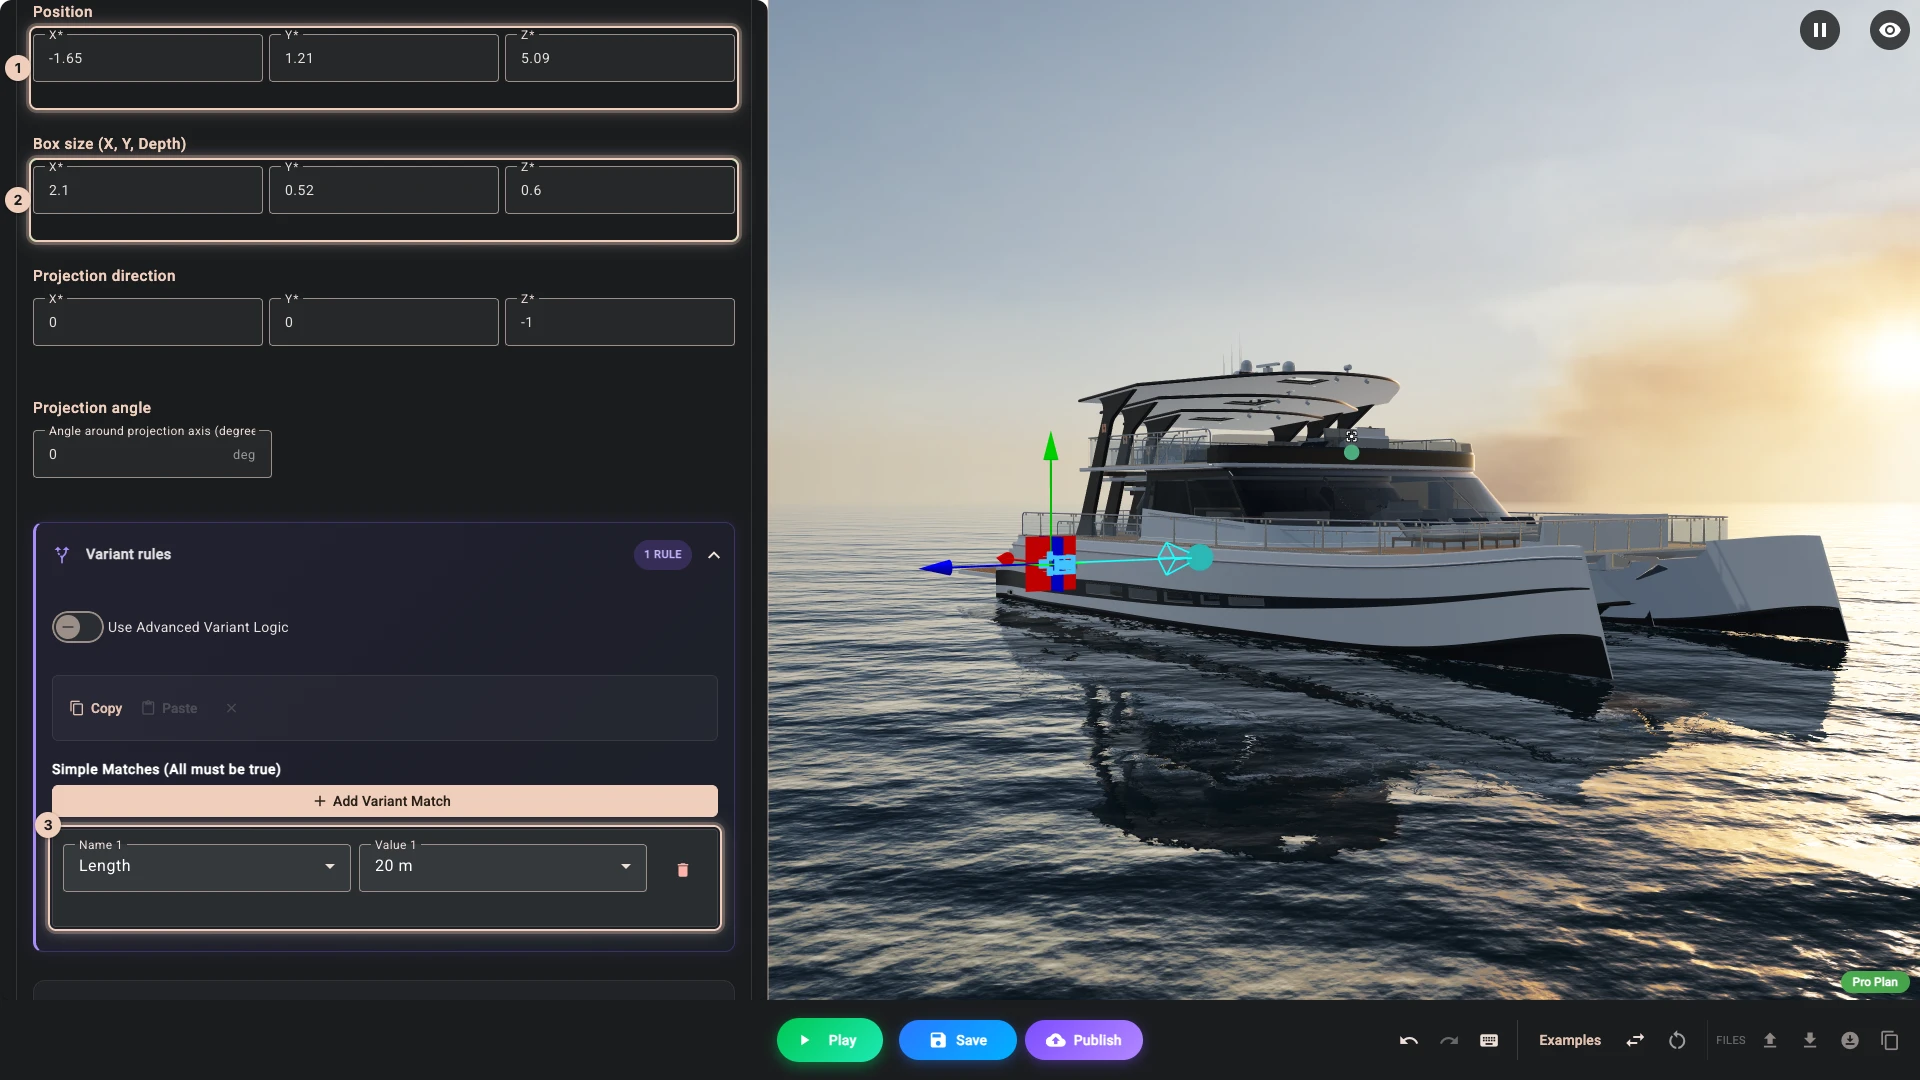
Open Personalization and press Add text decal. Set Name to Name, 20 m and pick Boat name as the bound control. Set Fallback text to Aurora, which shows until a shopper types, Max characters to 16 and Text color (default) to
#d9a860, which reads on all three hulls. A decal prints on what its box meets: Position 1 -1.65, 1.21, 5.09 puts the box on the starboard hull, between the stripe and the rubbing strip, and Box size (X, Y, Depth) 2 2.1, 0.52, 0.6 sizes it. Add a match 3: Length, 20 m.
-
Press Clone decal. Call the copy Name, 15 m, with Position -1.25, 1, 3.84, Box size (X, Y, Depth) 1.6, 0.4, 0.6 and the match's value 15 m.
-
Clone the first decal again for Name, 25 m, with Position -2.05, 1.42, 6.34, Box size (X, Y, Depth) 2.6, 0.65, 0.6 and the value 25 m.
-
Back in Navigation, add a focal called The name, with Camera Position -0.5, 2.4, 11, Camera Target -1.7, 1.25, 5.1 and Boat name. The sterns stand together, so one view finds the name on all three boats.
-
Press Play. The boat opens as before, and the new controls wait further down the panel.
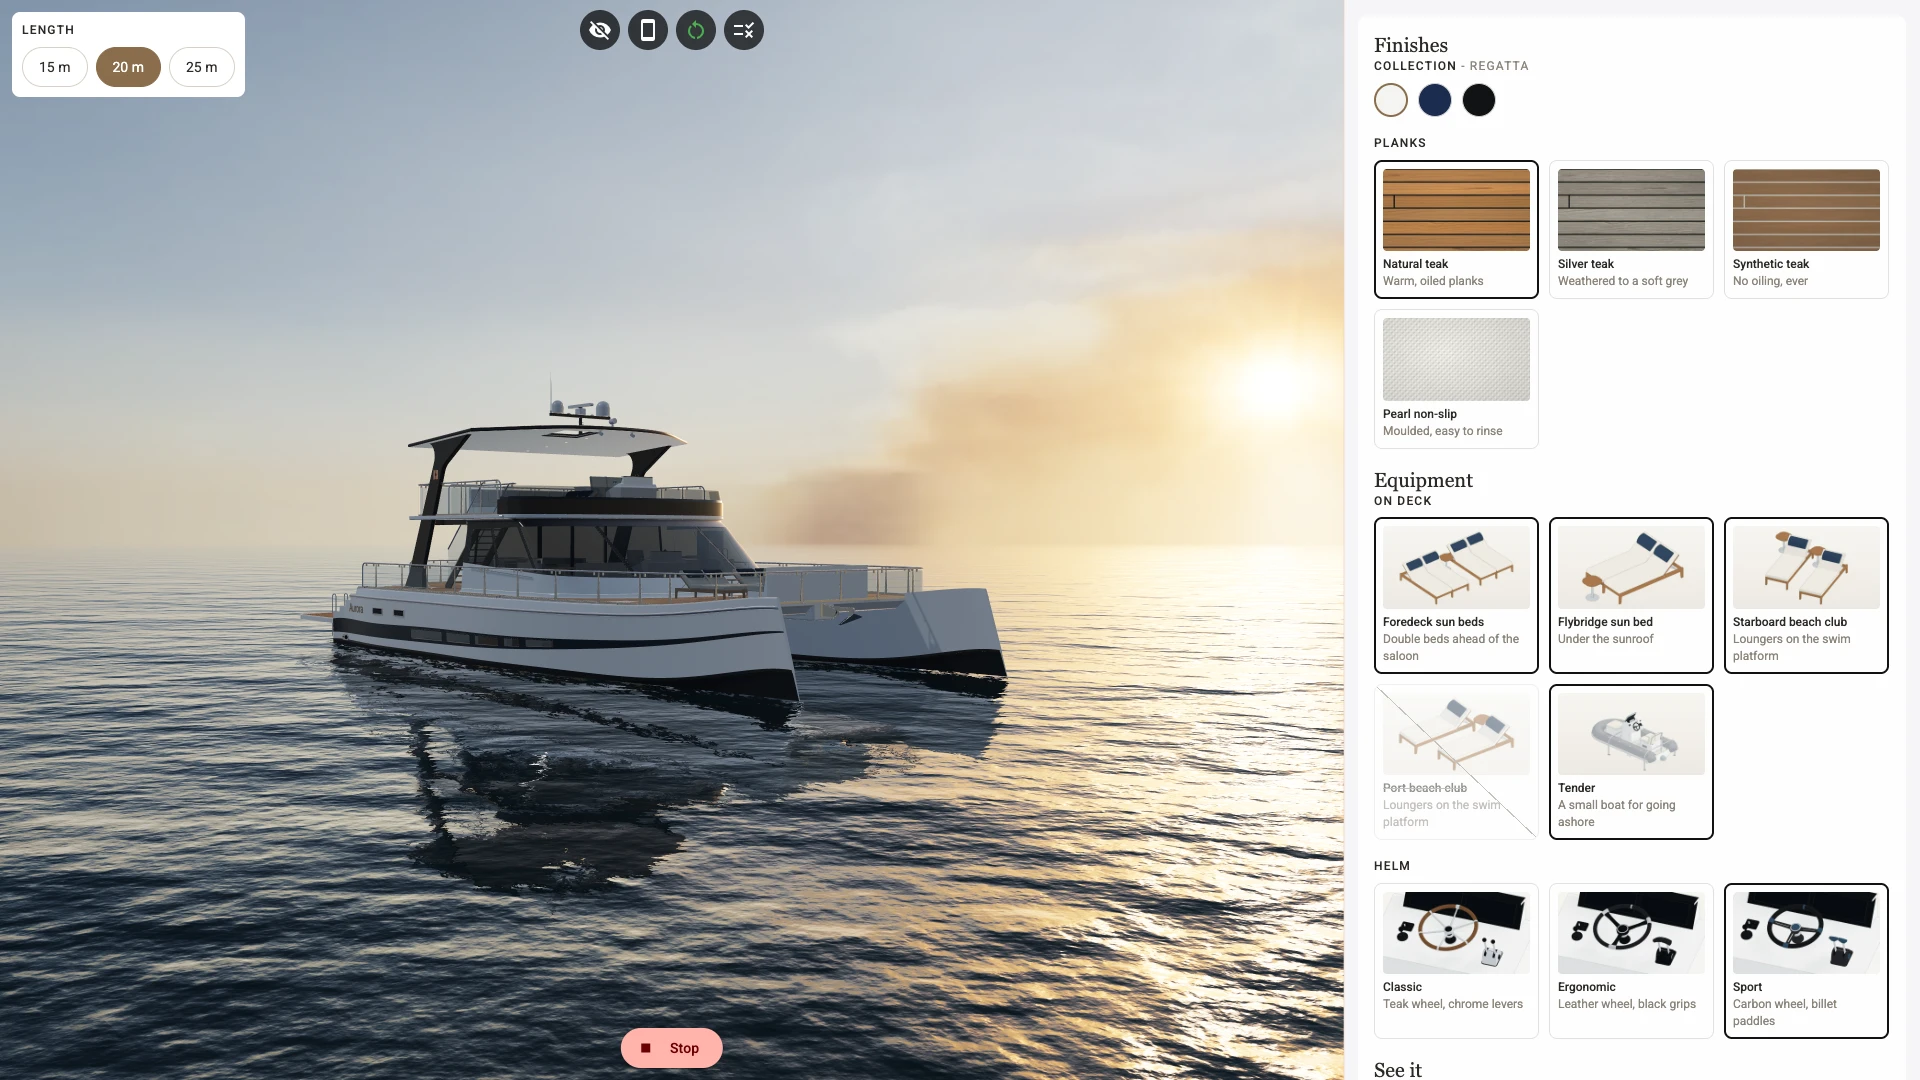
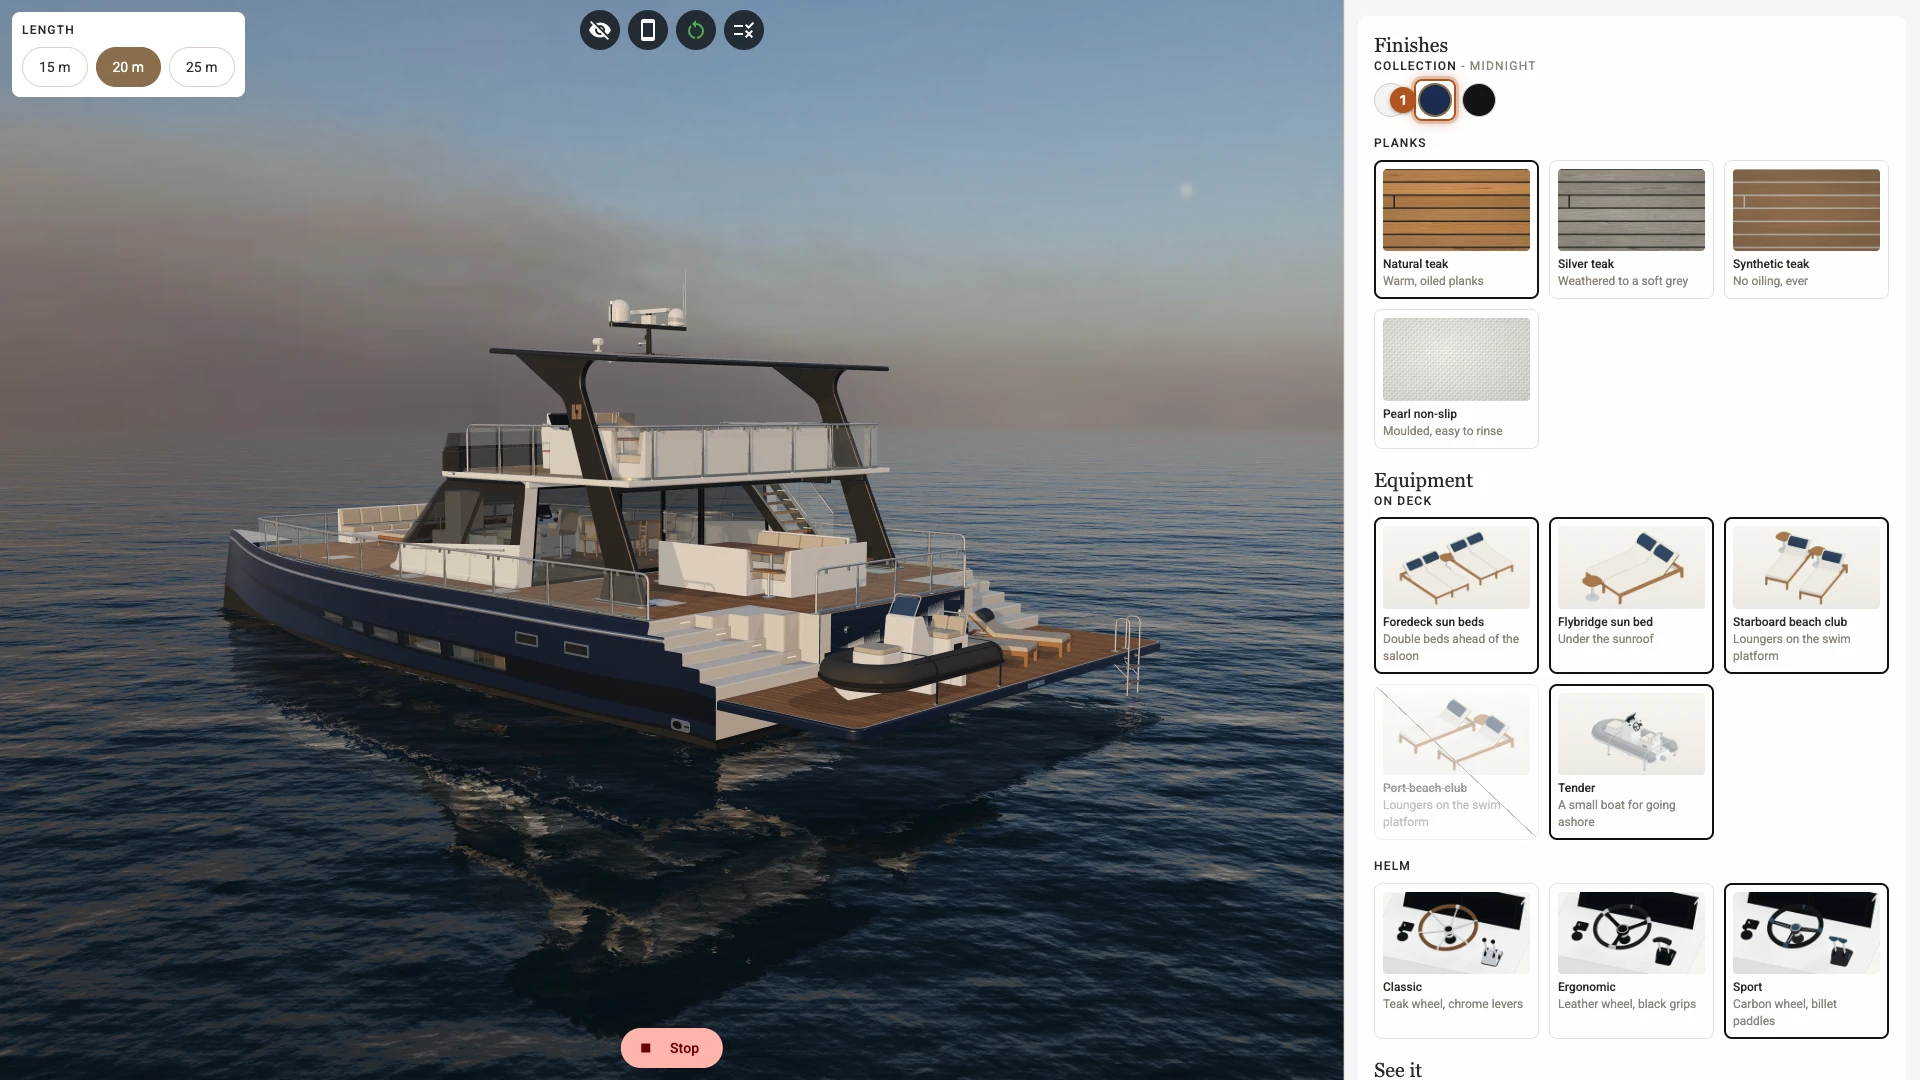
- Pick Midnight 1. The camera flies round to where the sun falls on the hull.
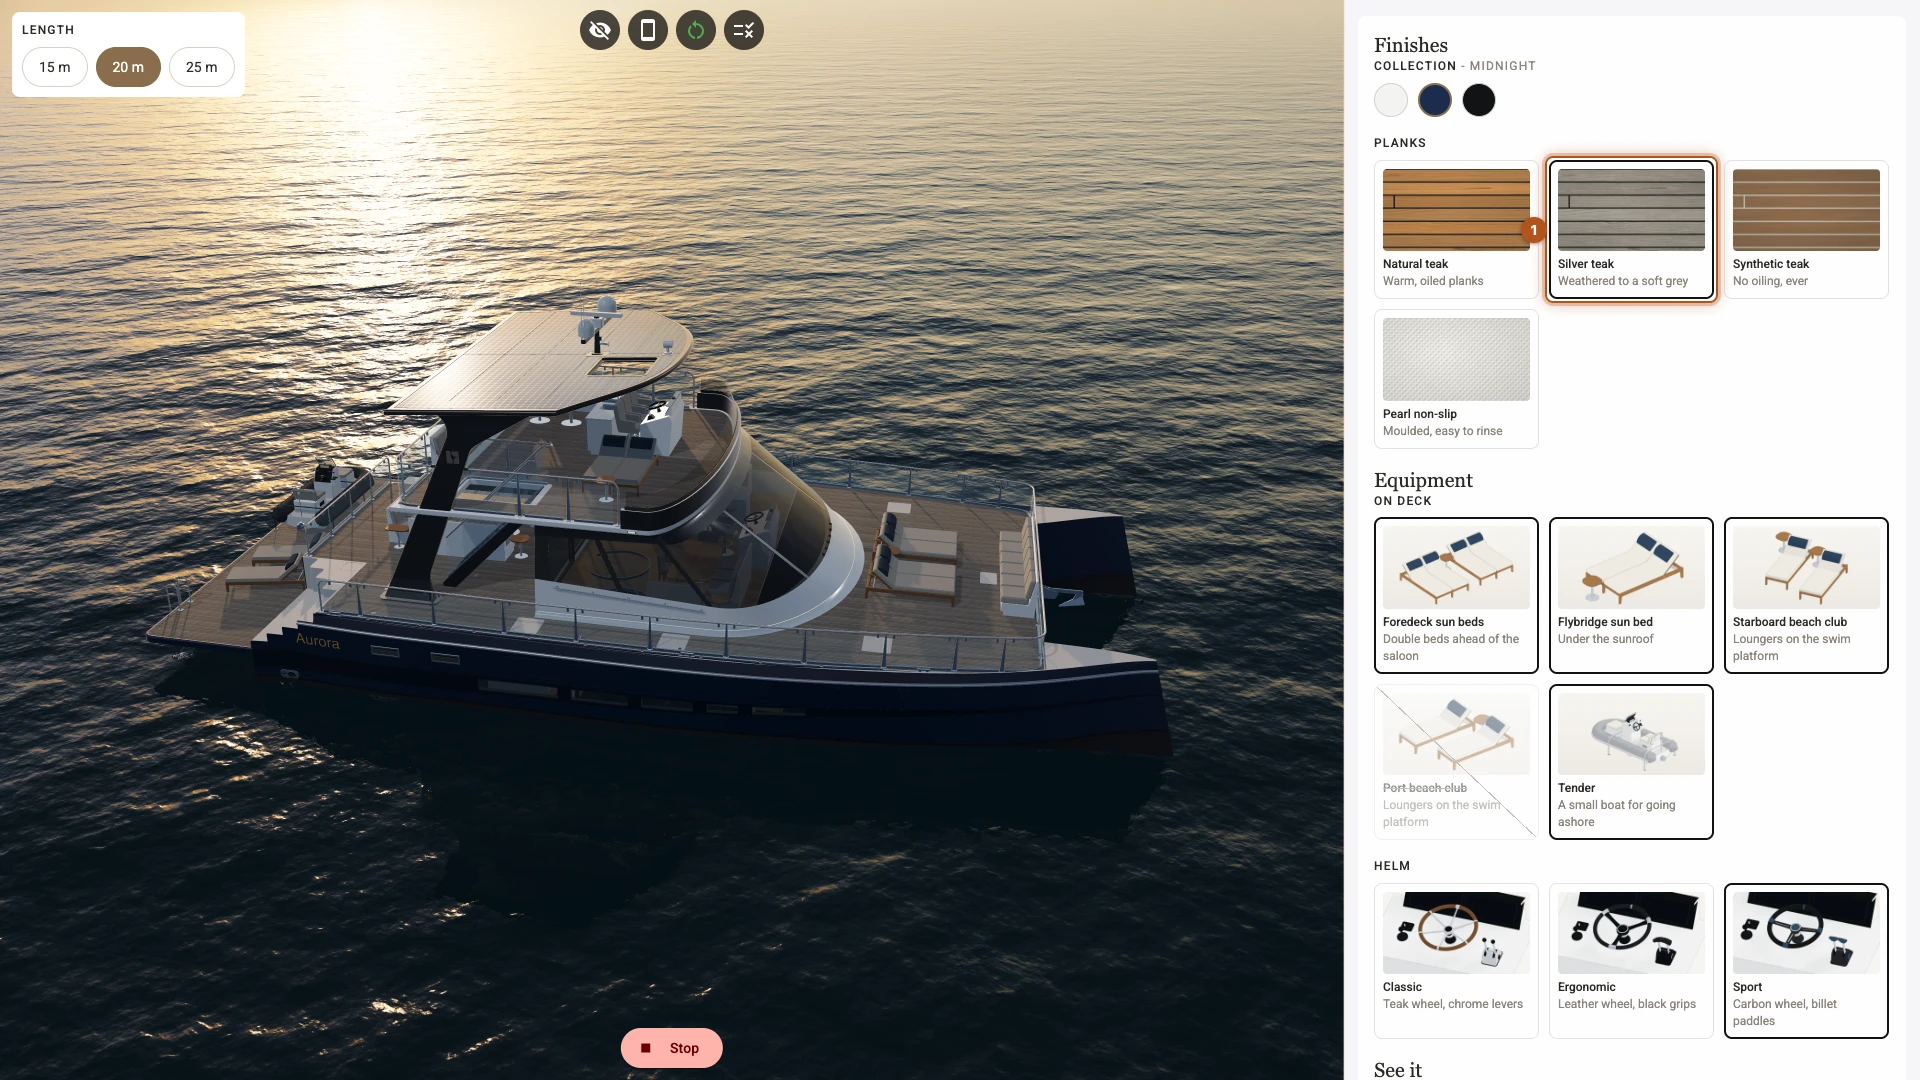
- Pick Silver teak 1. It flies up over the decks.
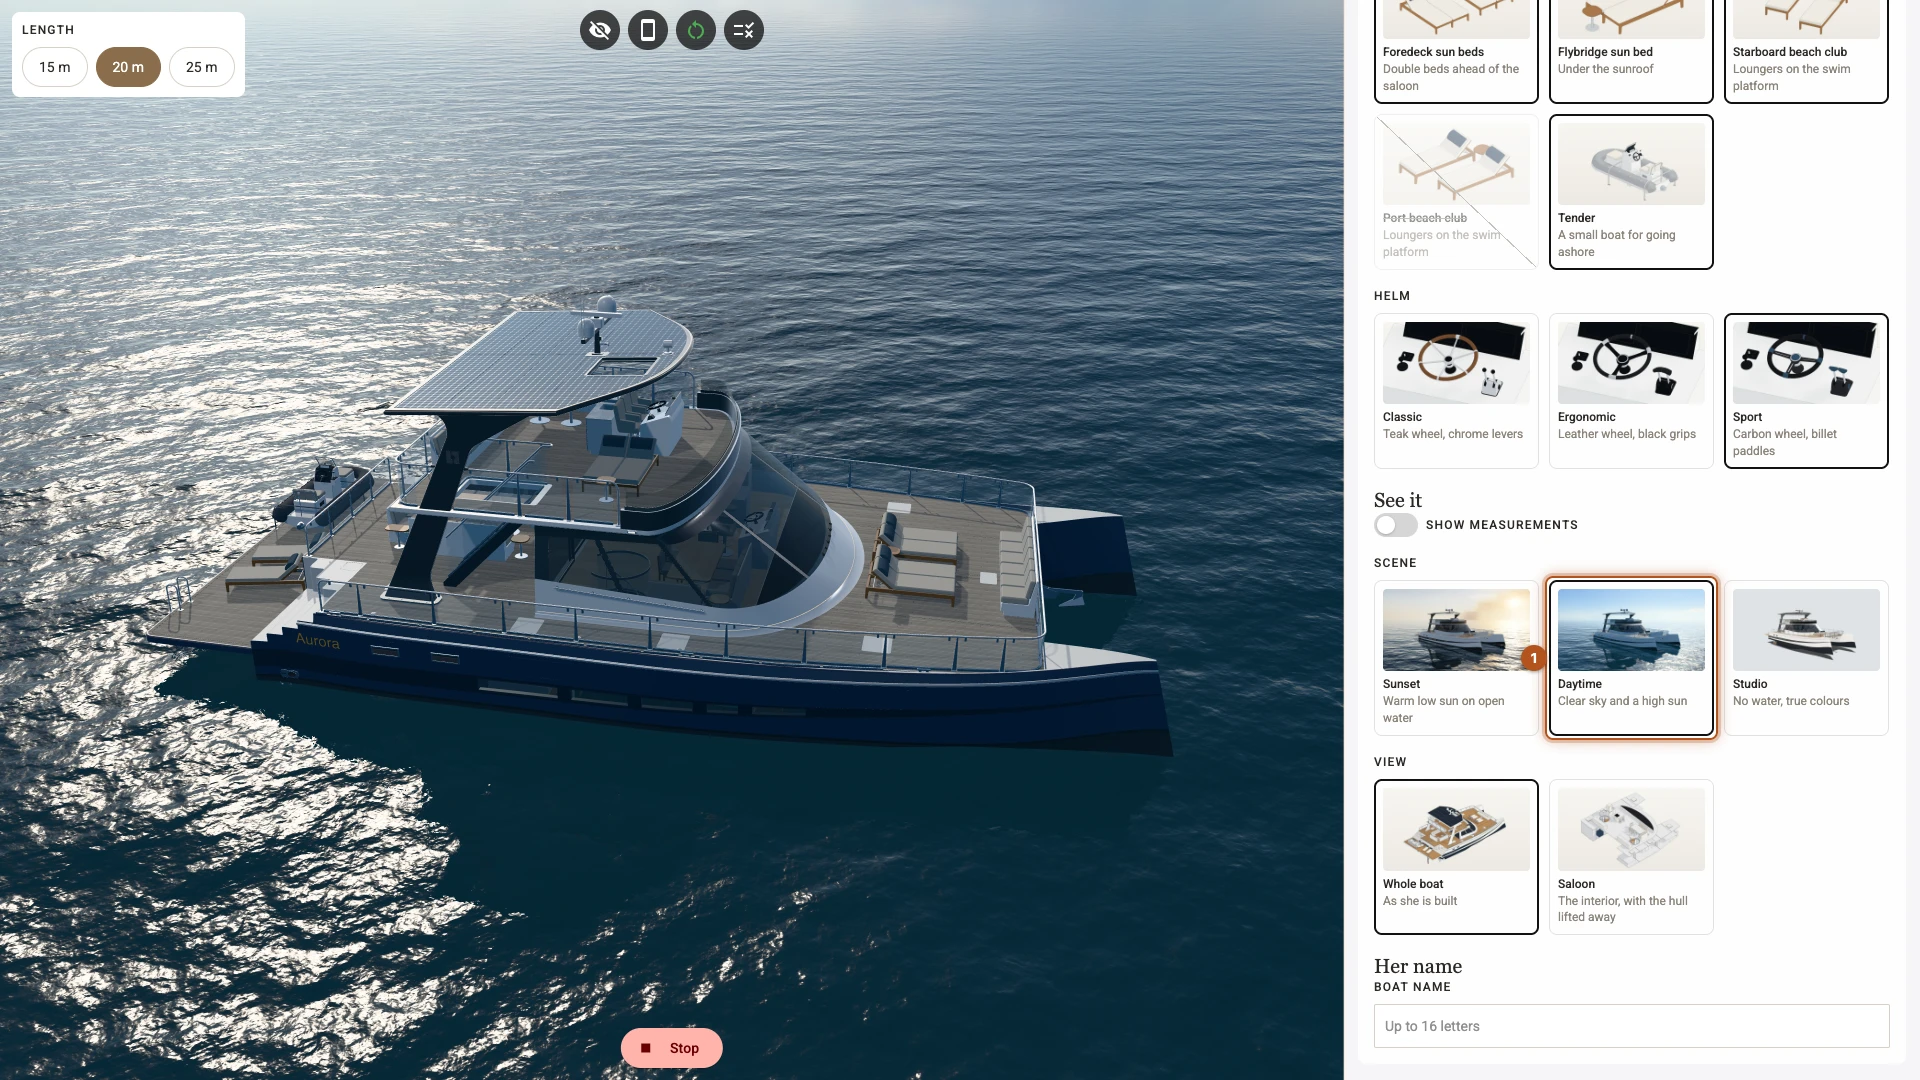
- Pick Daytime 1. The evening dissolves into a clear day, and the camera stays where it is.
- Pick Studio 1. The water and the sky go, for a plain look at the true colours.
- Pick Saloon 1. The shell, the fittings and the structure go, and the interior stays.
-
Pick Whole boat, then Sunset.
-
Pick 25 m 1. The camera steps back for the longer boat.
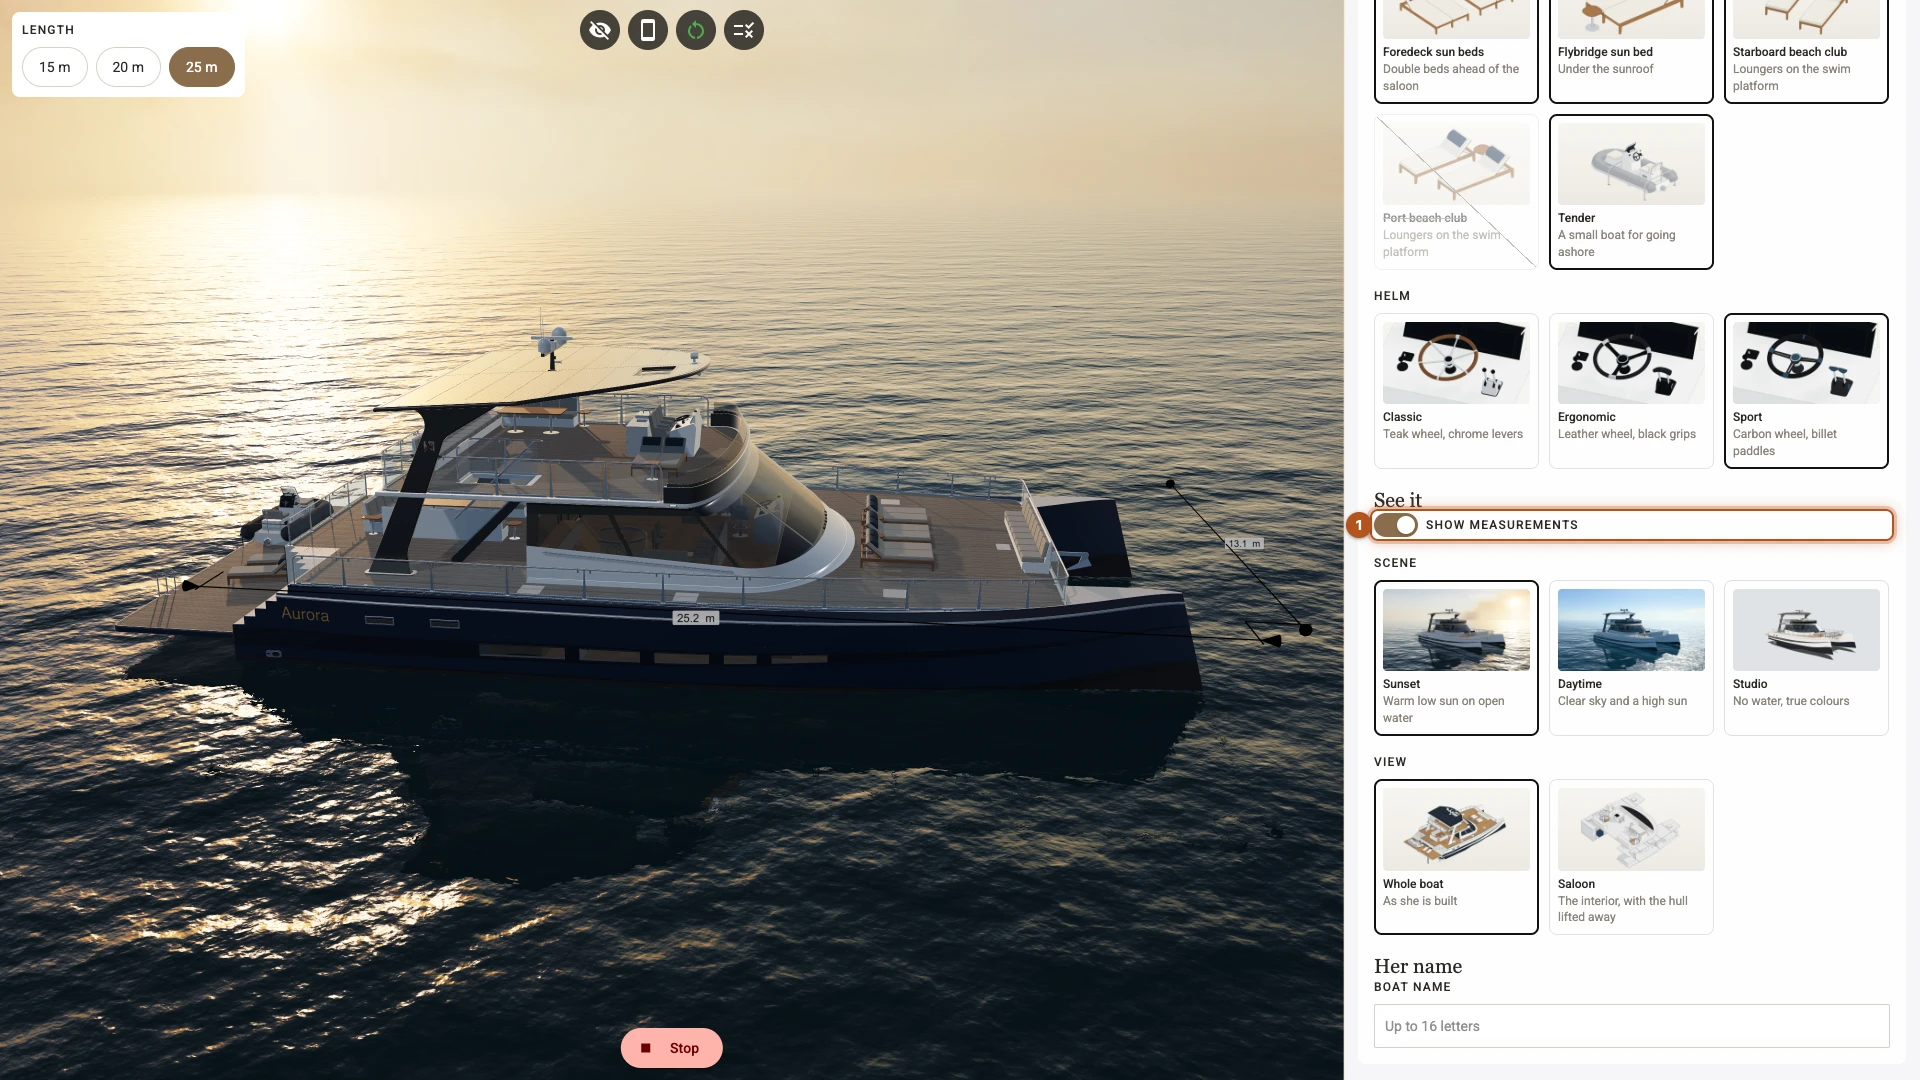
- Turn on Show measurements 1. The camera moves side on, and the lines measure the boat that is showing.
-
Turn Show measurements off again.
-
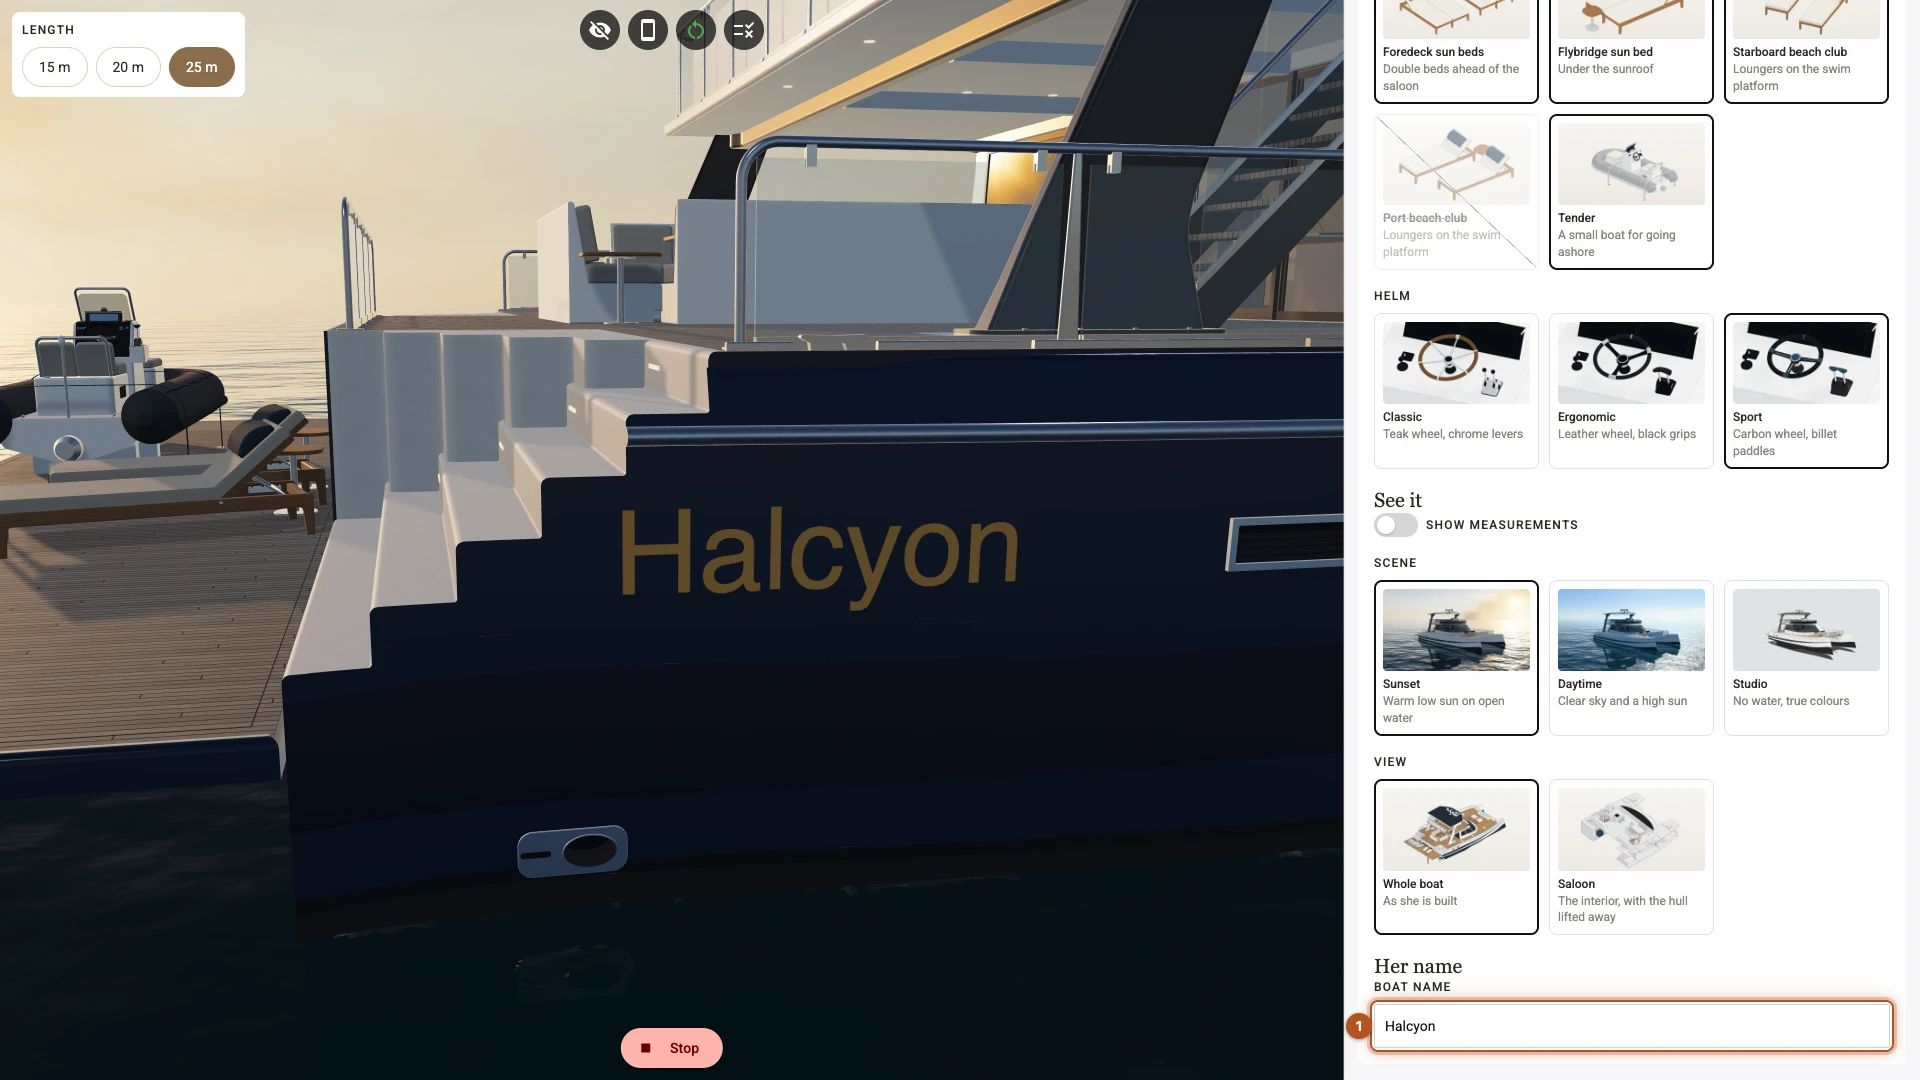
Type Halcyon in Boat name 1. The camera flies to the hull, and the name is printed on it.
What you just did
A scene variant changes the surroundings and nothing else. It holds only what you set, so most changes to the scene underneath reach every variant. The sky is the exception: a variant that picks a sky uses that sky, and settings such as Hide Sky do not carry over. The first variant whose match holds is shown, and with no match the scene stays as you built it. Models and rules are not part of it, which is why View is a control of its own.
View and Scene stay off the order. Neither changes the boat that gets built, so neither belongs under the cart line. Boat name does, so it keeps the setting you started with.
A rule on a group covers everything inside it. Options holds the helms and the sun beds, each with its own rule. Those rules still decide while View is Whole boat, and the group's rule takes them all away when it is not.
A focal fires on a change. With Fly when these controls change set, it fires each time a shopper changes that control, as long as its match holds. If several could fire, the first in the list does.
Fit to models keeps your direction and frames what is showing. That is how one focal serves all three boats. A boat picked for the first time is still on its way, and with Keep the current view until the new model is ready on, as you left it in Three sizes, the focal waits for the boat.
A bounding box measures what shows. You listed Hull platform on all three boats and only the boat on screen counts, so one dimension serves them all. It measures the hull, which is why the 20 m boat reads 20.2 m, and leaves out the swim platform. On a boat this size the default line and label are hard to see, so they took a style of their own.
A decal is a box that prints on the model. The text fits itself to the box, so a long name prints smaller. It sits on the starboard hull only: for the port hull clone each decal, make the Position Z negative and set Z in Projection direction to 1. With no font chosen it uses the browser's own sans-serif. Register one under Fonts in Style and add it in the decal's Supported fonts to print in your own.
Environment, Navigation, Dimensions and Personalization cover each of these in full.
Next
Chapter 8, Price it, gives the boat a base price, charges for its options and paid extras.
Verified against the product in November 2026