Enable 3D on Your Store
There is one switch to flick, and you only ever do it once.
Shopify calls it an app embed. Turning it on gives 3D Bits permission to appear on your storefront. From that moment, every product you publish from the app shows its configurator on its own product page, and every product you have not published carries on exactly as before. There is no template to edit for each product and nothing to paste anywhere.
Turning it on
Open 3D Bits in your Shopify admin and go to Storefront in the app's navigation - the page itself is titled Storefront display - or find the third step of the checklist on the app's home page. Either one has a button labelled Enable 3D on your store.
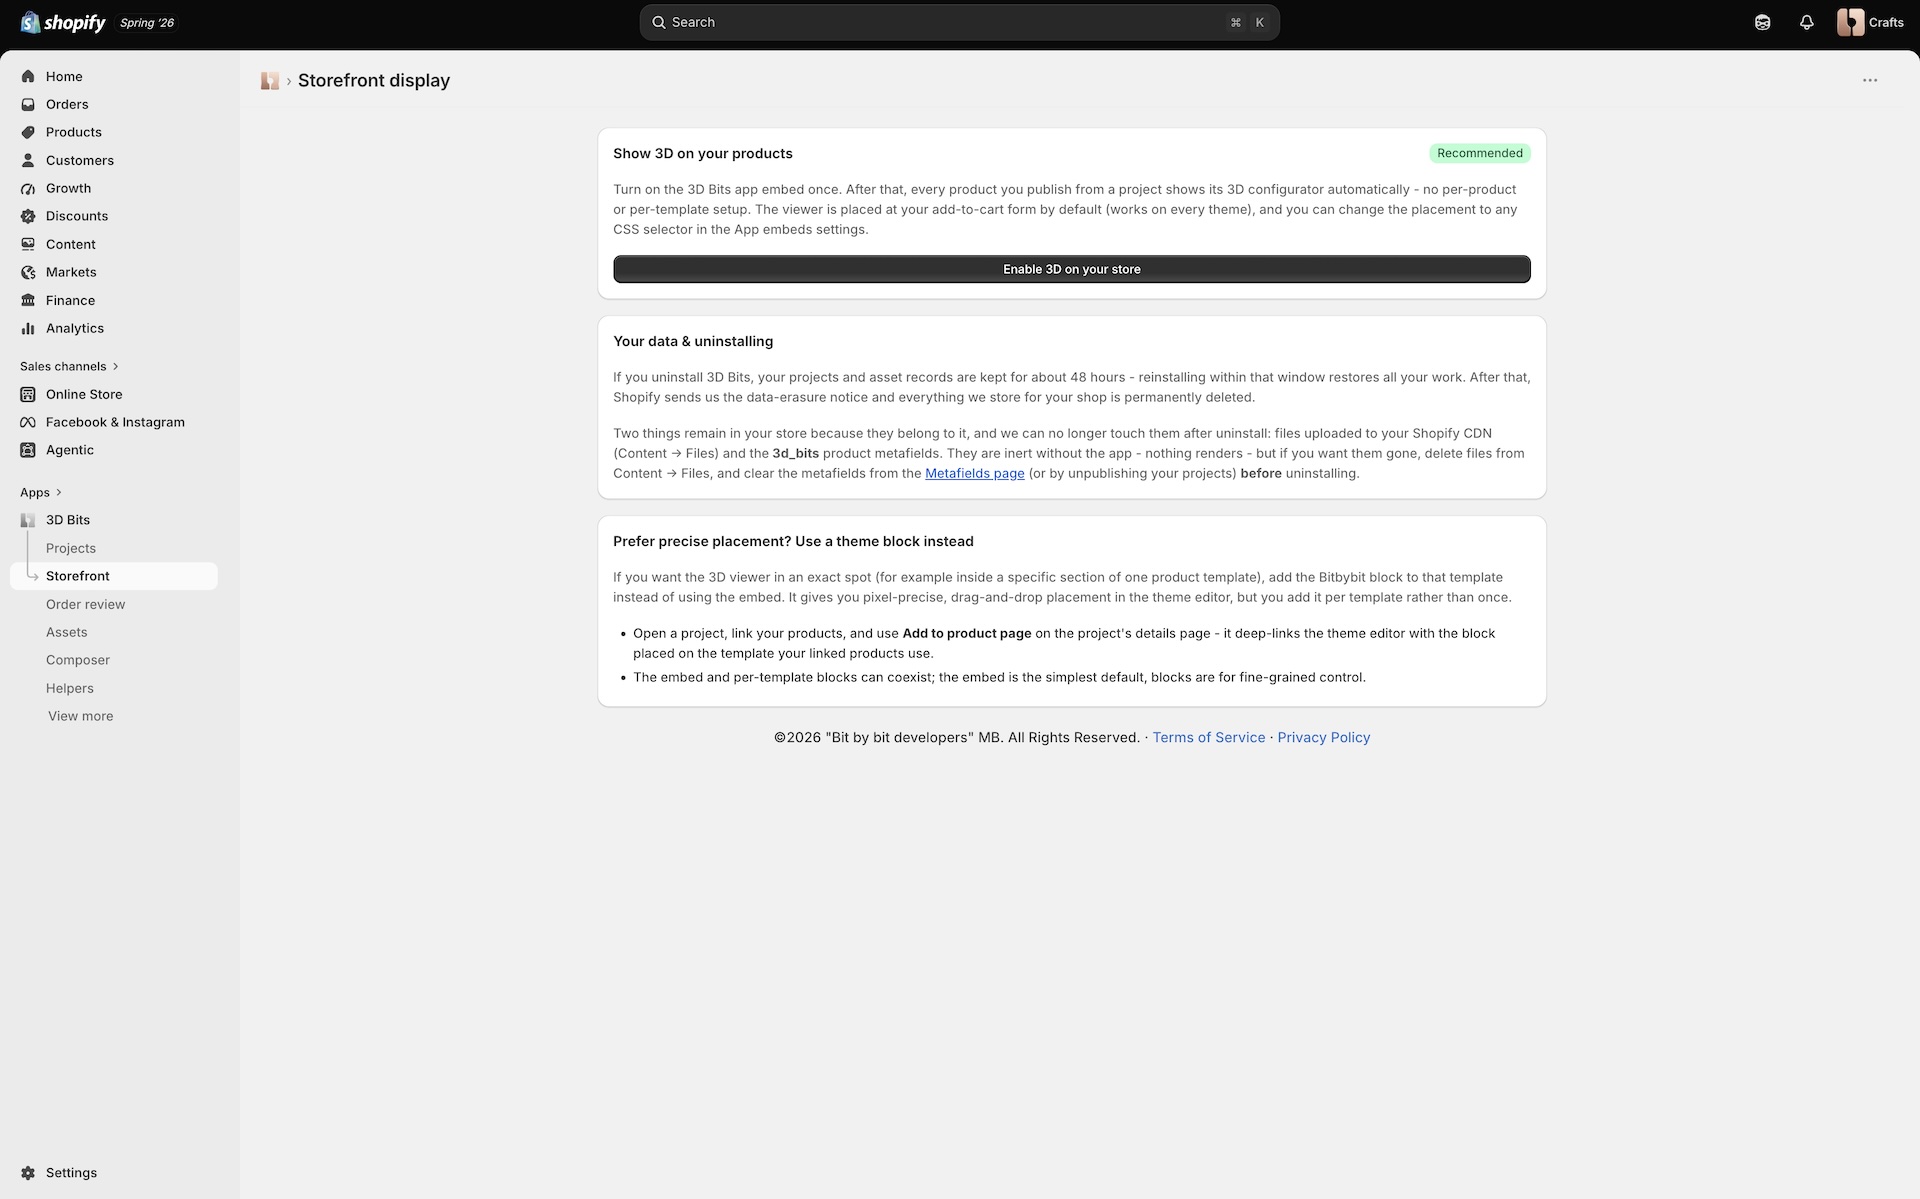
Pressing it opens your theme editor with 3D Bits already switched on in the App embeds panel. Click Save in the theme editor, and you are finished.
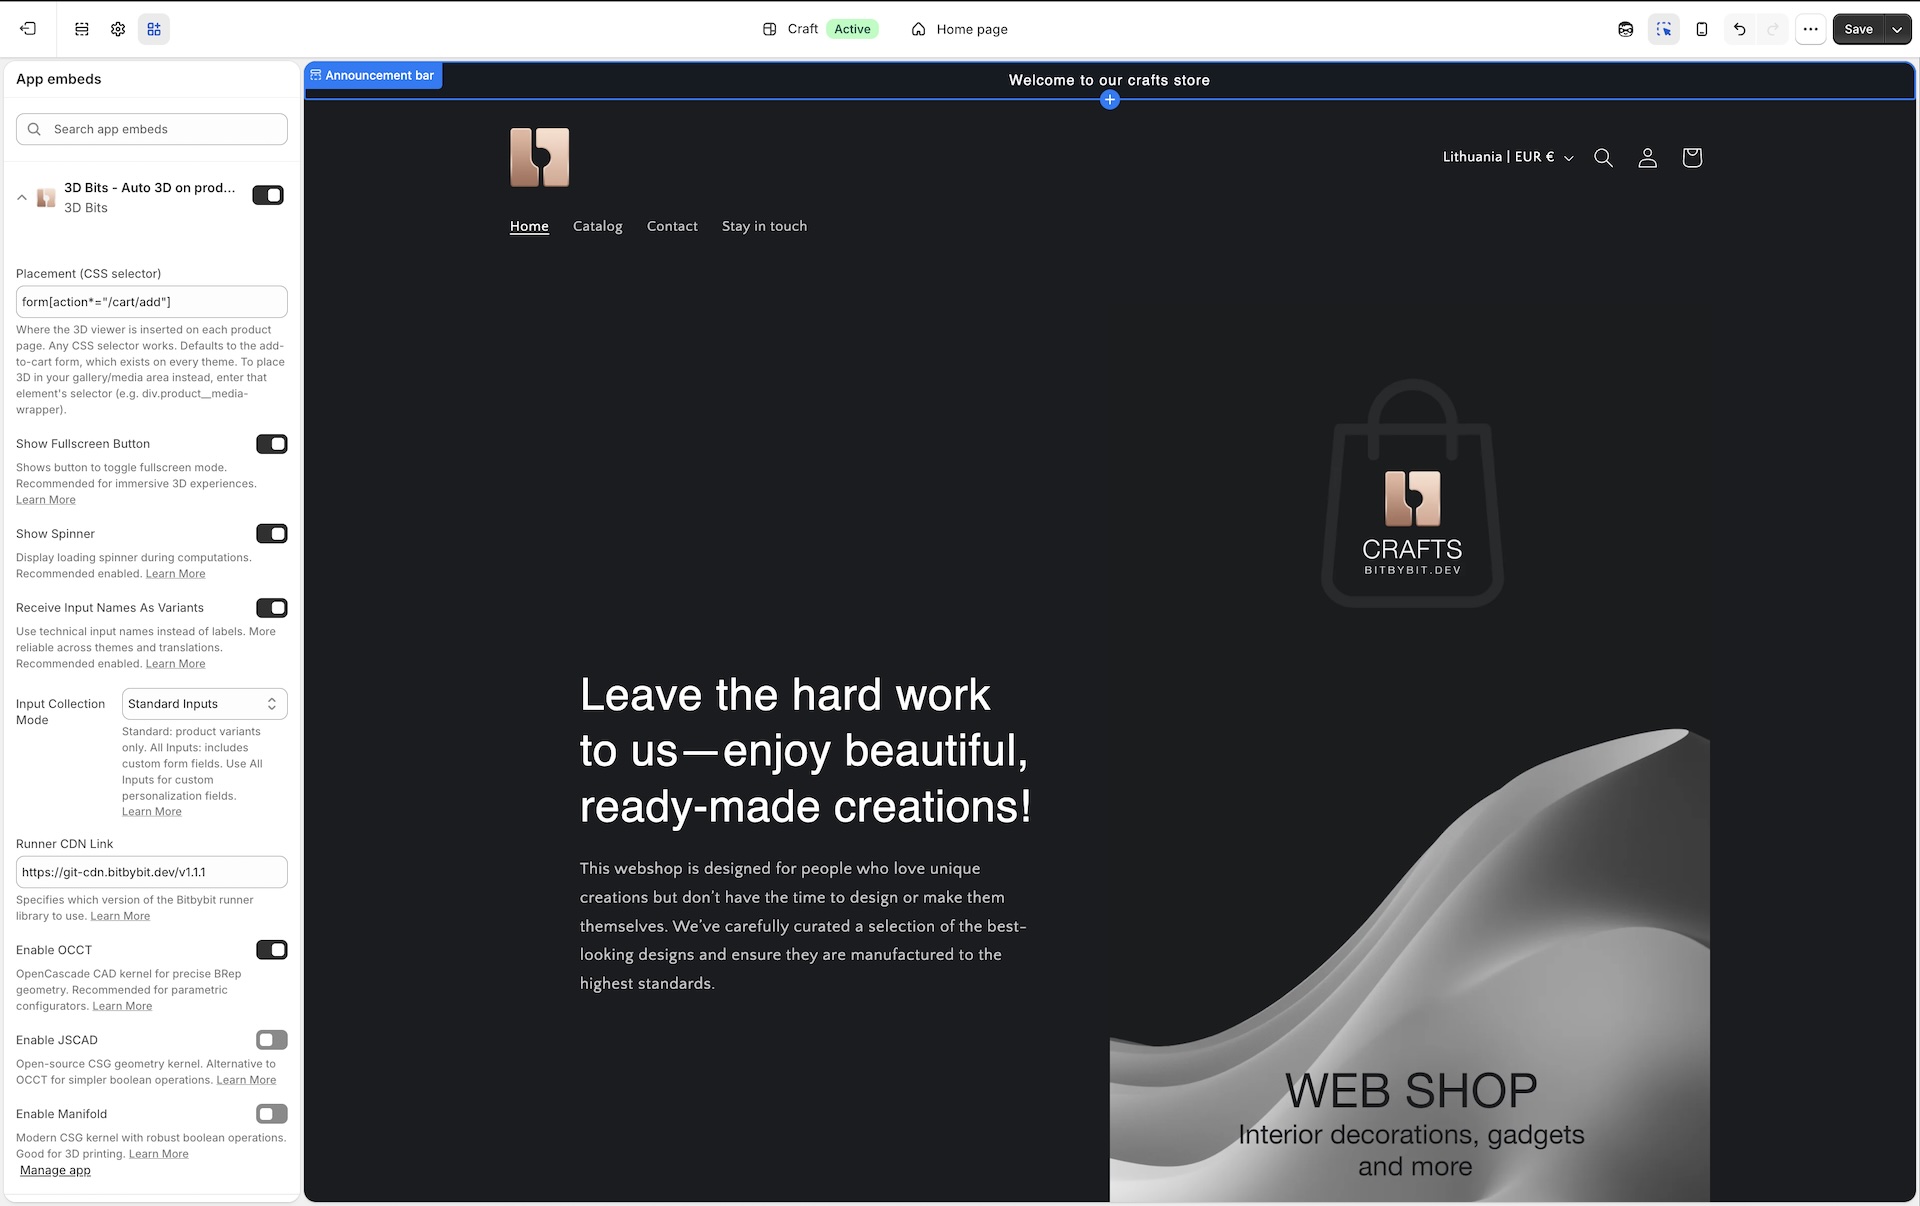
Occasionally we cannot switch it on for you, usually on an unusual theme setup. In that case the button still opens the theme editor at the App embeds panel, and you switch on 3D Bits - Auto 3D on product pages yourself, then Save. Same result, one extra click.
Doing it by hand
If you would rather not use the button, the manual route is the same place. In your Shopify admin go to Online Store, then Themes, then Customize on your live theme. Open the App embeds panel from the left sidebar, find 3D Bits - Auto 3D on product pages, switch it on, and click Save.
How to tell it worked
Publish a project to a product, then open that product page on your storefront. The configurator should appear near the add to cart button.
If the product page looks unchanged, work through these in order. Check that the project is actually published rather than only saved, since those are different actions. Check that the product is linked to the project. Check that you saved the theme editor after switching the embed on, which is easy to forget. And make sure you are looking at the theme the embed was enabled on, because enabling it on a draft theme does nothing for your live one.
Where the configurator appears
By default the configurator is placed at your add to cart form, which every Shopify theme has. That is a deliberate choice: it is the one element we can rely on being present, so the default works everywhere without you configuring anything.
If you want it somewhere else, such as inside your product gallery, you can point it at a different element. That is the Placement setting, covered in the app embed reference.
For finer control, where the 3D view goes in one part of your template and the options panel in another, you place theme blocks yourself instead. See Theme Blocks. The embed notices when a project is set up that way and steps aside, so the two never fight over the same product.
Products you have not published
Nothing happens to them. The embed only acts on products that have a published 3D Bits project, so switching it on across your store is safe even if you are only trialling one product.
The same is true in reverse. If you unpublish a project, its products go back to normal.
What about older setups
If you set up products before the app embed existed, by placing a BITBYBIT VIEWER or RUNNER block into a product template, those keep working untouched. The embed recognises them and leaves them alone rather than drawing a second viewer on top.
You can move them over whenever you like by rebuilding them as projects and publishing, and there is no rush.