Build a drone: sliders and the frame
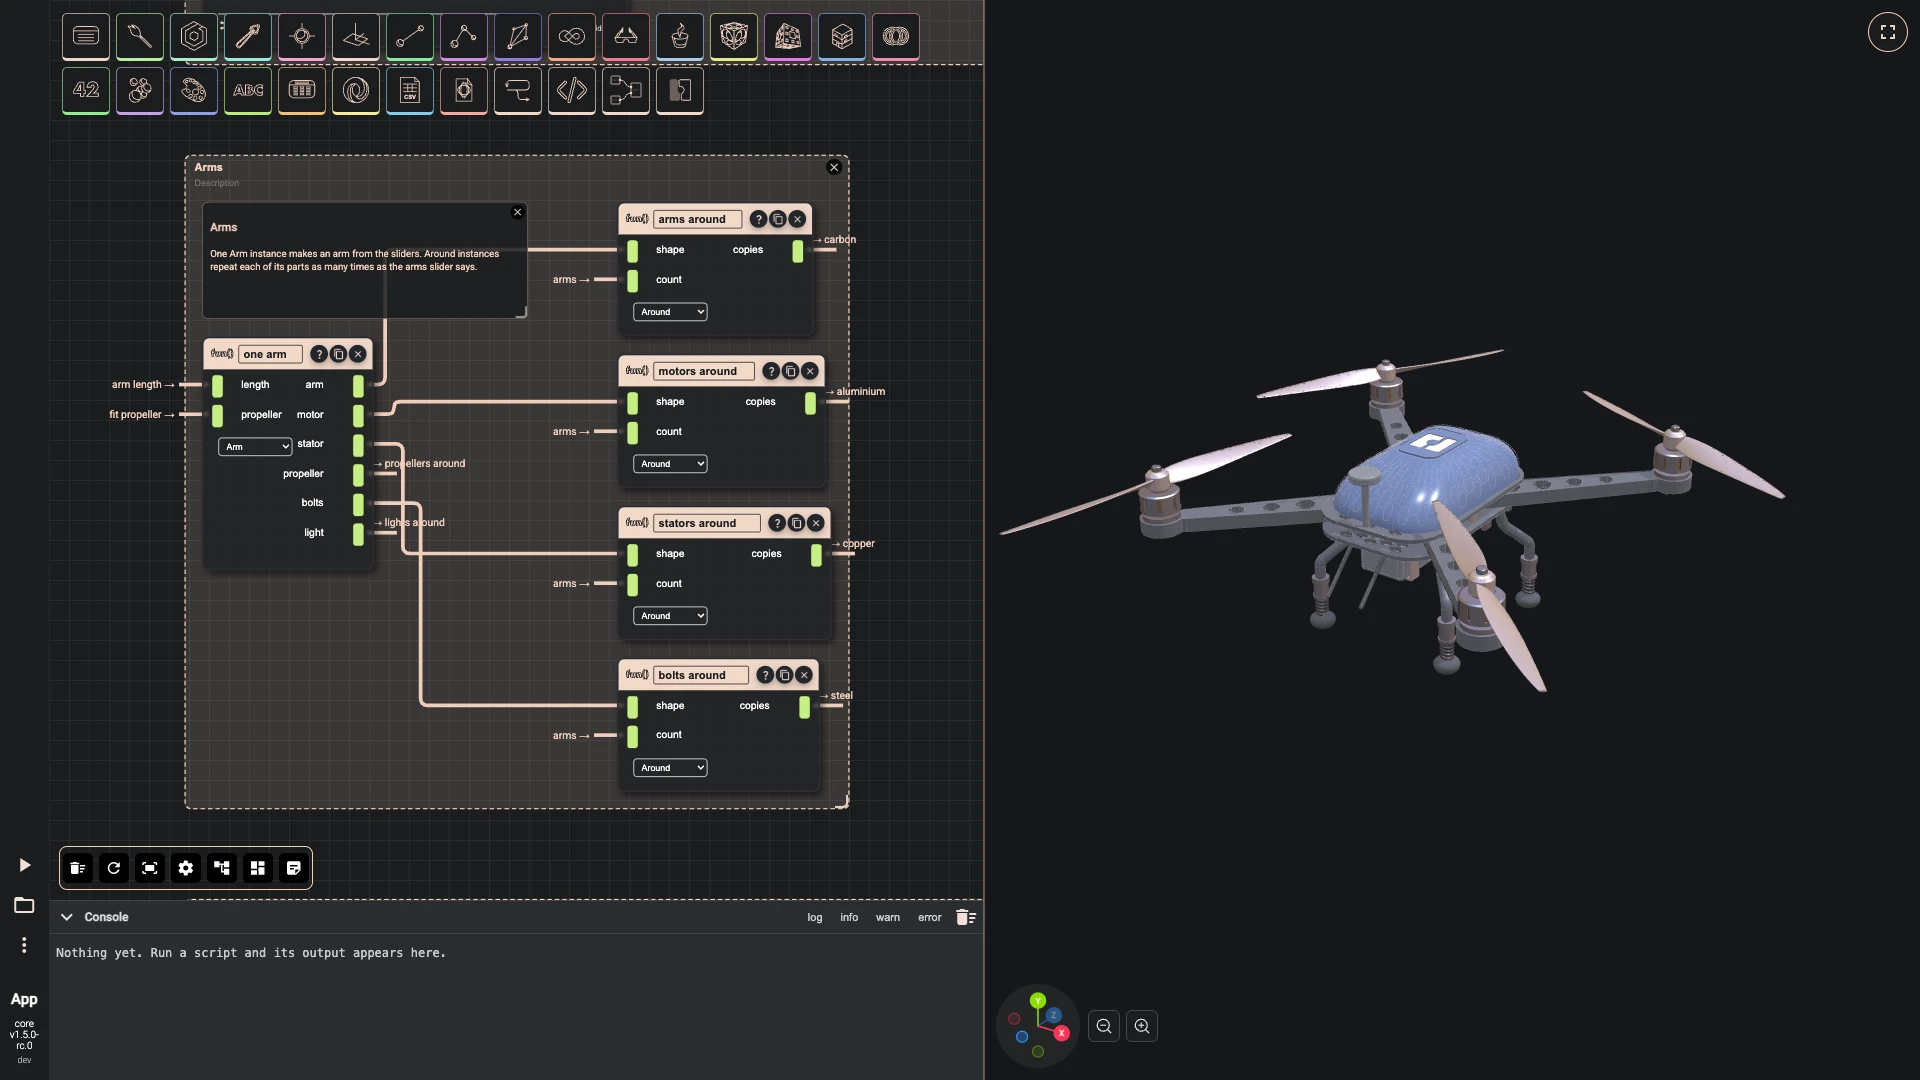
Over seven chapters you build this drone in the Rete editor: a carbon frame of two plates, arms that carry motors, propellers, bolts and lights, a canopy traced with a honeycomb and marked with the bitbybit logo, sprung landing legs and a camera, all sized by three sliders. The number of arms is a slider too, and the drone rebuilds around it. It is the showcase the editor opens with.
The drone is built in millimetres. Each step adds components and wires; where a step says a component is hidden, switch its Visible toggle off, so only finished parts are drawn. Adding components and nodes and wires show how to find a component, set its fields and wire it.
Every part lives in a group, with a comment that says what the part is and how it is made: a graph of this size reads like a document once its groups are named. Organising a script shows how groups and comments work. When a step puts a component into a group made earlier, select the group and the component and press Add selected components to the group. Auto-arrange the graph lays out each group on its own and places the groups beside one another, so press it whenever the canvas gets crowded; the pictures were taken after it.
This chapter makes the sliders, lights the stage and makes the frame.
-
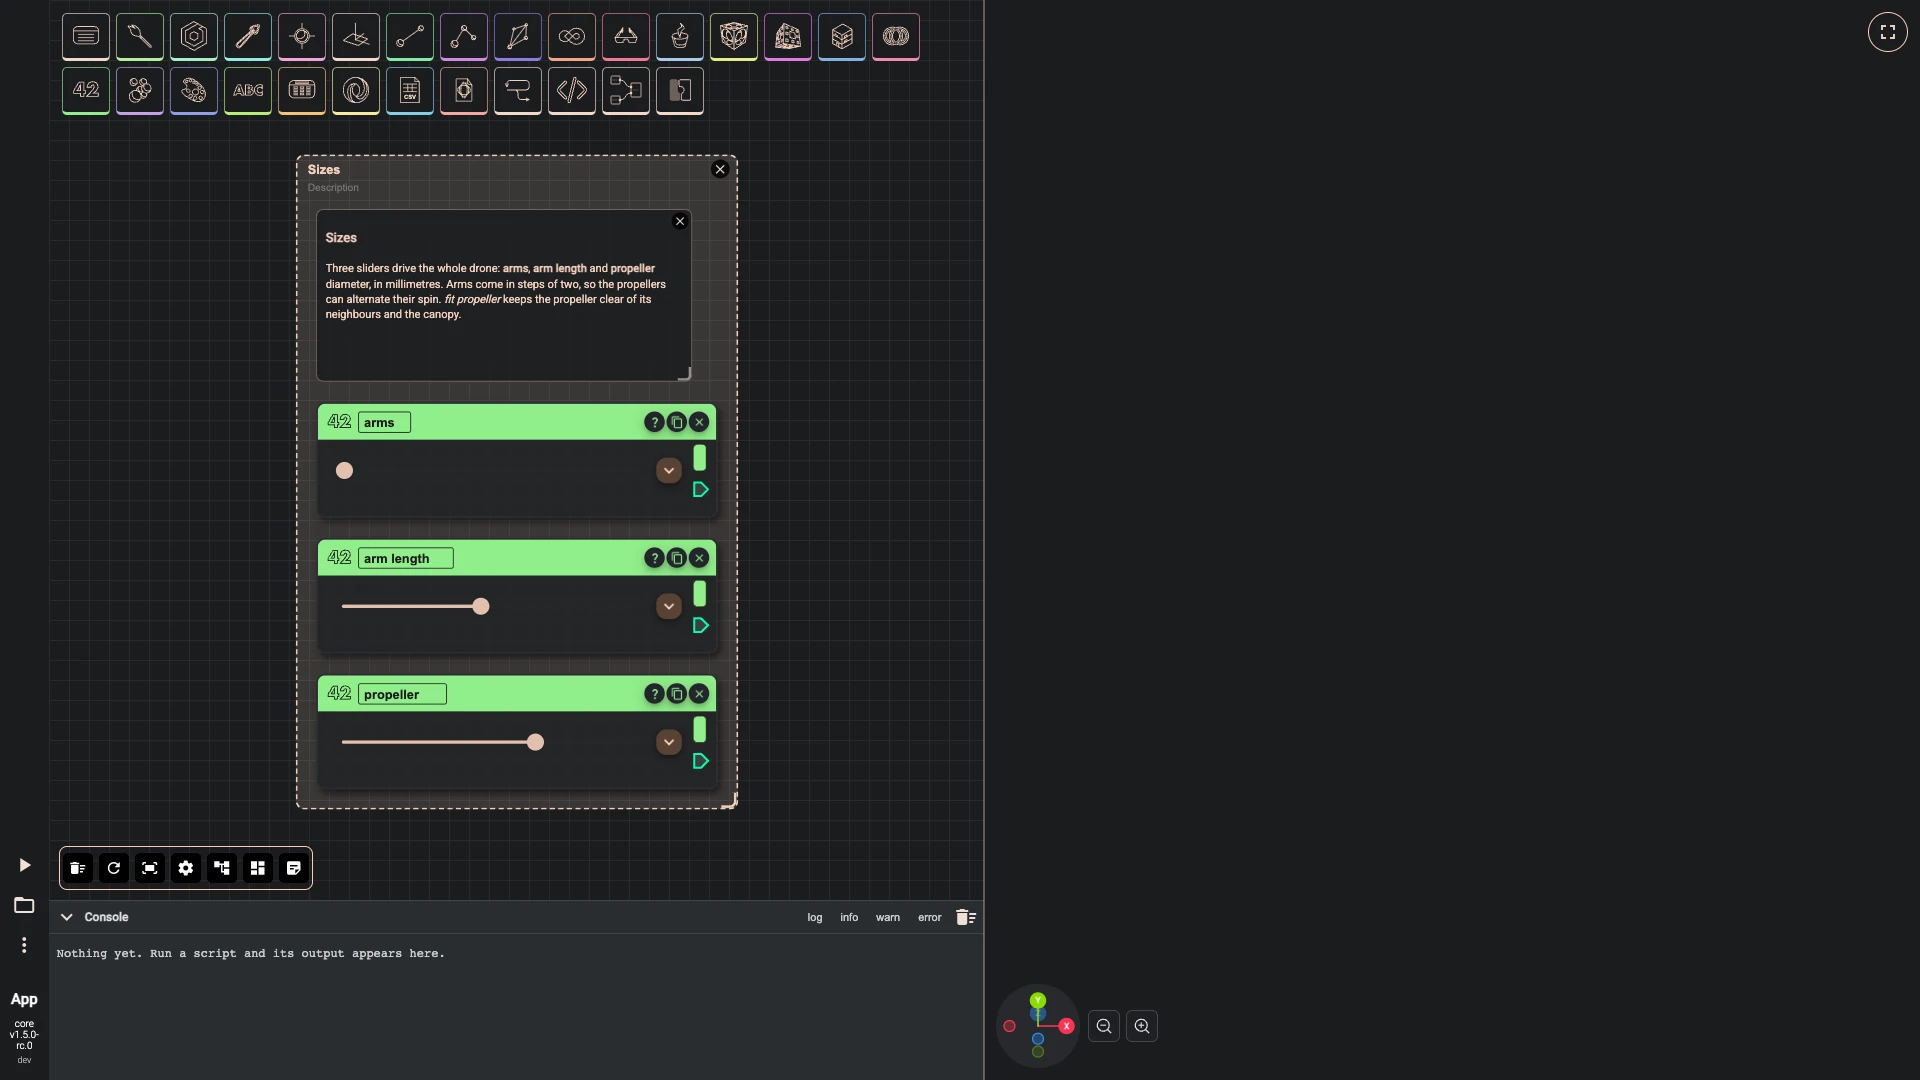
Three number sliders hold the drone's sizes. They sit in a group with a comment that says what they are for: groups and comments change nothing in the model, they make a large graph readable.
-
Add number slider as arms: number 4, from 4 to 8 in steps of 2.
-
Add number slider as arm length: number 185, from 120 to 260 in steps of 5.
-
Add number slider as propeller: number 230, from 100 to 300 in steps of 5.
-
Press Add a comment, double-click the comment and write:
Sizes
Three sliders drive the whole drone: arms, arm length and propeller diameter, in millimetres. Arms come in steps of two, so the propellers can alternate their spin. fit propeller keeps the propeller clear of its neighbours and the canopy.
-
Select the comment, arms, arm length and propeller, press Group selected components and title the group Sizes.
-
-
A propeller must not reach its neighbour or the canopy. A list gathers the three sizes, in this order, and a code component works out the largest propeller that fits, so the slider can never ask for too much.
- Add create list as sizes in the Sizes group.
- Wire arms › result into sizes › listElements.
- Wire arm length › result into sizes › listElements.
- Wire propeller › result into sizes › listElements.
- Add typescript editor as fit propeller: hidden, in the Sizes group, with the code below.
- Wire sizes › list into fit propeller › inputs.
const start = async (inputs: any, index: number) => {const [arms, length, diameter] = inputs;const neighbours = 2 * length * Math.sin(Math.PI / arms) - 10;const canopy = 2 * (length - 68);const largest = Math.floor(Math.min(neighbours, canopy) / 5) * 5;return Math.min(diameter, largest);}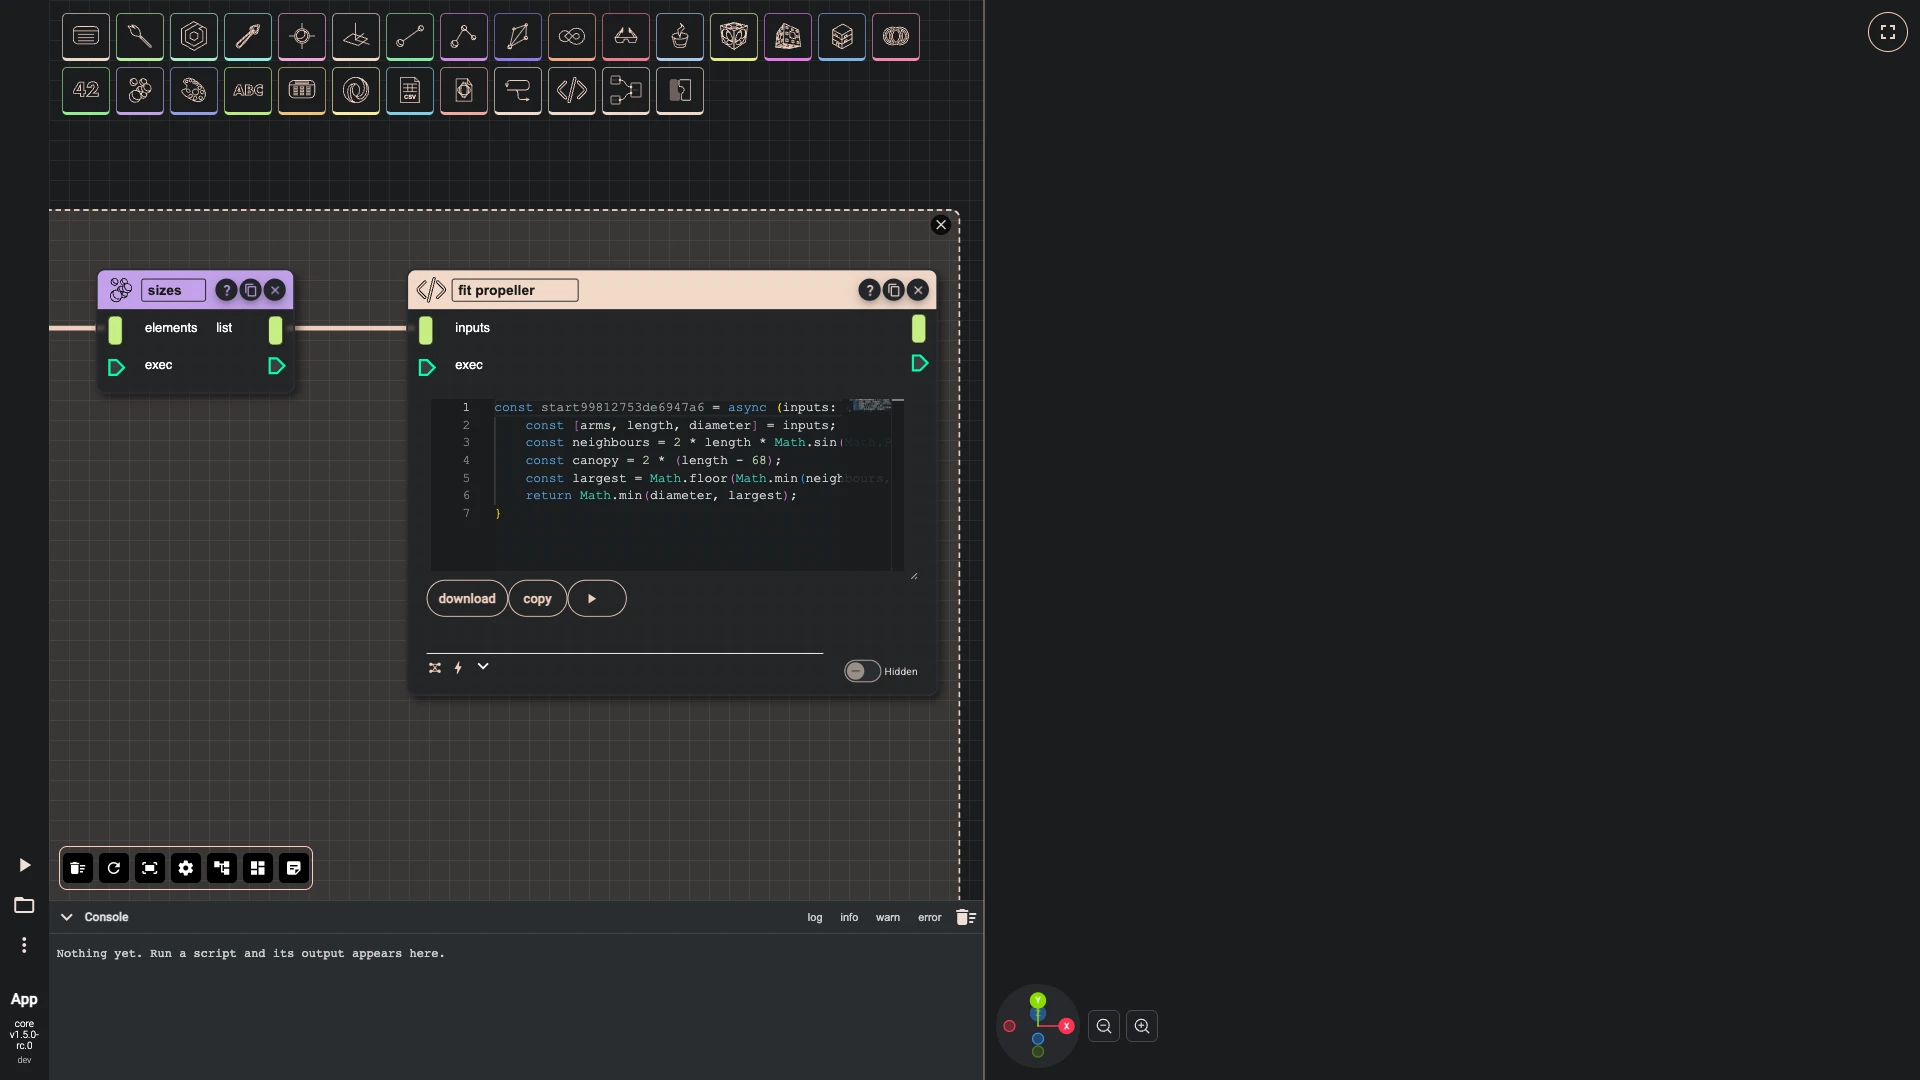
-
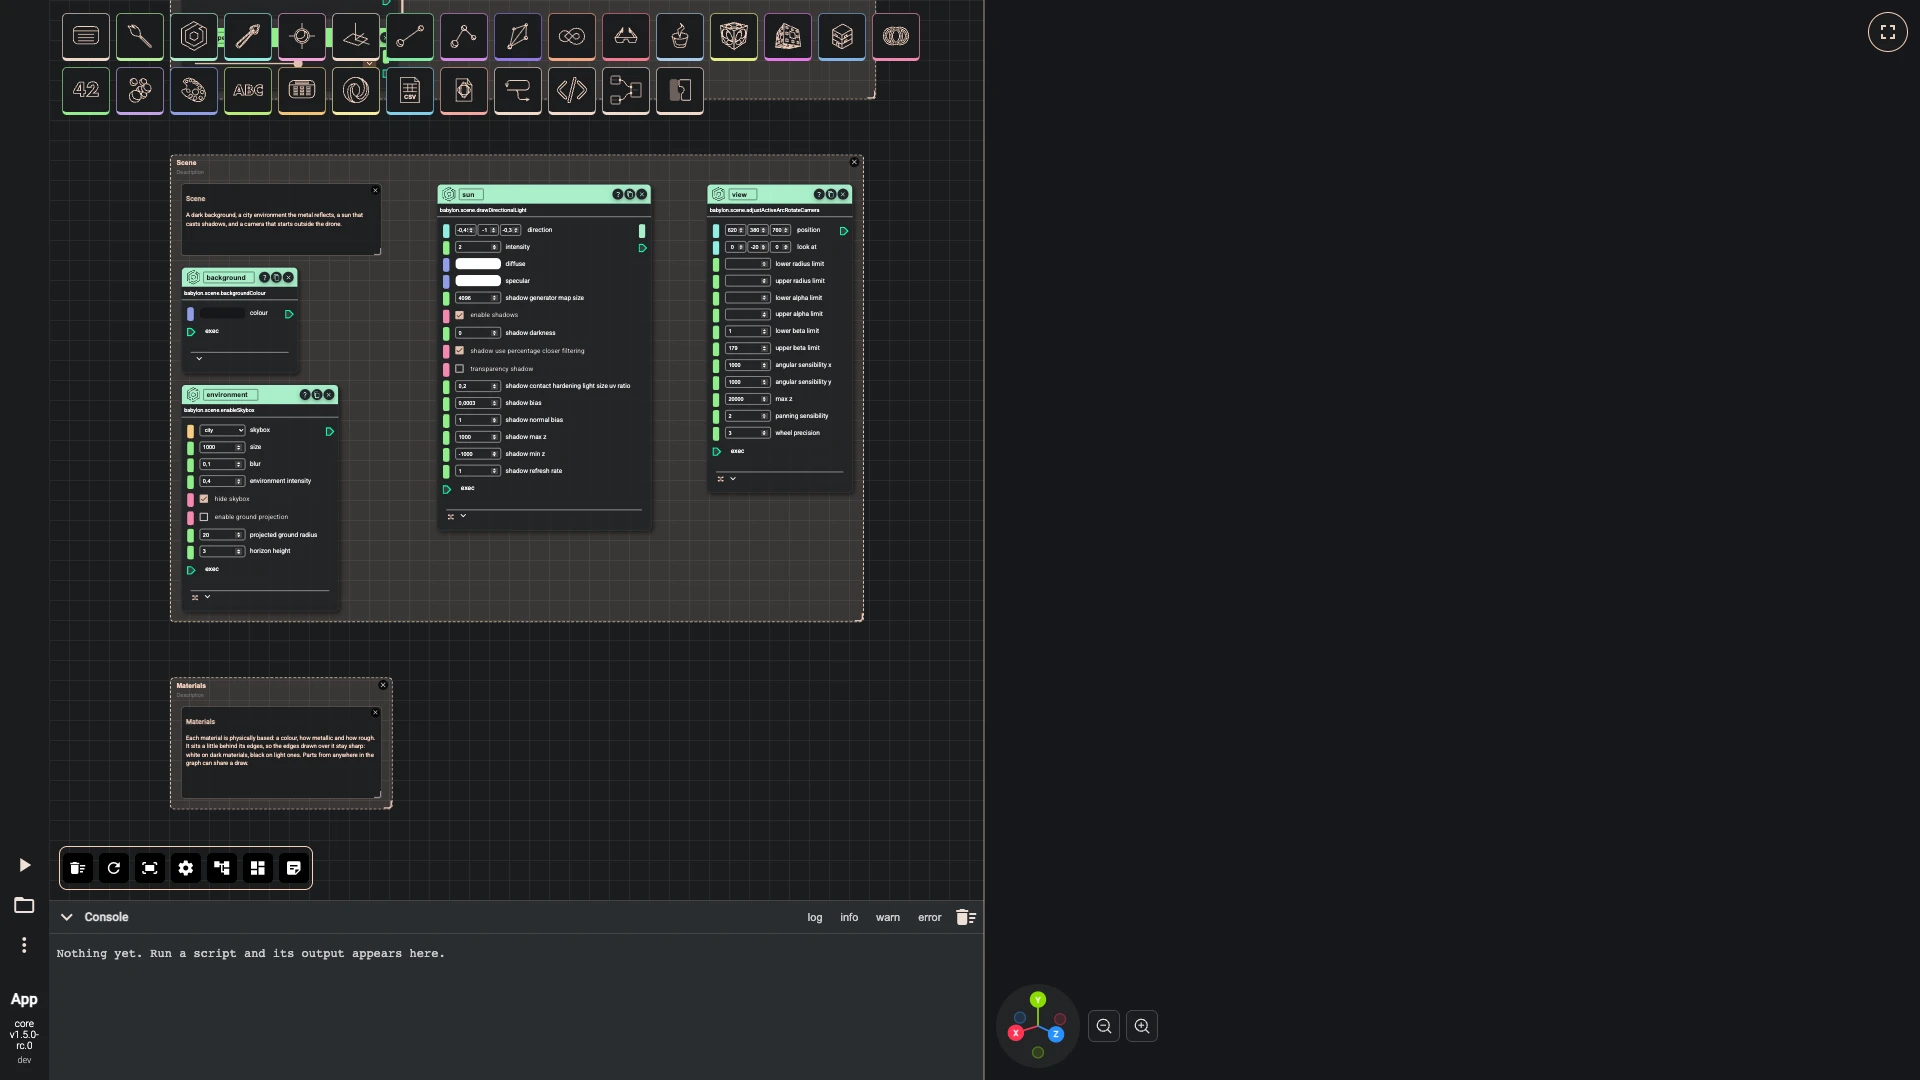
Set the stage before the first part, so every part looks as it will in the end: a dark background, a city environment that metal reflects (its picture hidden), a sun that casts shadows, and the camera placed outside the drone, far enough to see all of it. The Materials group waits empty beside them: each part's material joins it as the part is drawn. A shape drawn anywhere in the graph casts and catches shadows once a light makes them.
-
Add background colour as background: colour #15171a.
-
Add enable skybox as environment: skybox city, environment intensity 0.4, hide skybox on.
-
Add draw directional light as sun: direction [-0.45, -1, -0.3], intensity 2, shadow generator map size 4096, shadow bias 0.0003, shadow normal bias 1, shadow min z -1000, shadow max z 1000.
-
Add adjust active arc rotate camera as view: position [620, 380, 760], look at [0, -20, 0], max z 20000, panning sensibility 2.
-
Press Add a comment, double-click the comment and write:
Scene
A dark background, a city environment the metal reflects, a sun that casts shadows, and a camera that starts outside the drone.
-
Select the comment, background, environment, sun and view, press Group selected components and title the group Scene.
-
Press Add a comment, double-click the comment and write:
Materials
Each material is physically based: a colour, how metallic and how rough. It sits a little behind its edges, so the edges drawn over it stay sharp: white on dark materials, black on light ones. Parts from anywhere in the graph can share a draw.
-
Select the comment, press Group selected components and title the group Materials.
-
-
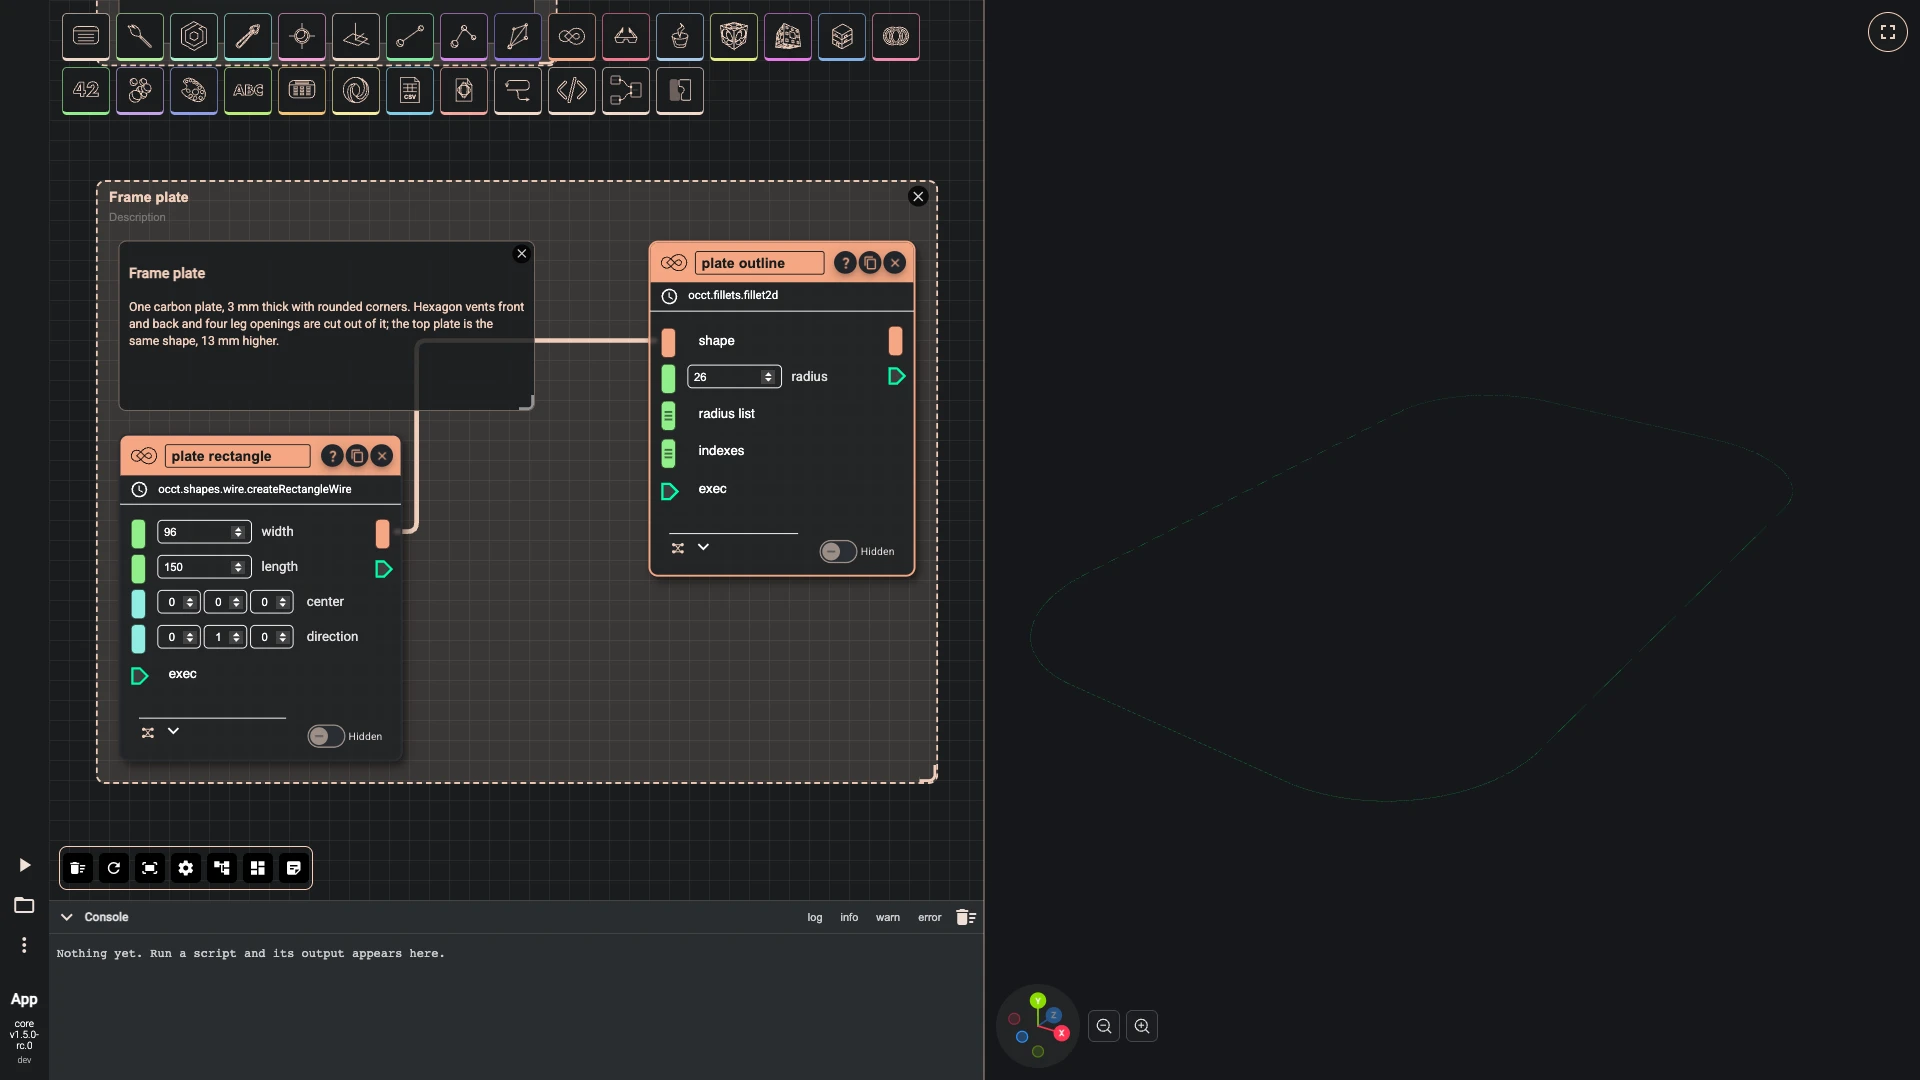
The frame plate starts as a rectangle, 96 by 150 millimetres, with its corners rounded. Each step on the way to a part is hidden, so only finished parts are drawn; select a node to see its shape glow in the 3D view.
-
Add rectangle wire as plate rectangle: width 96, length 150, hidden.
-
Add fillet 2d as plate outline: radius 26, hidden.
-
Wire plate rectangle › result into plate outline › shape.
-
Press Add a comment, double-click the comment and write:
Frame plate
One carbon plate, 3 mm thick with rounded corners. Hexagon vents front and back and four leg openings are cut out of it; the top plate is the same shape, 13 mm higher.
-
Select the comment, plate rectangle and plate outline, press Group selected components and title the group Frame plate.
-
-
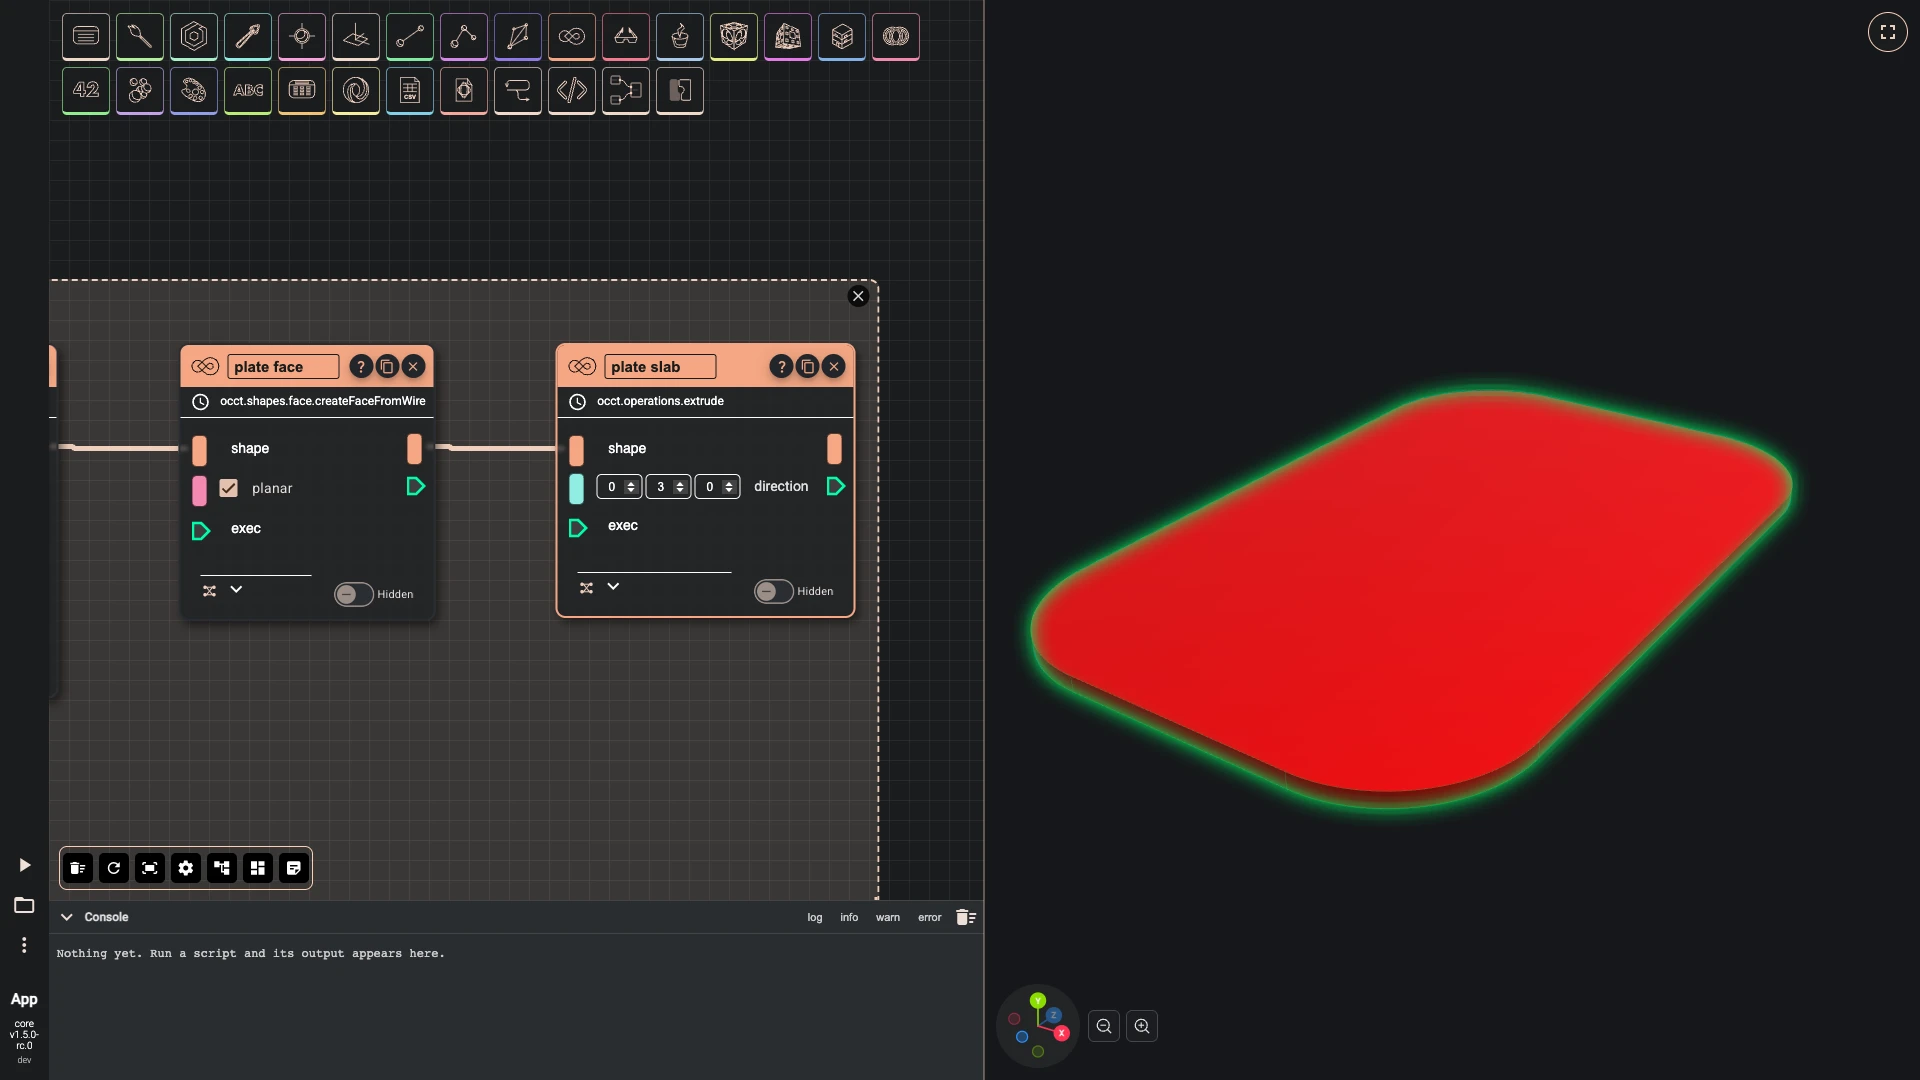
A face fills the outline, and an extrusion gives it its thickness of 3 millimetres.
- Add face from wire as plate face: planar on, hidden, in the Frame plate group.
- Wire plate outline › result into plate face › shape.
- Add extrude as plate slab: direction [0, 3, 0], hidden, in the Frame plate group.
- Wire plate face › result into plate slab › shape.
-
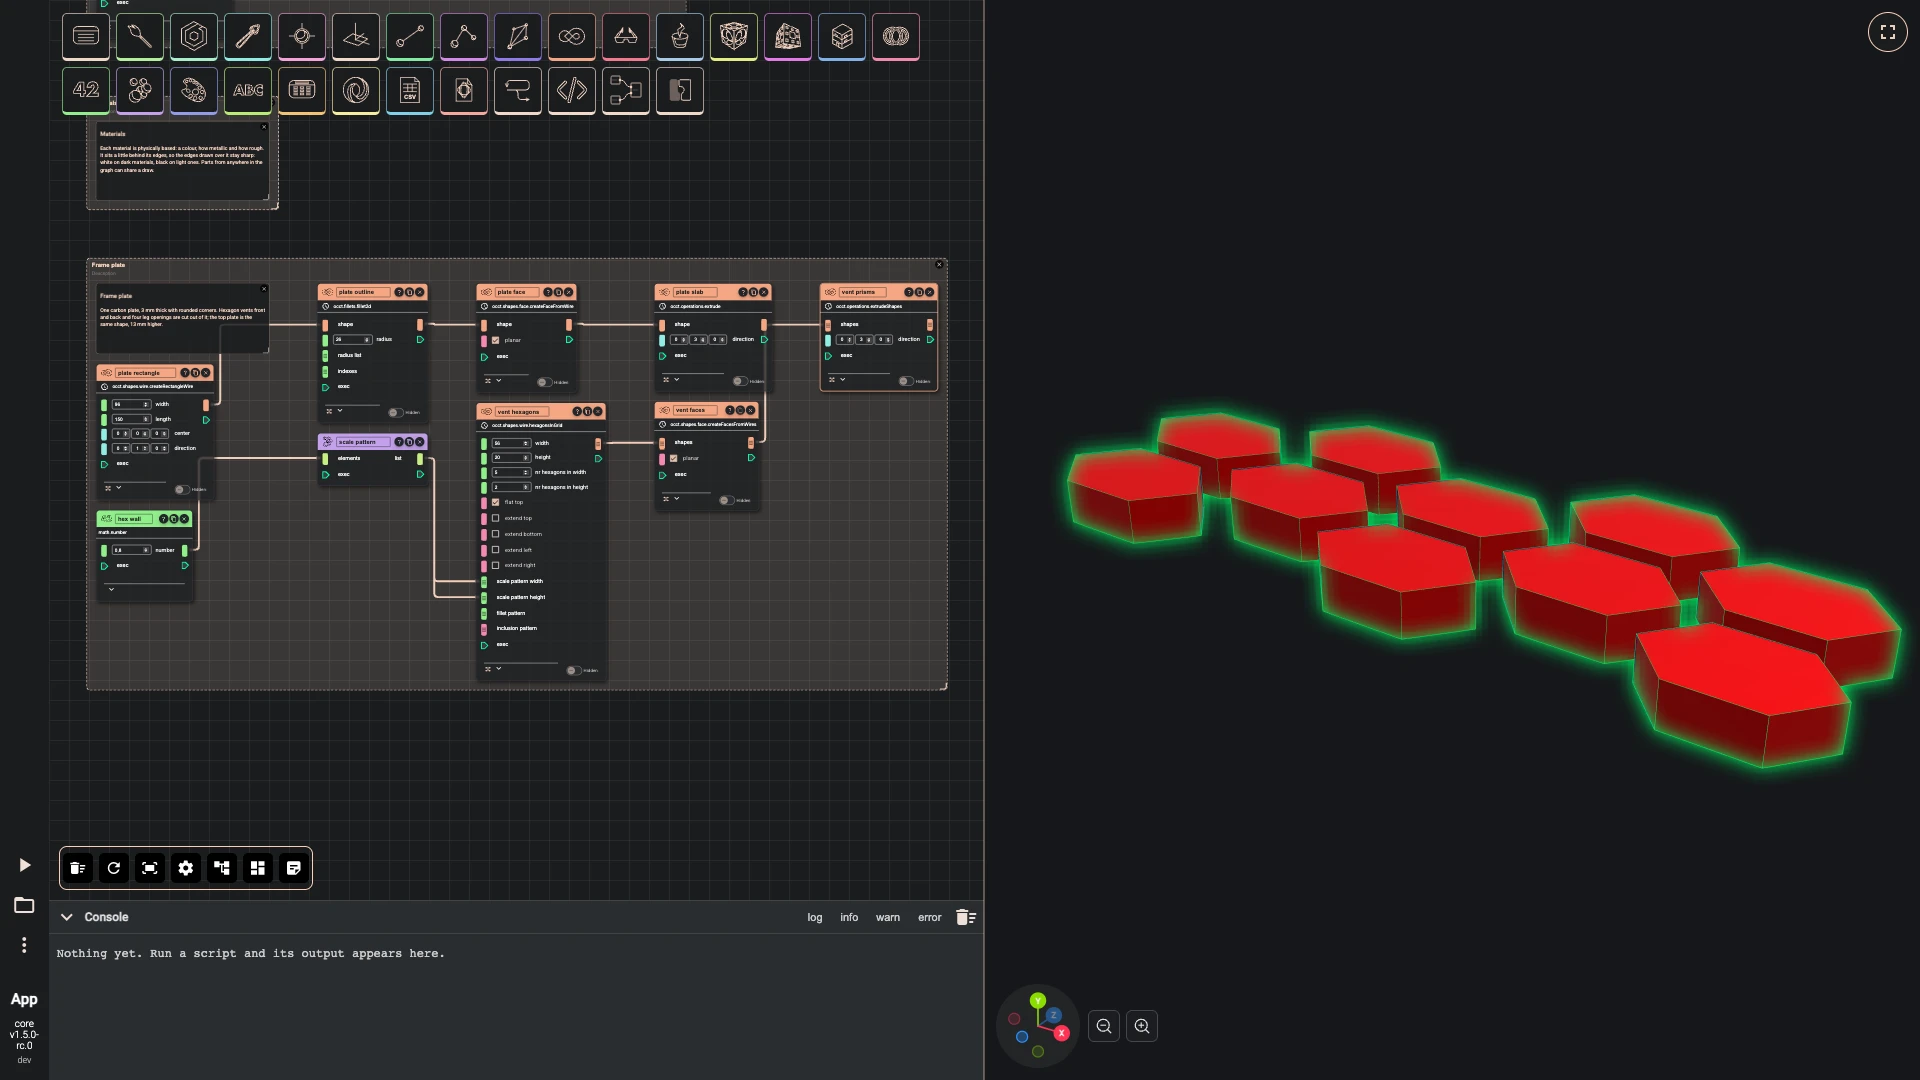
Hexagon vents come from a hexagon grid. Its scale pattern is a list input with no field, so a number goes in through a list component; at 0.8 the hexagons leave walls between them.
- Add number as hex wall: number 0.8, in the Frame plate group.
- Add create list as scale pattern in the Frame plate group.
- Wire hex wall › result into scale pattern › listElements.
- Add hexagons in grid as vent hexagons: width 56, height 20, nr hexagons in width 5, nr hexagons in height 2, flat top on, hidden, in the Frame plate group.
- Wire scale pattern › list into vent hexagons › scalePatternWidth.
- Wire scale pattern › list into vent hexagons › scalePatternHeight.
- Add faces from wires as vent faces: planar on, hidden, in the Frame plate group.
- Wire vent hexagons › result into vent faces › shapes.
- Add extrude shapes as vent prisms: direction [0, 3, 0], hidden, in the Frame plate group.
- Wire vent faces › result into vent prisms › shapes.
-
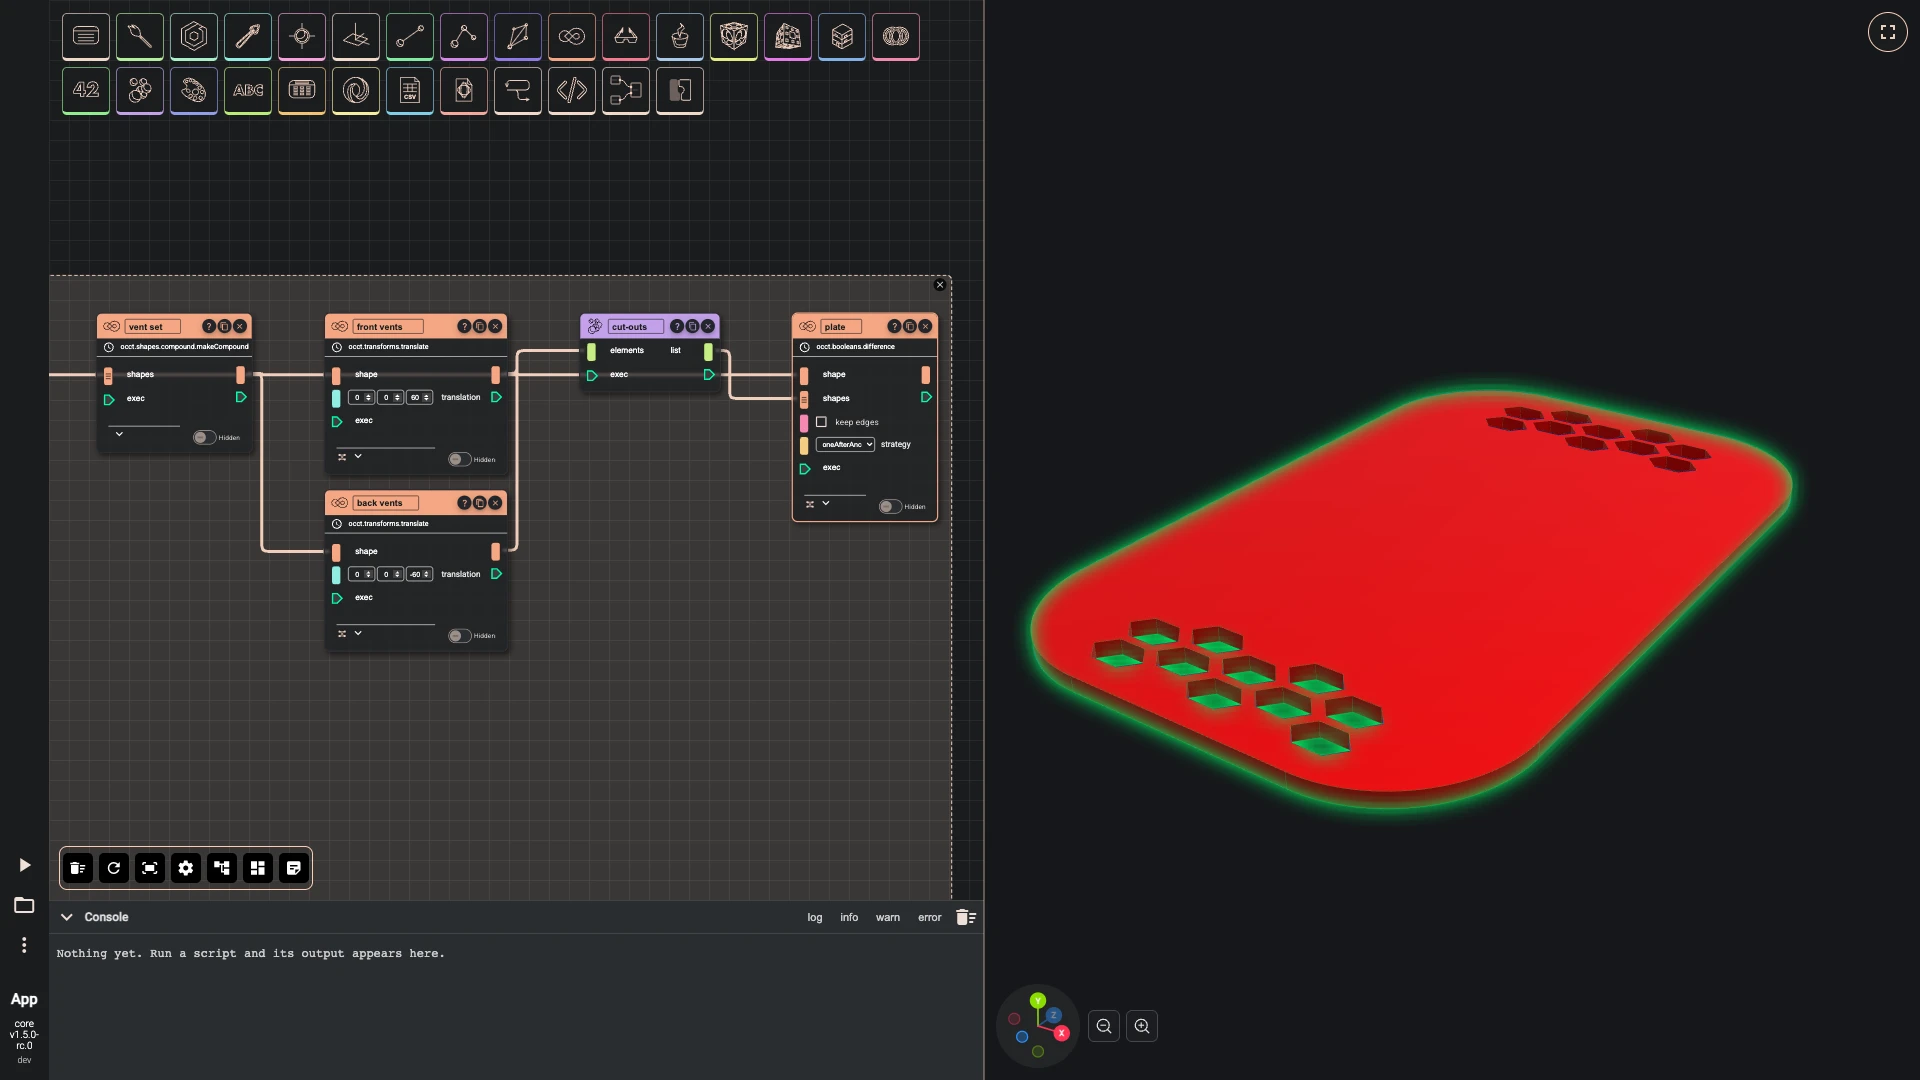
The prisms become one compound, moved to the front and to the back of the plate. A list component gathers the cut-outs, because the difference takes a list of shapes to cut away.
- Add make compound as vent set: hidden, in the Frame plate group.
- Wire vent prisms › result into vent set › shapes.
- Add translate as front vents: translation [0, 0, 60], hidden, in the Frame plate group.
- Add translate as back vents: translation [0, 0, -60], hidden, in the Frame plate group.
- Wire vent set › result into front vents › shape.
- Wire vent set › result into back vents › shape.
- Add create list as cut-outs in the Frame plate group.
- Wire front vents › result into cut-outs › listElements.
- Wire back vents › result into cut-outs › listElements.
- Add difference as plate: hidden, in the Frame plate group.
- Wire plate slab › result into plate › shape.
- Wire cut-outs › list into plate › shapes.
-
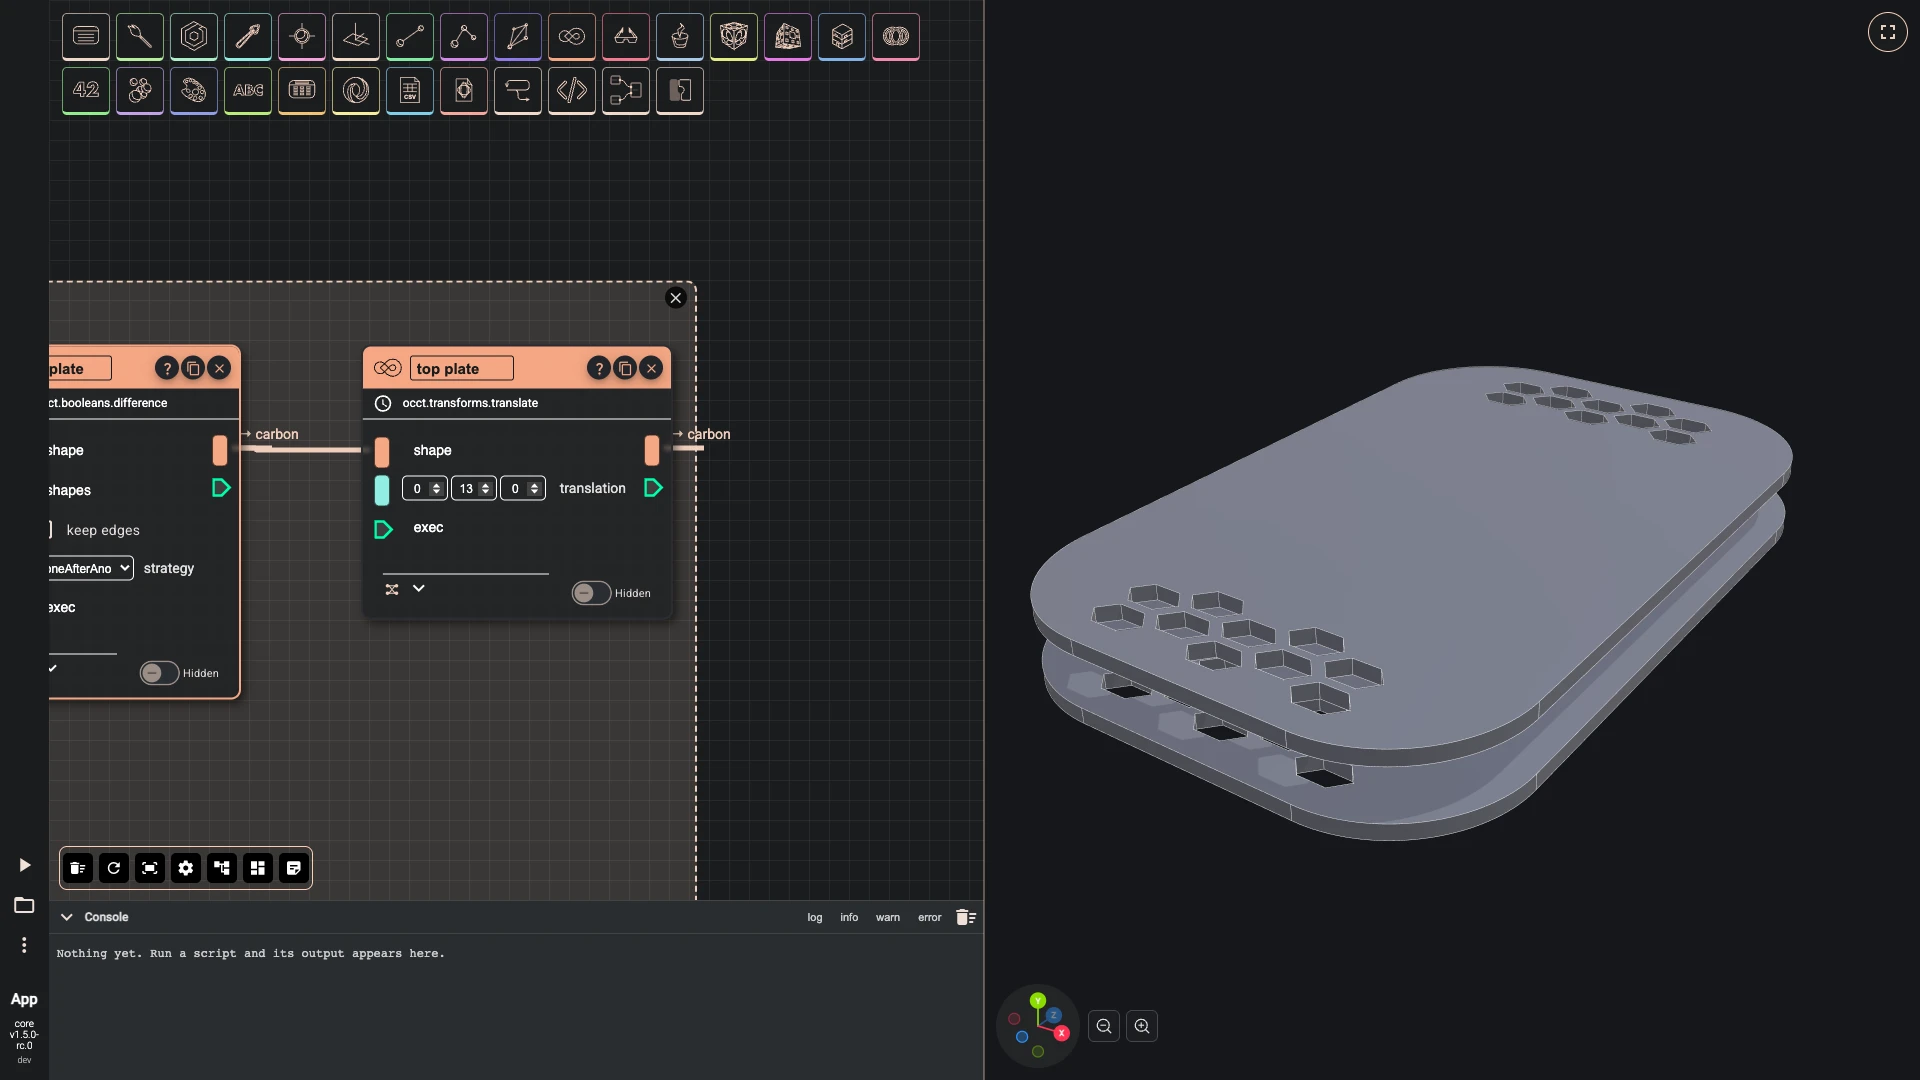
The top plate is the same plate, moved up 13 millimetres; one shape feeds both. A draw component in the Materials group shows the two in carbon: a physically based material, set a little behind the white edges drawn over it so they stay sharp. From here on the drone grows in the 3D view as you build.
- Add translate as top plate: translation [0, 13, 0], hidden, in the Frame plate group.
- Wire plate › result into top plate › shape.
- Add pbr metallic roughness as carbon material: name carbon, base color #23262b, metallic 0.35, roughness 0.45, z offset 2, in the Materials group.
- Add options occt shape as carbon look: precision 0.05, draw two sided off, edge colour #f2f2f2, edge width 6, in the Materials group.
- Wire carbon material › result into carbon look › faceMaterial.
- Add draw any async as carbon in the Materials group.
- Wire carbon look › result into carbon › options.
- Wire plate › result into carbon › entity.
- Wire top plate › result into carbon › entity.
Next: a module that repeats.
Verified against the product in October 2026