A tour of the Rete editor
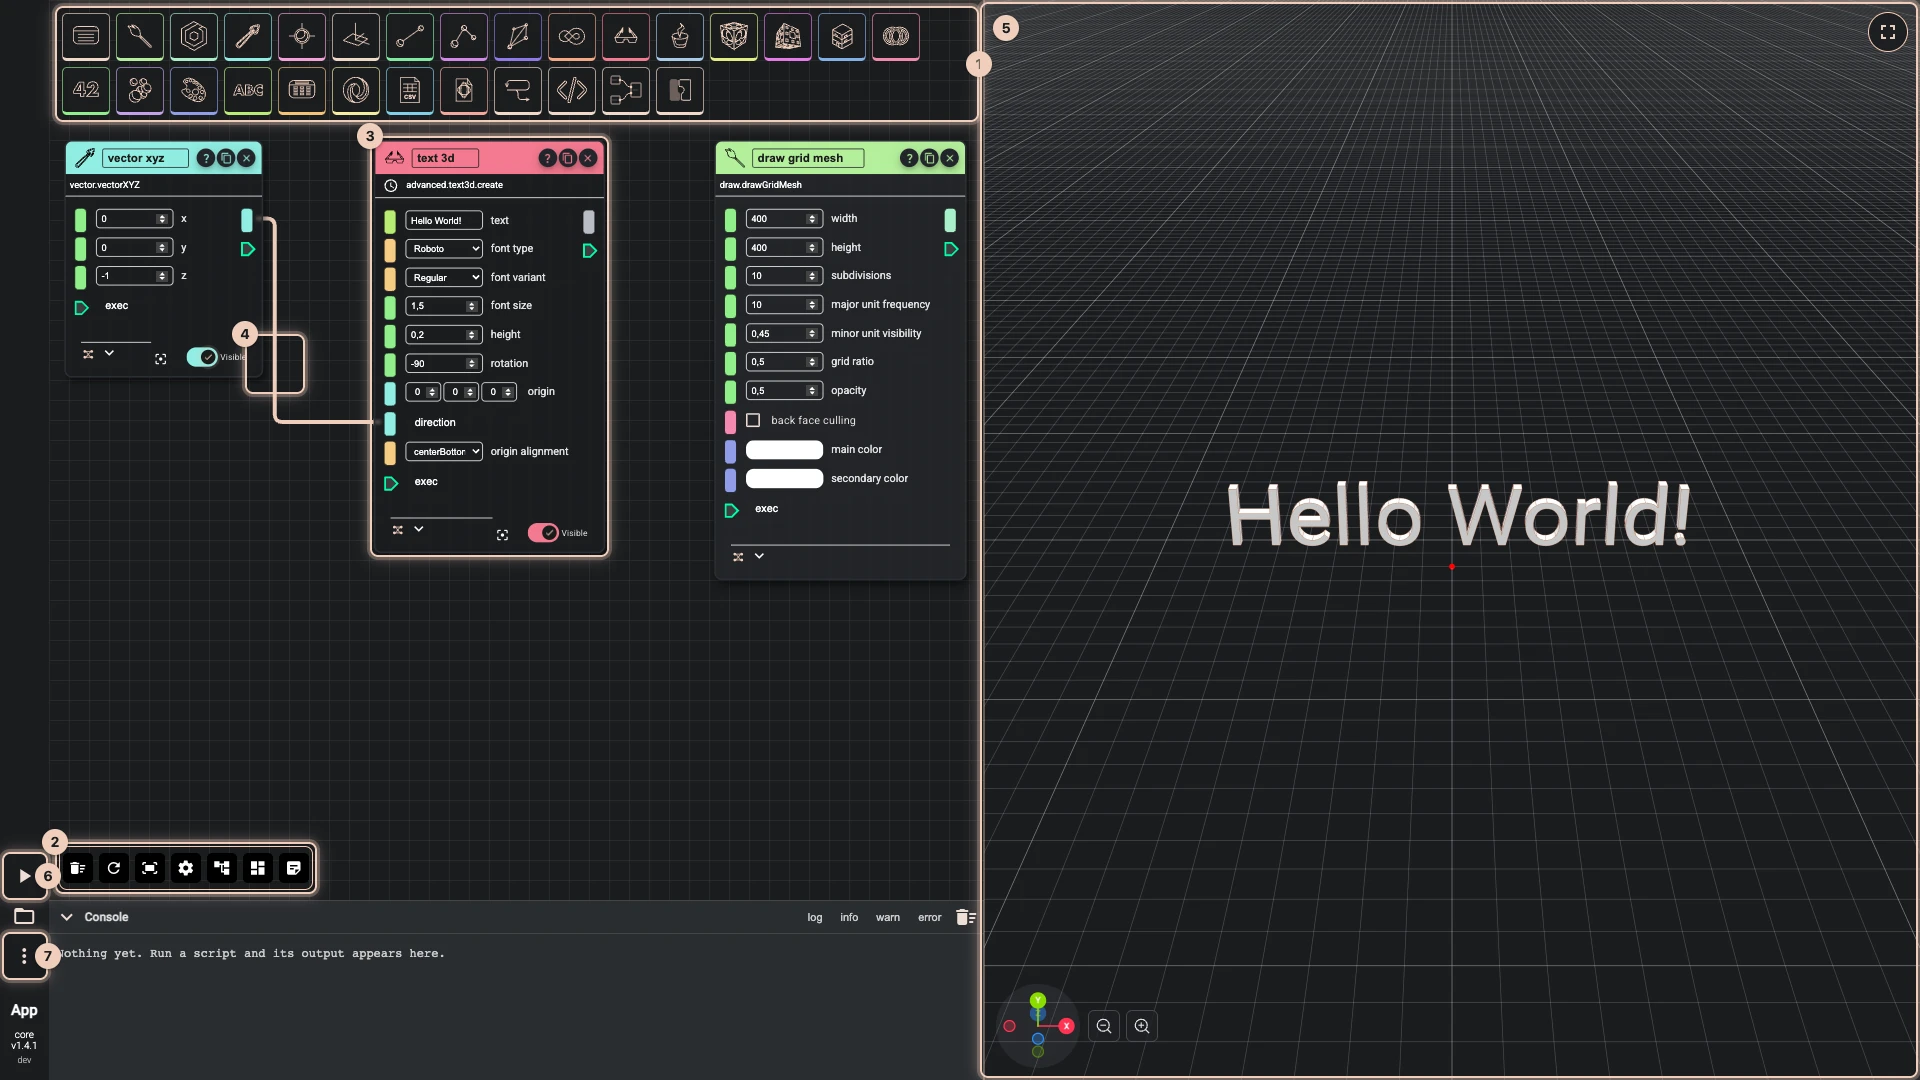
The numbers match the picture, which shows the script Hello World builds.
- The palette. One icon per top category of the API: draw, occt, math, lists and the rest. Click one to open its subcategories and components; Adding components shows the way down.
- The toolbar. Clear all cache and components, Clears cache and recomputes, Fit the whole script to screen, Editor settings, Auto-arrange the graph, Add a group and Add a comment. More buttons appear when you select nodes or a group, as Organising a script shows.
- A node. One component on the canvas, with its fields and sockets. The next picture shows its parts.
- A wire. It carries the output of one node into an input of another. The input's field hides, because the wire now gives its value.
- The 3D view. What the script draws. Turn it with the left mouse button, pan with the right, zoom with the wheel.
- Run The Code. Runs the script once. After that Rete runs again by itself whenever you change a value or a wire.
- More. Import, export, copy and paste the script, settings, and links to the documentation.
The console sits under the canvas; Running code explains it and the split between the canvas and the 3D view.
The parts of a node
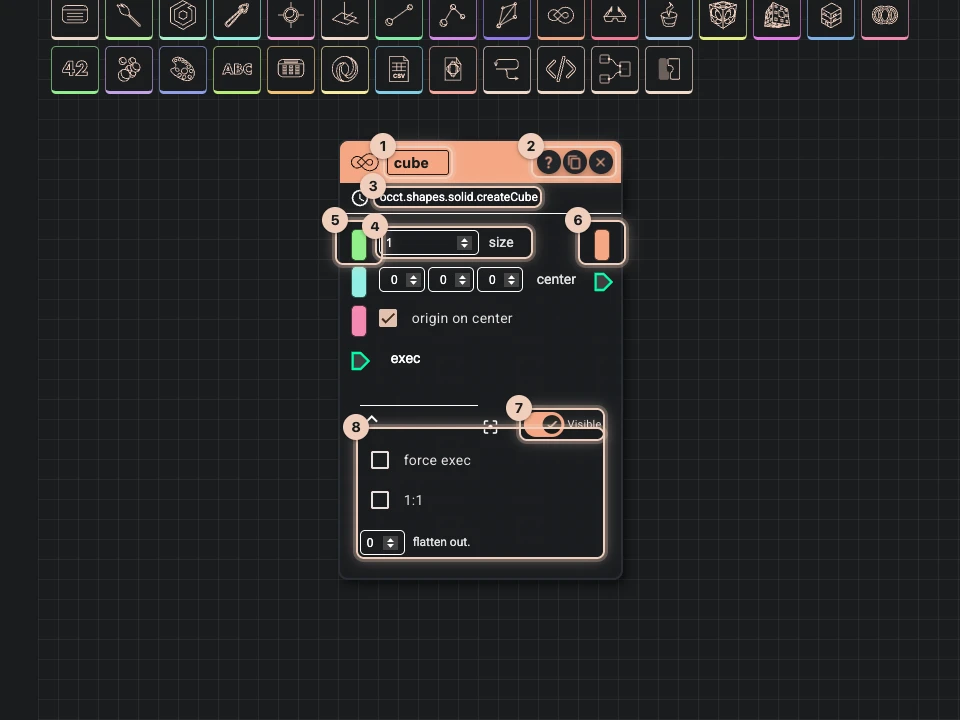
- The name. Click it to rename the node; empty it to get the component's own name back.
- Help, copy and delete. The question mark shows what the component does and opens its page in the API documentation; copy puts a duplicate with the same values beside your pointer; the cross deletes the node and its wires.
- The path, such as
occt.shapes.solid.createCube: where the component sits in the palette and what you would call in TypeScript. - A field. The value of an input that has no wire.
- An input's socket, on the left. Drop a wire here.
- The output's socket, on the right. Drag a wire from here. Hover a socket to see its type and the value it holds after a run.
- Visible. Whether the node draws its result in the 3D view. Beside it, the focus button turns the camera to the node's geometry; double-clicking the node does the same.
- The node options, opened with ⌄: force exec, 1:1 and flatten out., which Lists and node options explains.
Verified against the product in October 2026