Using Your Uploaded Cloud Assets
Introduction
This tutorial builds upon the previous one. To understand this section fully, you should have already completed the Uploading Cloud Assets tutorial.
We will now show you how to access and use those uploaded cloud assets within your Rete, Blockly, and TypeScript scripts. For this guide, we assume you have already uploaded the following assets to your project's cloud storage:
BoomBox.glbCalmCup.step
If you haven't uploaded these yet, please refer to the previous tutorial before proceeding.
Each example below is a preview of a public script whose project holds the two files: start it to run the script, and open the script in its editor to see how it is built. A preview runs in your browser, so the STEP part can take a moment to appear.
Using Cloud Assets in the Rete Editor
Loading cloud assets into the Rete editor is quite straightforward. The Rete script below demonstrates a complete setup. We won't provide a step-by-step guide for finding every component, as each component in Rete usually displays its category path, making it easier to locate.
Key Component for Cloud Assets:
The most important component for accessing your uploaded cloud assets is get file, under asset > get.
Important Notes for Rete:
- File name or title: Give get file the file's name with its extension, such as
BoomBox.glborCalmCup.step, or the title you gave the file. A name is looked up first, then a title. - Working with Meshes (from
.glb):- When a
.glbfile is loaded, it's treated as a direct BabylonJS Mesh. - Components in the "Babylon" category that manipulate meshes (like transformations) work by referencing and modifying the original mesh rather than creating a new clone at each step. This is done for performance.
- This means the editing experience might feel different compared to working with OCCT geometry (which involves creating new shapes from operations).
- If you need to work with a distinct copy of a mesh, you can use the
babylon->mesh->edit->clonecomponent.
- When a
- Different Processing for
.glbvs..step:- Both
.glband.stepassets start with the same get file component to get the file data. - However, a
.glbfile is typically interpreted and loaded directly by BabylonJS IO components (turning it into a mesh). - A
.stepfile, on the other hand, needs to be interpreted by an OCCT IO component first (to parse the CAD data into an OCCT shape), and then that OCCT shape is processed and meshed for display.
- Both
- Scene Enhancements (Optional): The example script below also includes components to create a skybox, a directional light, enable shadows, and create a ground plane from a circle face. These are not essential for loading the assets themselves but make the scene visually richer. Feel free to ignore these parts if you're only focused on asset loading.
Rete Editor Example:

Open the script in the Rete editor
Using Cloud Assets in the Blockly Editor
Similar to the Rete example, the Blockly script below shows a complete setup. We'll highlight the core principles rather than a detailed step-by-step block placement guide. The script also includes optional blocks for creating the skybox, light, and ground.
Key Considerations for Blockly:
- Asynchronous Nature: You might notice that the Blockly script appears more involved than the Rete equivalent. This is partly because Rete often hides some of the complexities related to asynchronous operations (like file loading). Blockly, by design, exposes these more explicitly to align closely with traditional programming language concepts. This helps in understanding fundamental concepts like
async/await(even if visually represented) and provides more power for writing real-time simulations or games. - The get file block: Like Rete's component of the same name, it fetches a file of the project by its name or title.
- Processing
.glbvs..step: The interpretation process is similar to Rete:.glbfiles are typically handled by BabylonJS loading blocks, while.stepfiles require OCCT parsing blocks before drawing. - Variables and Asynchronous Context: The example uses variables for better readability and an asynchronous context (often set up with special
asyncfunction blocks) toawaitlong-running computations like file loading and parsing. This "awaiting" allows the script to handle these operations without freezing, in a way that feels more synchronous. - Coordinate System for
.glb: Remember that.glbfiles usually require setting the scene to use a right-handed coordinate system for correct orientation.
Blockly Editor Example:
Open the script in the Blockly editor
Using Cloud Assets in the TypeScript Editor
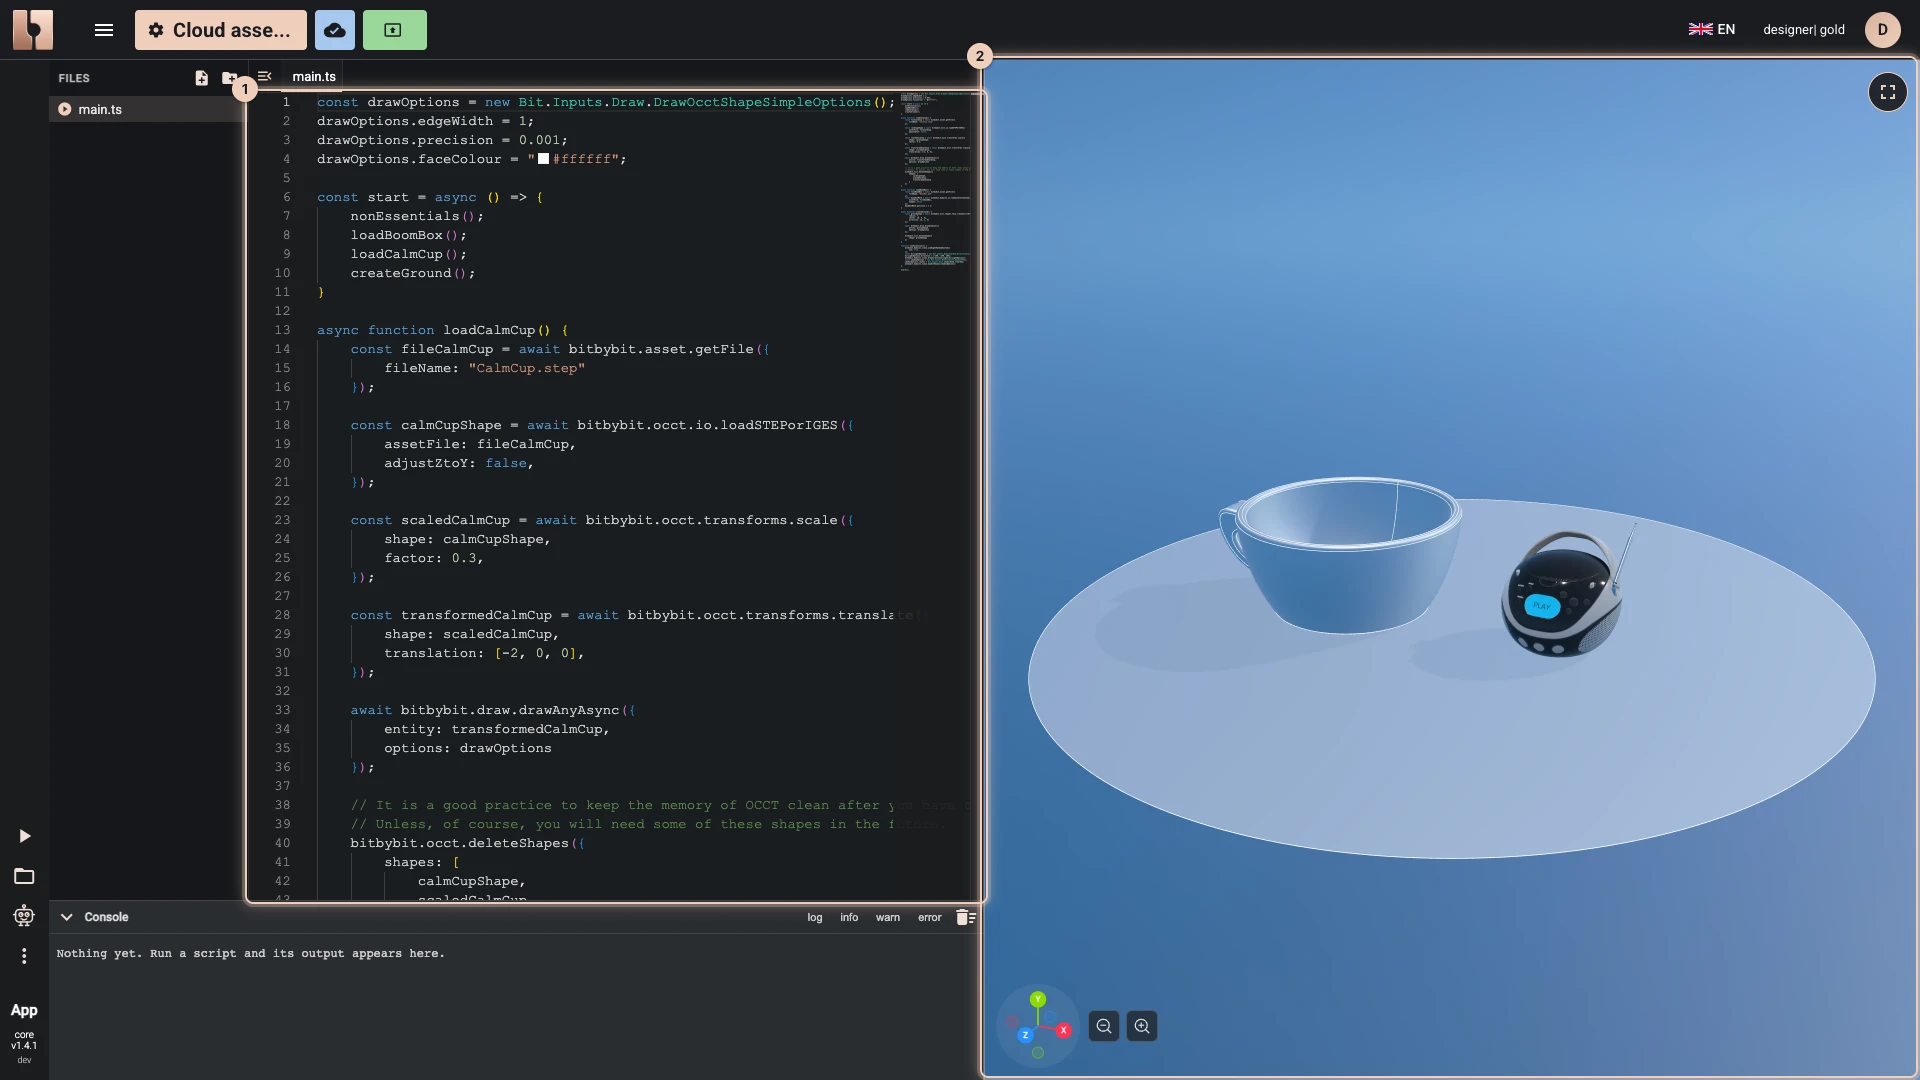
TypeScript offers the most direct and powerful way to interact with Bitbybit.dev's features, including loading cloud assets. The example below demonstrates how to load the BoomBox.glb and CalmCup.step assets.
Key Aspects of the TypeScript Approach:
- Functions for Clarity: The example script uses functions to separate essential asset-loading logic from non-essential parts (like creating the ground, skybox, and light).
bitbybitObject: You'll see that the code uses the globalbitbybitobject to access various functions for file loading, OCCT operations, drawing, and BabylonJS interactions. This is consistent with how you access platform features in TypeScript.- Asynchronous Operations (
async/await): Similar to the more explicit Blockly setup, TypeScript relies heavily onasyncfunctions and theawaitkeyword to handle operations that take time, such as loading files from the cloud, parsing CAD data, or drawing complex geometry. This ensures the application remains responsive. - File name or title: As in Rete and Blockly,
bitbybit.asset.getFiletakes the file's name, such asBoomBox.glbandCalmCup.step, or its title.
TypeScript Editor Example:
Open the script in the TypeScript editor
const drawOptions = new Bit.Inputs.Draw.DrawOcctShapeSimpleOptions();
drawOptions.edgeWidth = 1;
drawOptions.precision = 0.001;
drawOptions.faceColour = "#ffffff";

nonEssentials();
loadBoomBox();
loadCalmCup();
createGround();
}

async function loadCalmCup() {
const fileCalmCup = await bitbybit.asset.getFile({
    fileName: "CalmCup.step"
});

const calmCupShape = await bitbybit.occt.io.loadSTEPorIGES({
    assetFile: fileCalmCup,
    adjustZtoY: false,
});

const scaledCalmCup = await bitbybit.occt.transforms.scale({
    shape: calmCupShape,
    factor: 0.3,
});

const transformedCalmCup = await bitbybit.occt.transforms.translate({
    shape: scaledCalmCup,
    translation: [-2, 0, 0],
});

await bitbybit.draw.drawAnyAsync({
    entity: transformedCalmCup,
    options: drawOptions
});

// It is a good practice to keep the memory of OCCT clean after you have constructed your drawn mesh.
// Unless, of course, you will need some of these shapes in the future.
bitbybit.occt.deleteShapes({
    shapes: [
        calmCupShape,
        scaledCalmCup,
        transformedCalmCup
    ]
})
}

async function loadBoomBox() {
const fileBoomBox = await bitbybit.asset.getFile({
    fileName: "BoomBox.glb"
});
const boomboxMesh = await bitbybit.babylon.io.loadAssetIntoScene({
    assetFile: fileBoomBox,
    hidden: false
});
boomboxMesh.position.x = 2;
}

async function createGround() {
const groundShape = await bitbybit.occt.shapes.face.createCircleFace({
    radius: 7,
    center: [0, 0, 0],
    direction: [0, 1, 0]
});

await bitbybit.draw.drawAnyAsync({
    entity: groundShape,
    options: drawOptions
});

bitbybit.occt.deleteShape({
    shape: groundShape
})
}

function nonEssentials() {
bitbybit.babylon.scene.useRightHandedSystem({
    use: true
});
const dirLightOptions = new Bit.Inputs.BabylonScene.DirectionalLightDto();
dirLightOptions.direction = [-100, -100, 100];
bitbybit.babylon.scene.drawDirectionalLight(dirLightOptions);
const skyboxOptions = new Bit.Inputs.BabylonScene.SkyboxDto();
skyboxOptions.skybox = Bit.Inputs.Base.skyboxEnum.clearSky;
bitbybit.babylon.scene.enableSkybox(skyboxOptions);
The same code in a TypeScript script of the project that holds the two files, run beside its result:
Conclusion
You've now seen how to use your uploaded cloud assets to create essentially the same 3D scene across all three of Bitbybit's main editor environments. These examples can serve as a valuable reference for loading your own unique designs and assets into the platform.
We're excited to offer three distinct editors, each with its own strengths. We believe this flexibility allows you to choose the right tool for the right task, whether you prefer visual programming or text-based coding, to bring your 3D visions to life and share them with the world.
Verified against the product in October 2026