The Coding Editors, Rebuilt: Readable Rete Graphs, Async Blockly Functions and a Drone Built Three Ways

Bitbybit has three coding editors: Rete, where you wire nodes together; Blockly, where you snap blocks; and TypeScript, where you write code against the same API. This release rebuilds a large part of all three. Most of the work went into Rete, which now stays readable when a script grows to hundreds of nodes. Blockly functions can await geometry, TypeScript scripts can span many files, and an AI agent can drive any of the three editors.
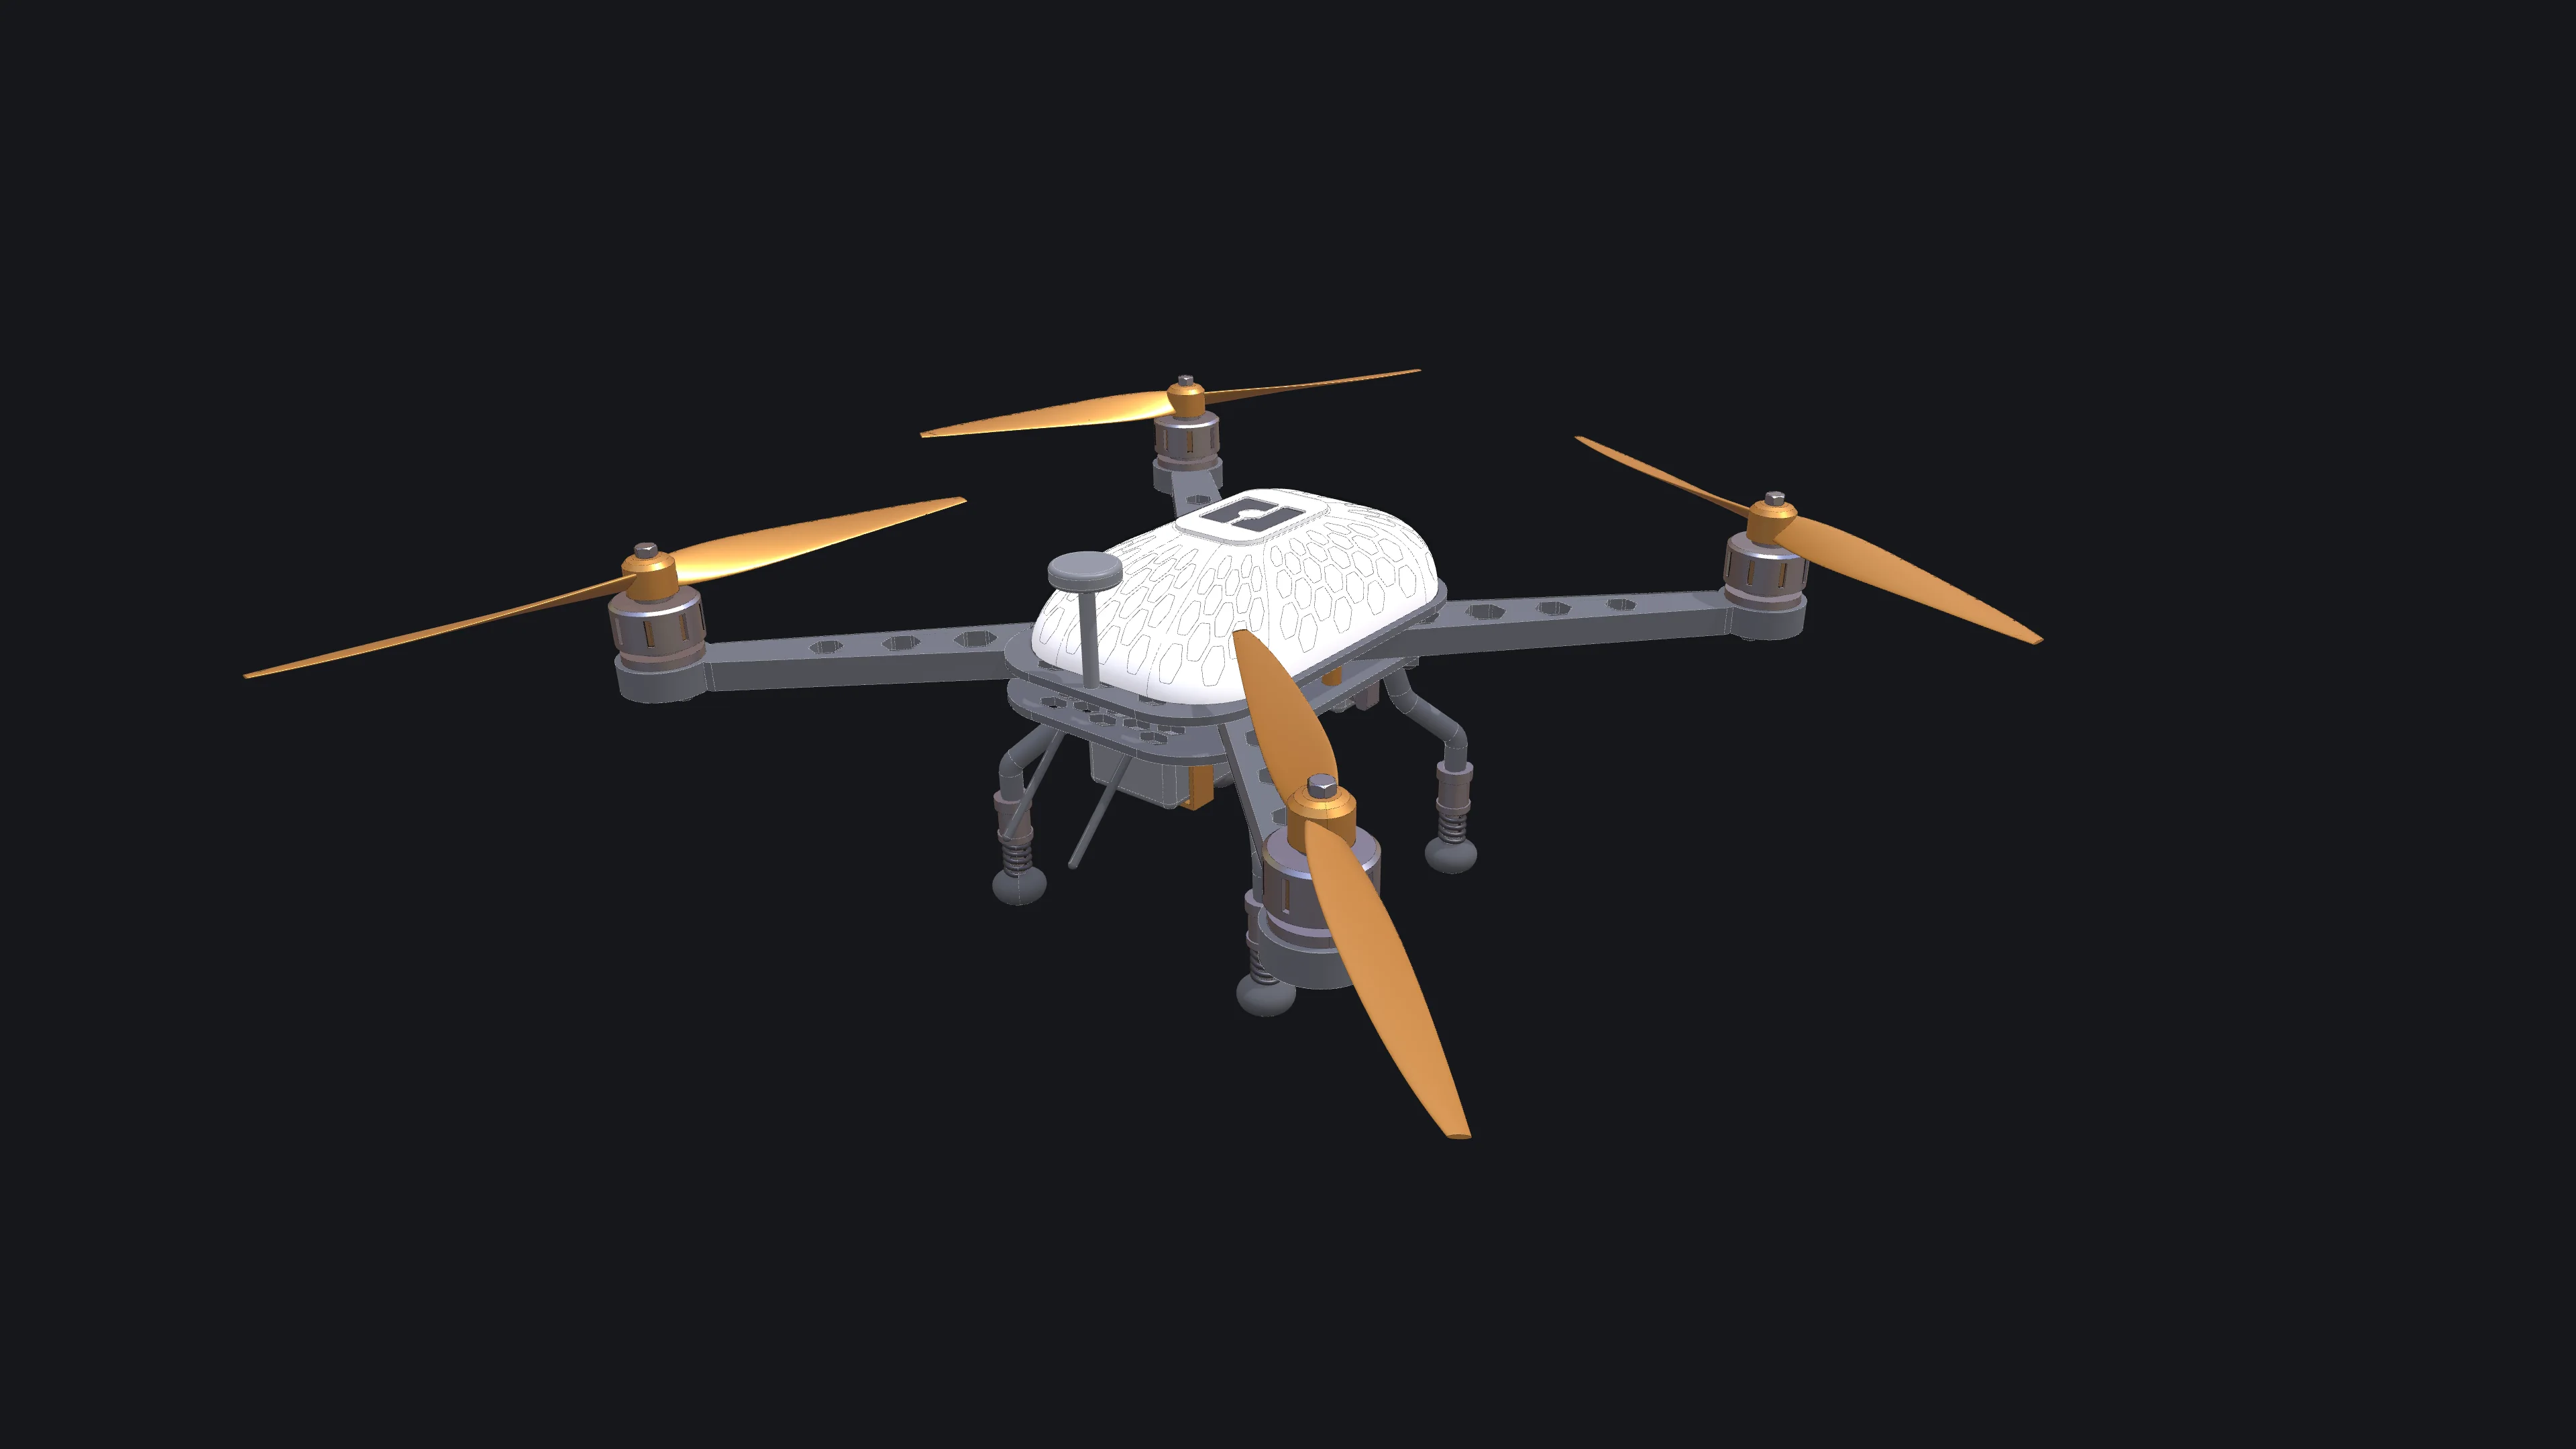
To show what that adds up to, we built one drone in all three editors: a quadcopter with a carbon frame, motors with cooling slots, propellers that alternate their spin, a canopy traced with a honeycomb and the bitbybit logo on its hatch, sprung landing legs and a camera on a gimbal. Each build is a tutorial with a picture after every step.
Watch the drone's Rete script at work, from the whole graph down to a single wire, then the same drone in TypeScript and Blockly:
A drone, built three ways
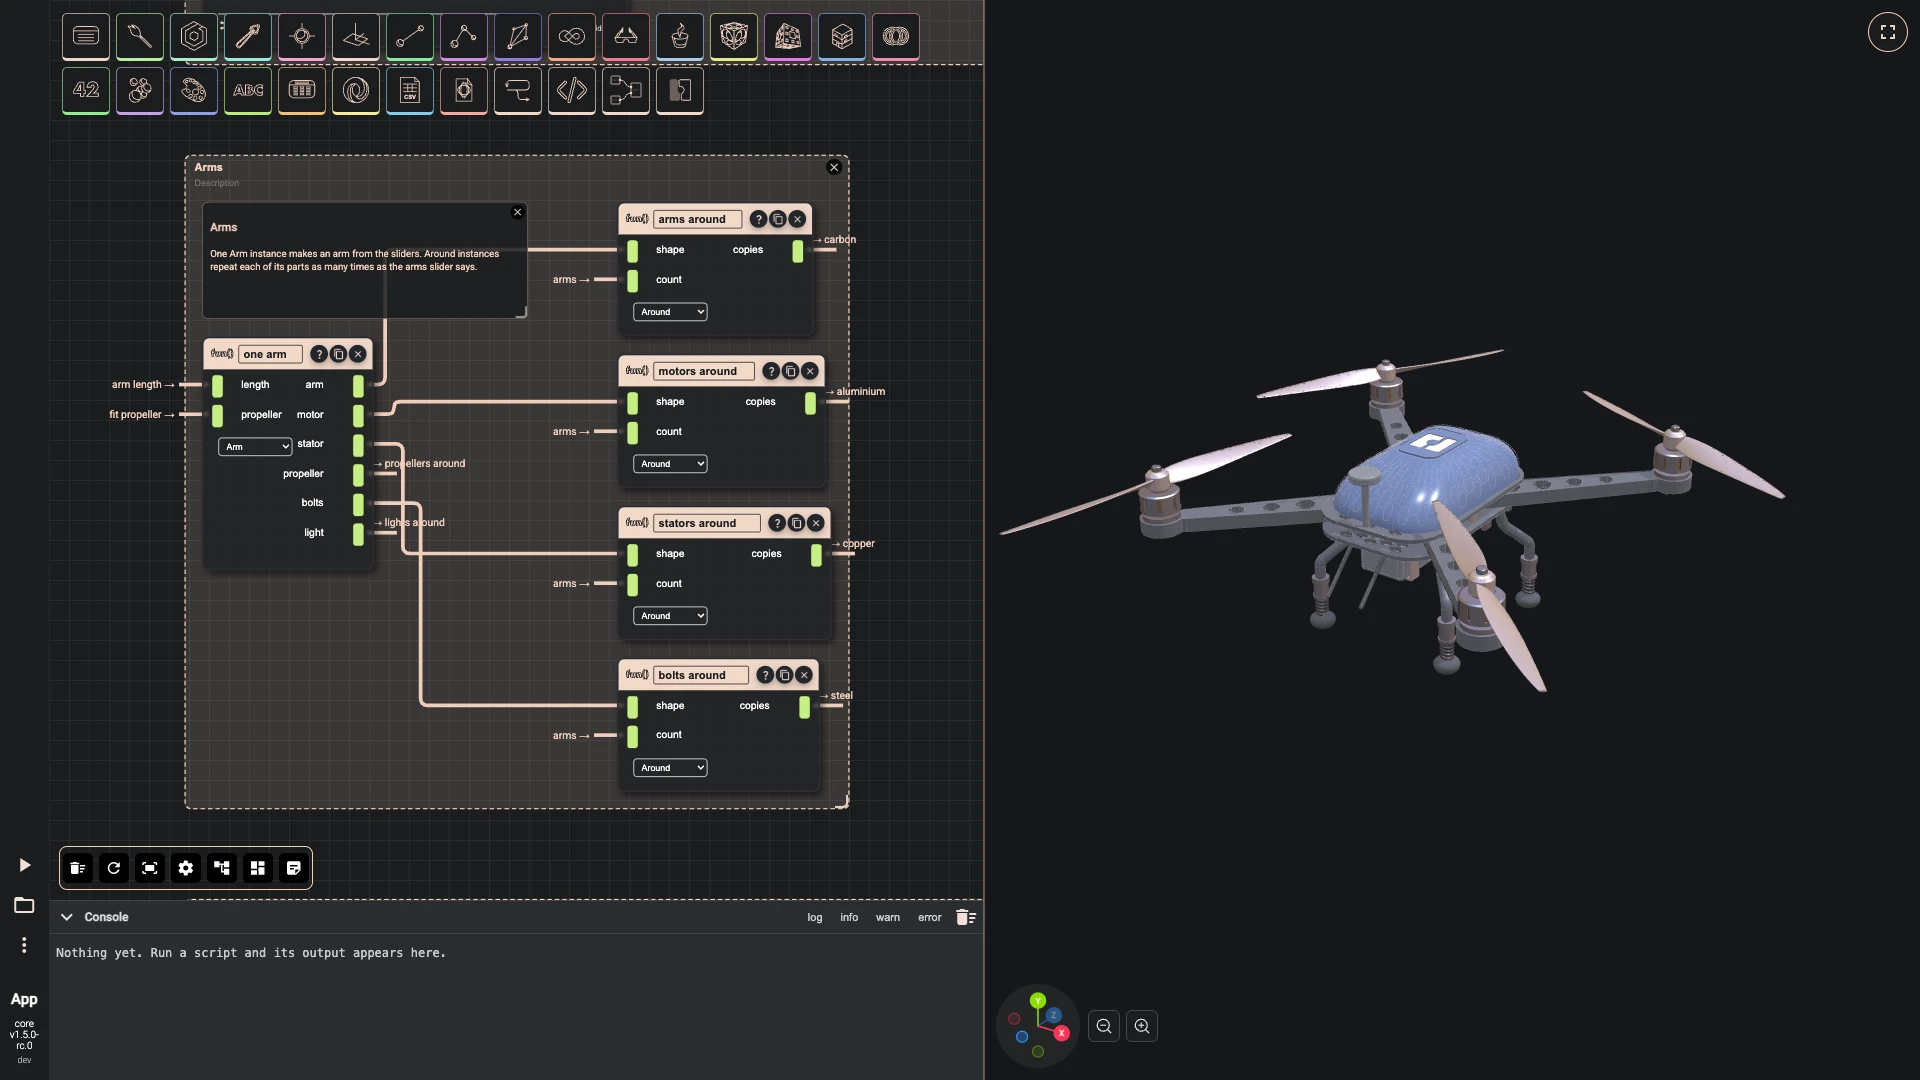
The drone is the showcase of each editor, and the tutorials build it in seven chapters: sizes and the frame, a way to repeat a part around the drone, one arm, arms around the frame, the canopy, the landing gear and the payload. Every chapter has a picture of the editor after every step.
- In Rete: 202 components in commented groups, two modules (one repeats a part around the drone, one makes an arm with its motor, propeller, bolts and light), and code components where a few lines say more than a dozen nodes.
- In Blockly: variables for the sizes, a function for every part, loops that repeat parts and cut their holes, and async functions for the parts that measure geometry. The functions are collapsed, so the stacks that call them read like a list of parts.
- In TypeScript: a script of nineteen files, one function per part and a folder for the arm, put together in
main.ts.
Change the number of arms to six and the drone rebuilds, and the propeller shrinks to fit between its neighbours.
Rete: wires you can read
In a large graph, curved wires cross the canvas and turn it into a tangle. Rete now draws wires right-angled: each output turns in a lane of its own, so wires that leave one node run side by side instead of on top of each other.
A wire between two groups is no longer drawn across the canvas at all. It becomes two short ends, each labelled with the other end: the output says where the value goes, and the input says where it comes from. Point at a label to see the whole wire, or select a node to see all of its wires. Both behaviours are switches in the settings, if you prefer the old look.
Groups, comments and an arrange that keeps them
Groups frame the nodes that belong together, with a title, a colour and a description; drag the group and everything in it moves. Comments hold Markdown, so a group can say in a sentence what it makes and how.
Auto-arrange now keeps groups whole. It lays each group out inside itself, in the order its wires run, wraps tall groups towards a square, and places the groups beside one another without overlap. Press it whenever the canvas gets crowded; the drone tutorial's pictures were taken right after it.
A colour-coded, typed graph
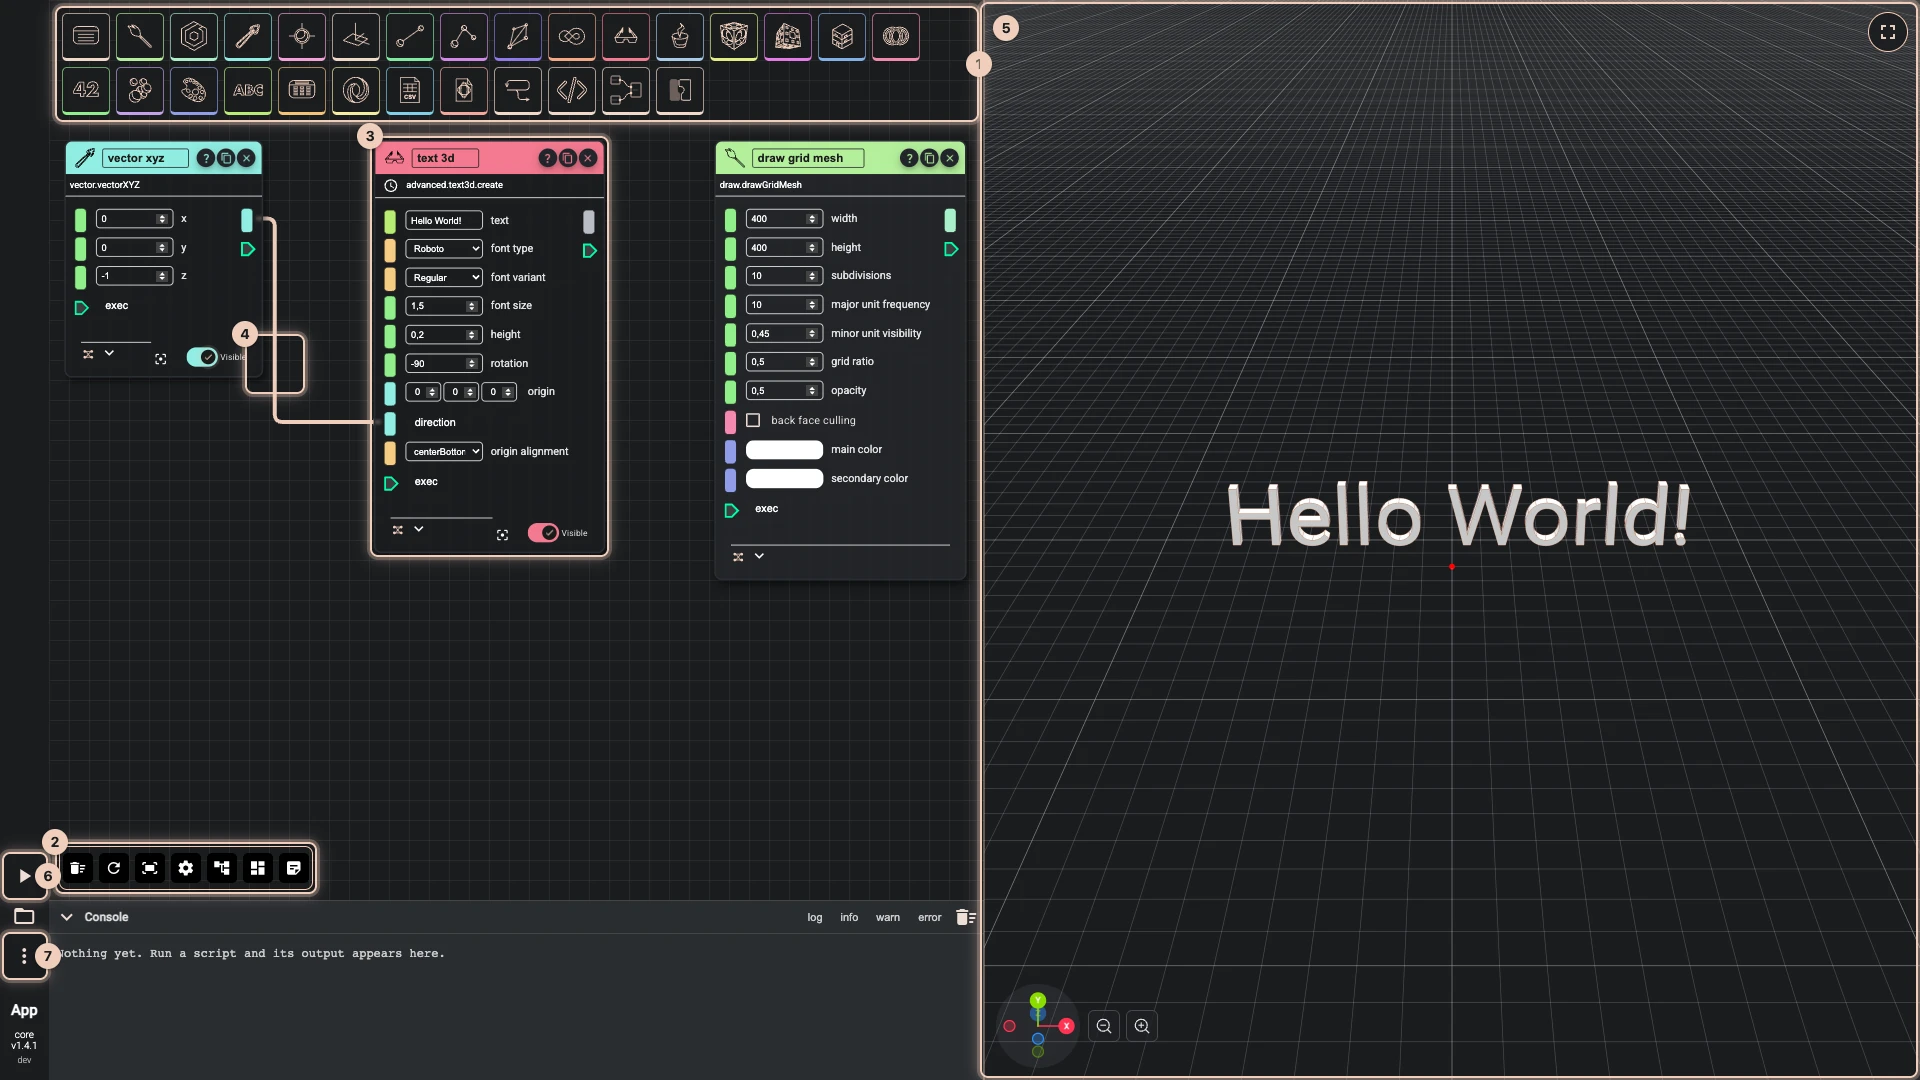
The whole graph is colour-coded by category. The colour runs from the category you pick a component from, through the component on the canvas, to its sockets, so you can tell at a glance which nodes are OCCT solids, which are meshes and which are points.
Sockets now carry types. Each socket is tinted for the kind of data it carries, and when you point at one, a tip names the type and shows the value it holds after the last run. If you'd rather have a calmer canvas, monochrome mode is one switch away in the settings.
Socket coaching instead of silent failures
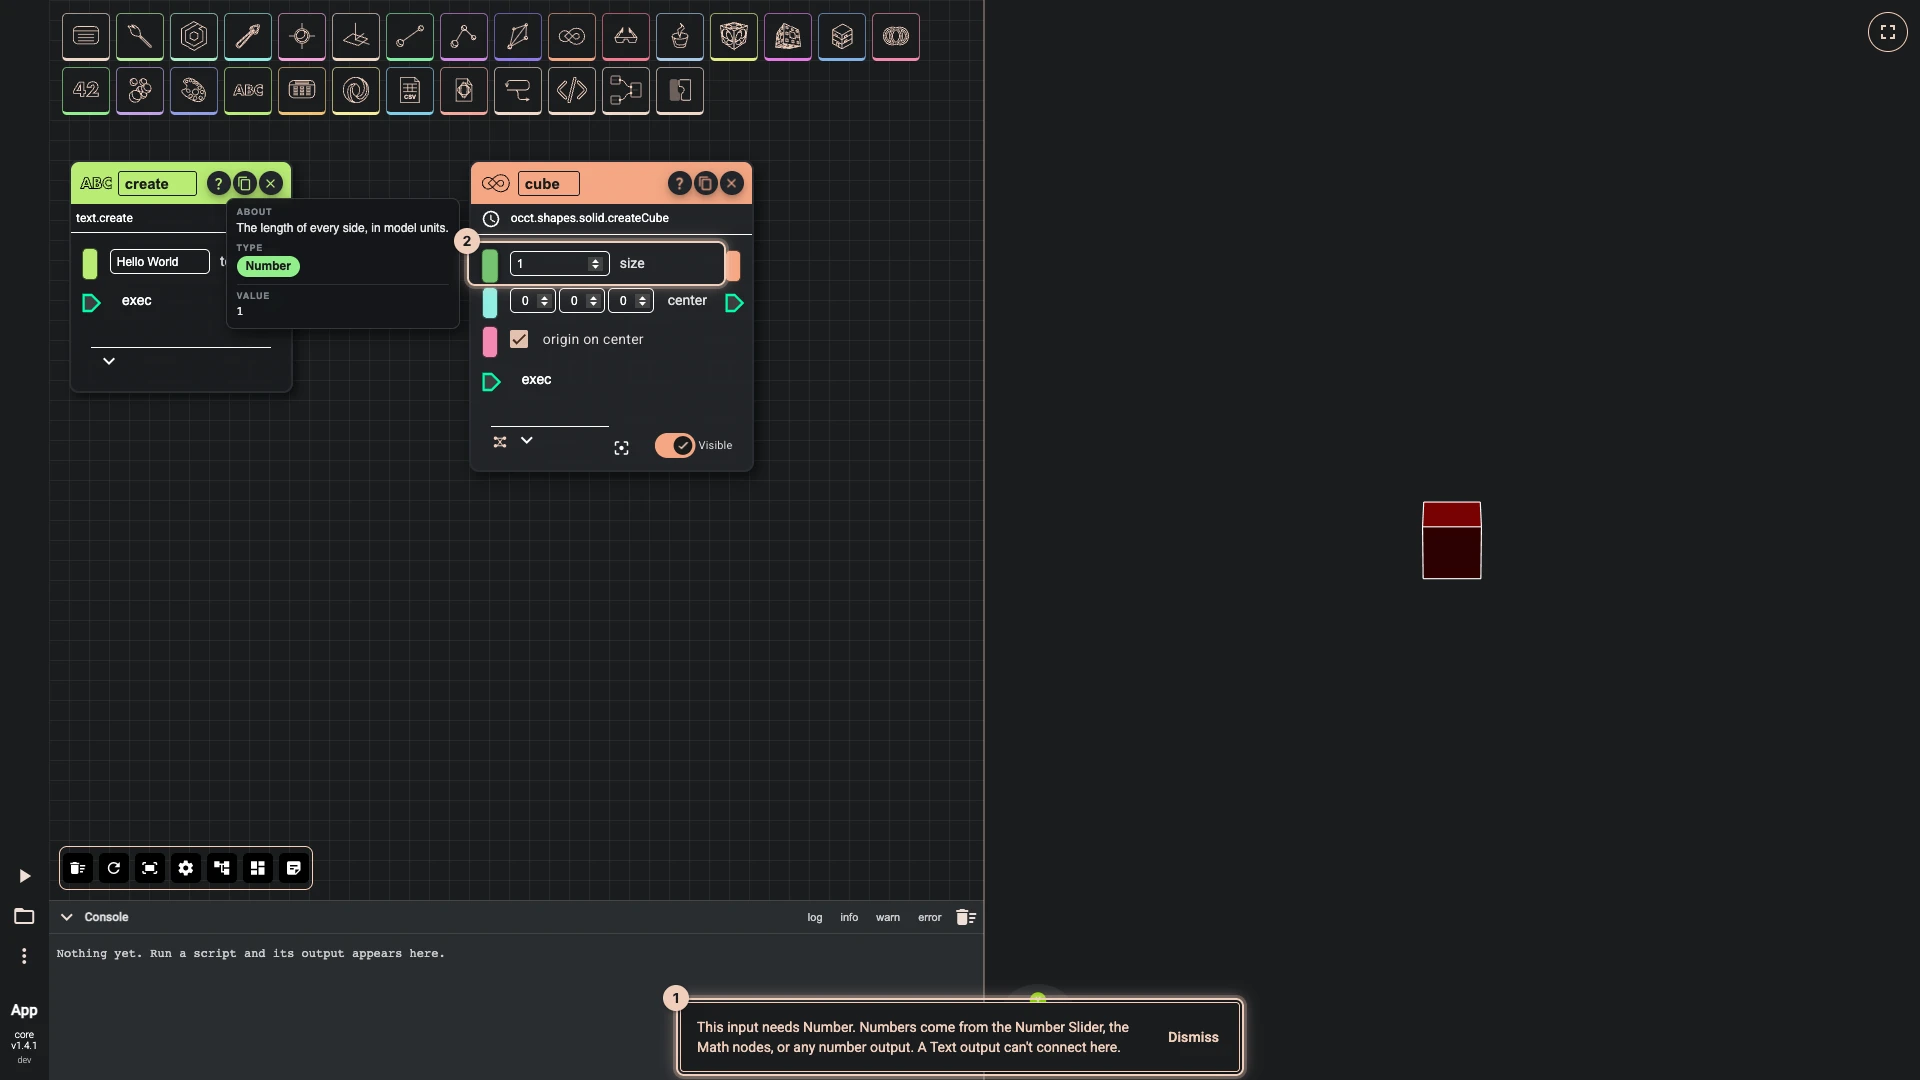
With typed sockets, the editor can help you wire things correctly:
- A refused wire says why. Drop a wire on an input that cannot take it and a short message says what that input needs and which nodes make it.
- Opened scripts keep their wiring. An older script whose connections no longer pass the type check keeps them, drawn red and dashed, and a message counts them, so nothing quietly disappears.
- Nodes show what they do with lists. When several wires feed one input, the node runs once per value and a badge says how many it received. Pair lists by position with 1:1 in the node's options.
Modules: graphs you use many times
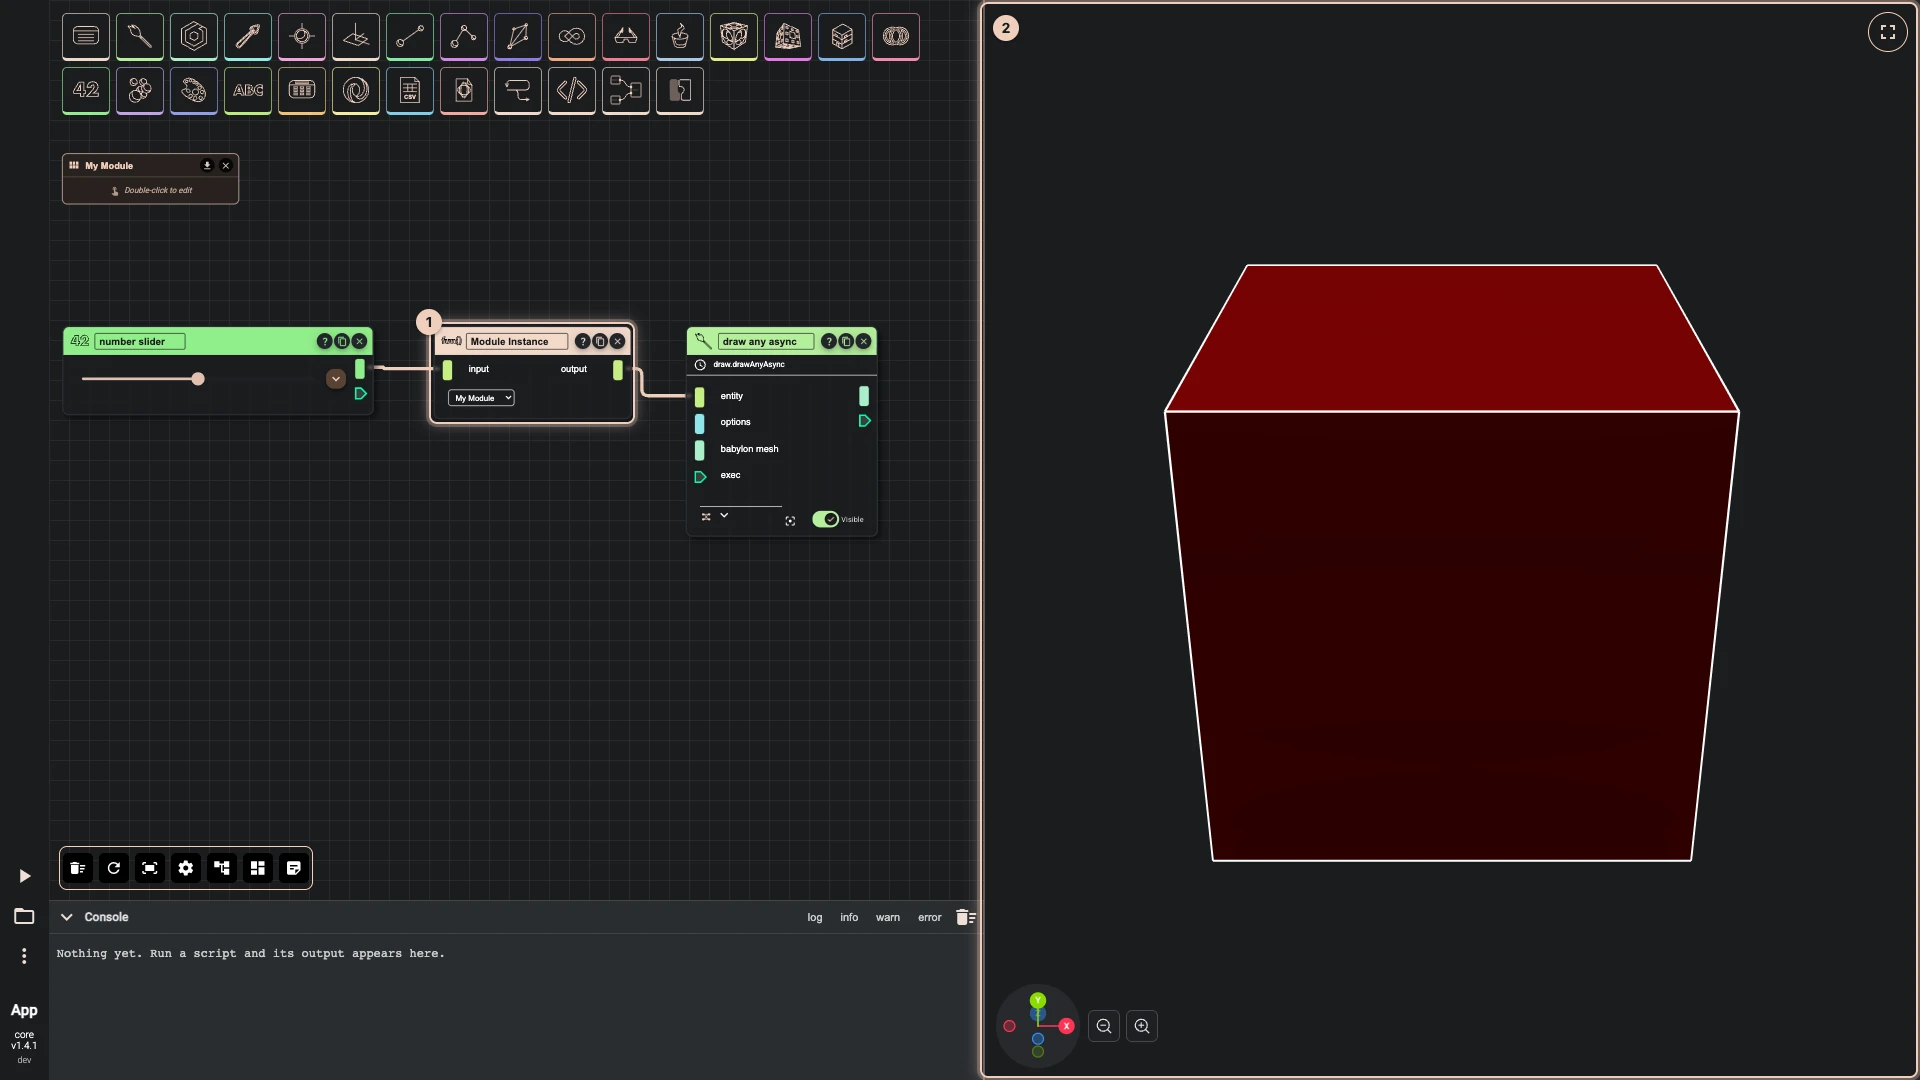
A module packages part of a graph with its own inputs and outputs. Define it once, then drop instances of it wherever you need it, the way you call a function in code. Double-click a module to edit the graph inside, with a breadcrumb back to the main canvas; an input's sample value stands in for what an instance gives it, so you can see what the module makes while you build it. The drone uses two modules: Around repeats any part evenly around the drone, and Arm makes a whole arm from its length and the propeller's diameter.
Find anything on the canvas
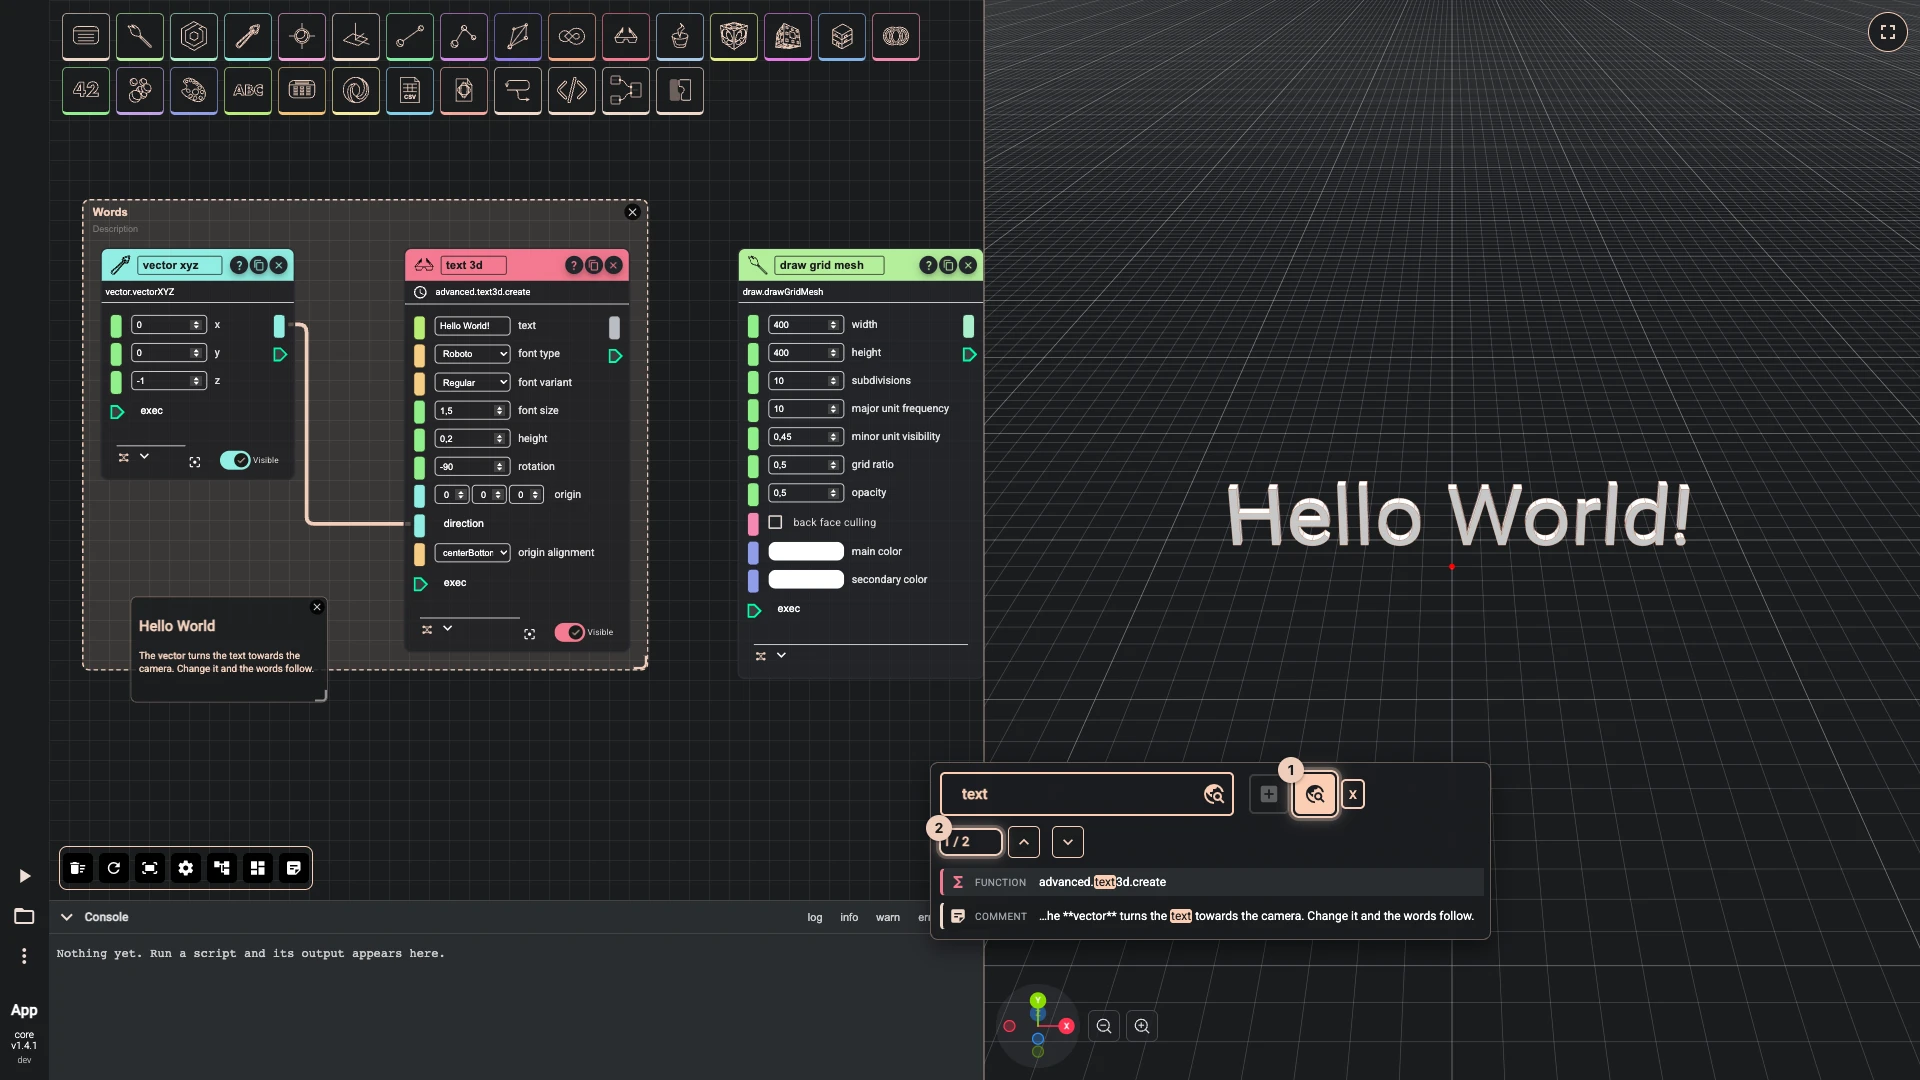
The component search now does two jobs. Add components searches the catalogue as before, and Find on canvas searches the script in front of you. It matches component names, titles, inputs, outputs, group titles and comment text, counts the matches, and steps through them with the arrows. Each match is framed and pulses so your eye goes straight to it.
Selection that shows its geometry
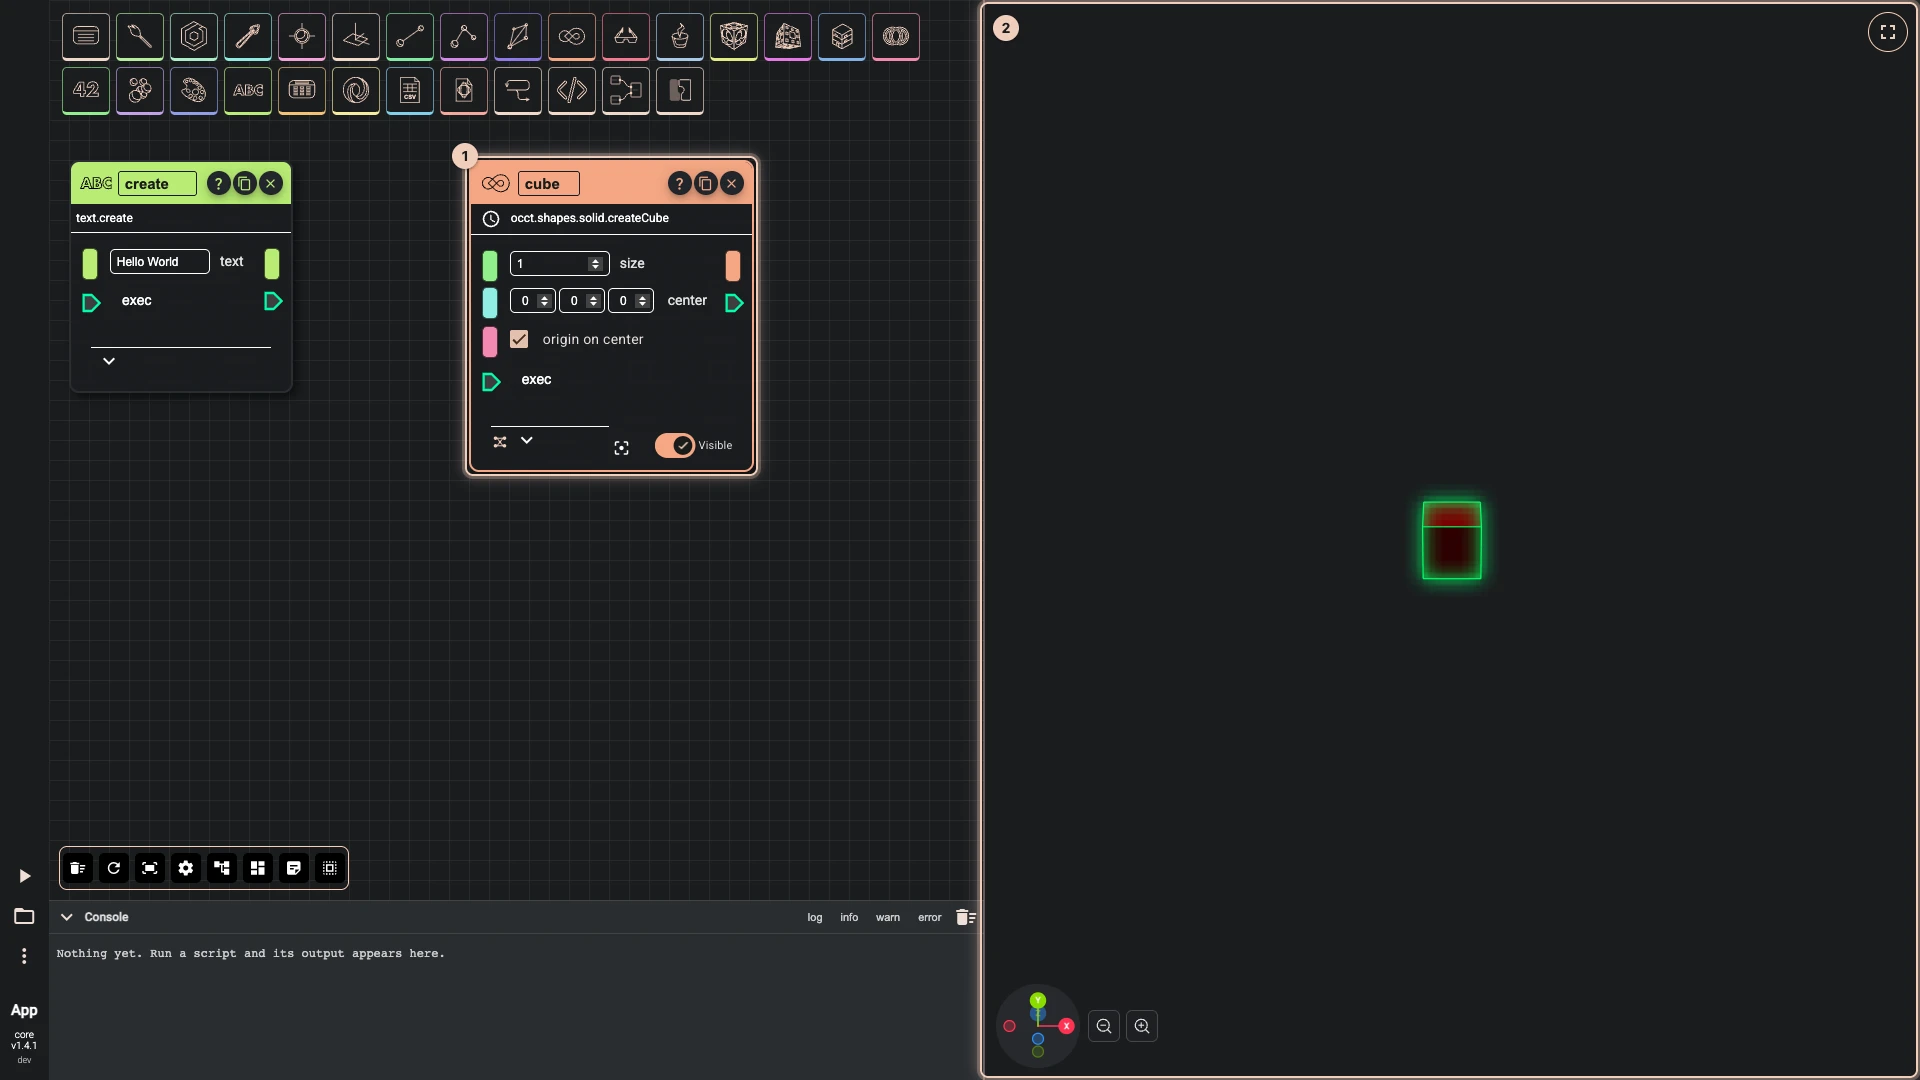
Selecting a node highlights the geometry it made in the 3D view, with a glow that draws on top of everything else. If the node's geometry is hidden, it is drawn while the node stays selected. Double-click a node to frame its geometry and centre the canvas on the node itself.
Code where code is clearer
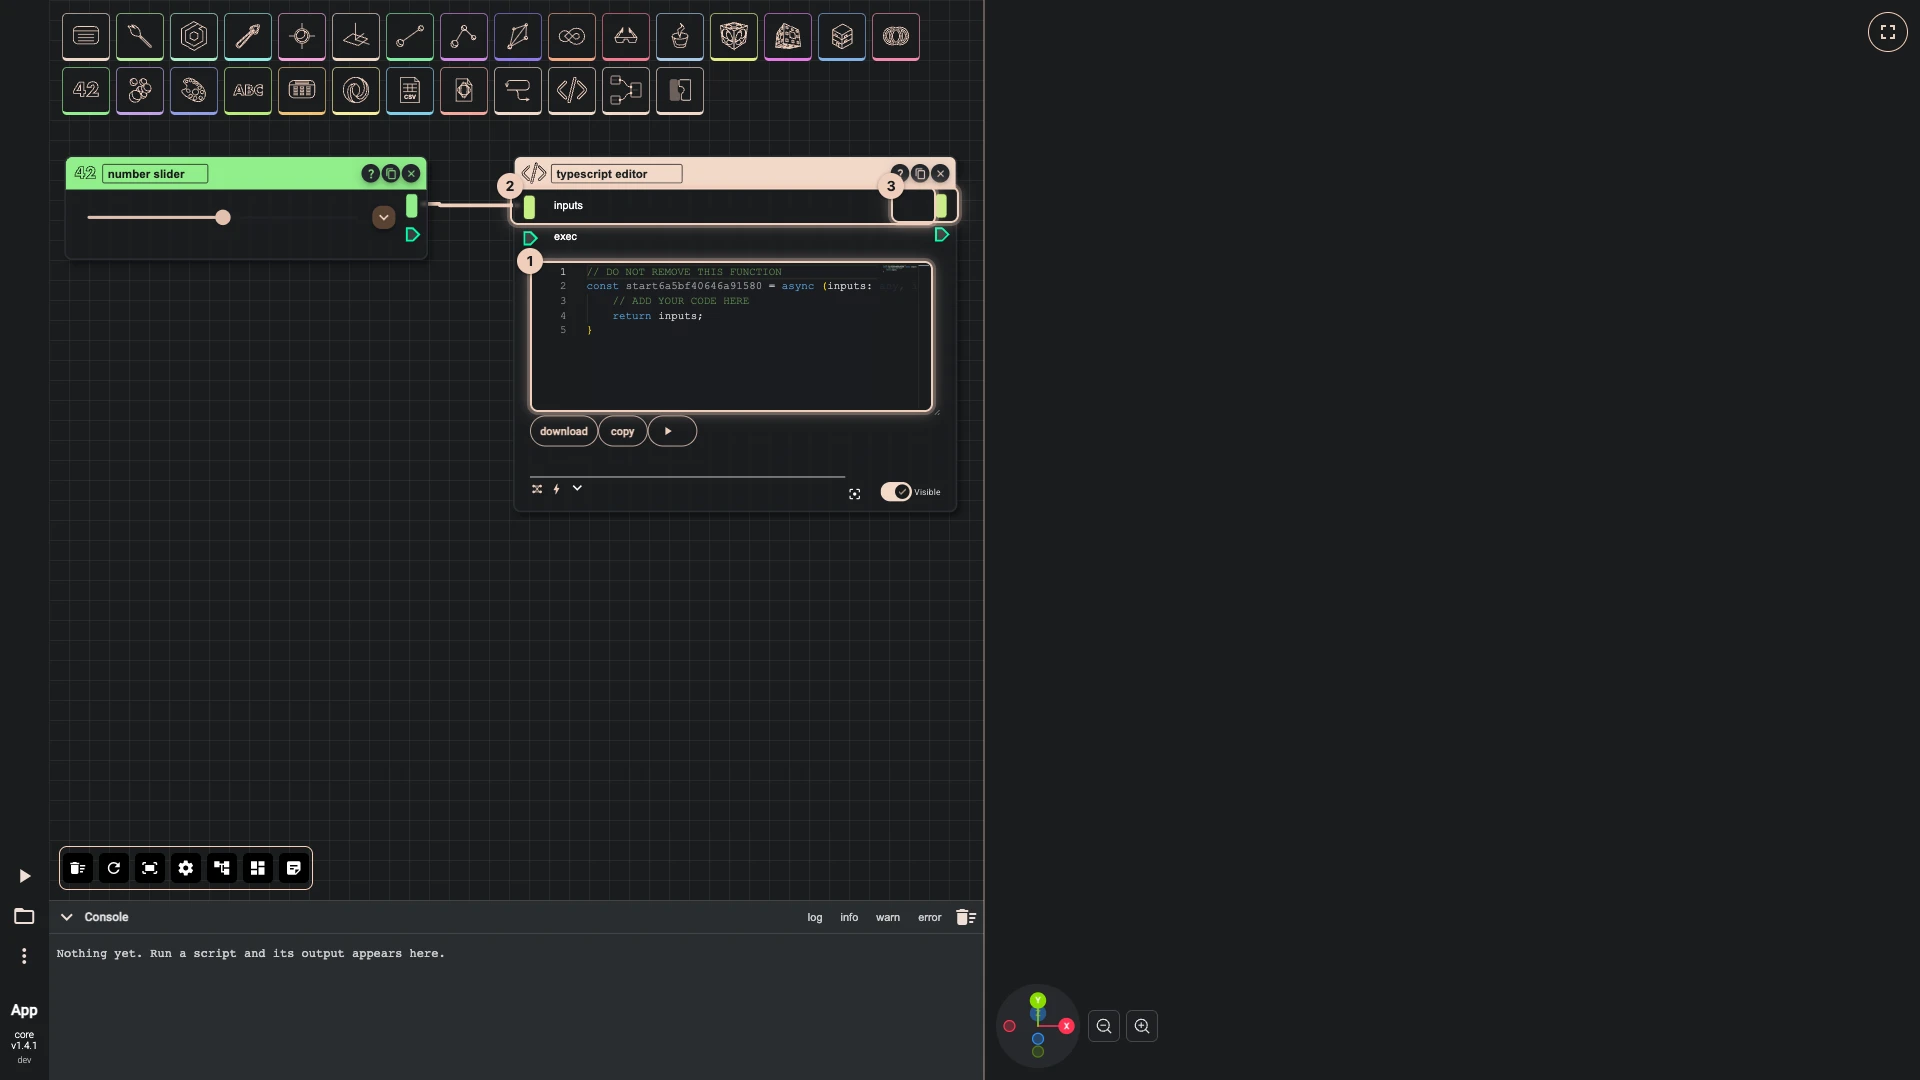
Some things are easier to say in a few lines than in a dozen nodes: a formula, a loop with a condition, a list reshaped. A typescript editor node holds a function that receives what is wired into it and returns what it gives out, with the same IntelliSense as the TypeScript editor. The drone mixes both: simple shapes are nodes, and parts with a profile of many points or a loop are code nodes.
Settings and split screen
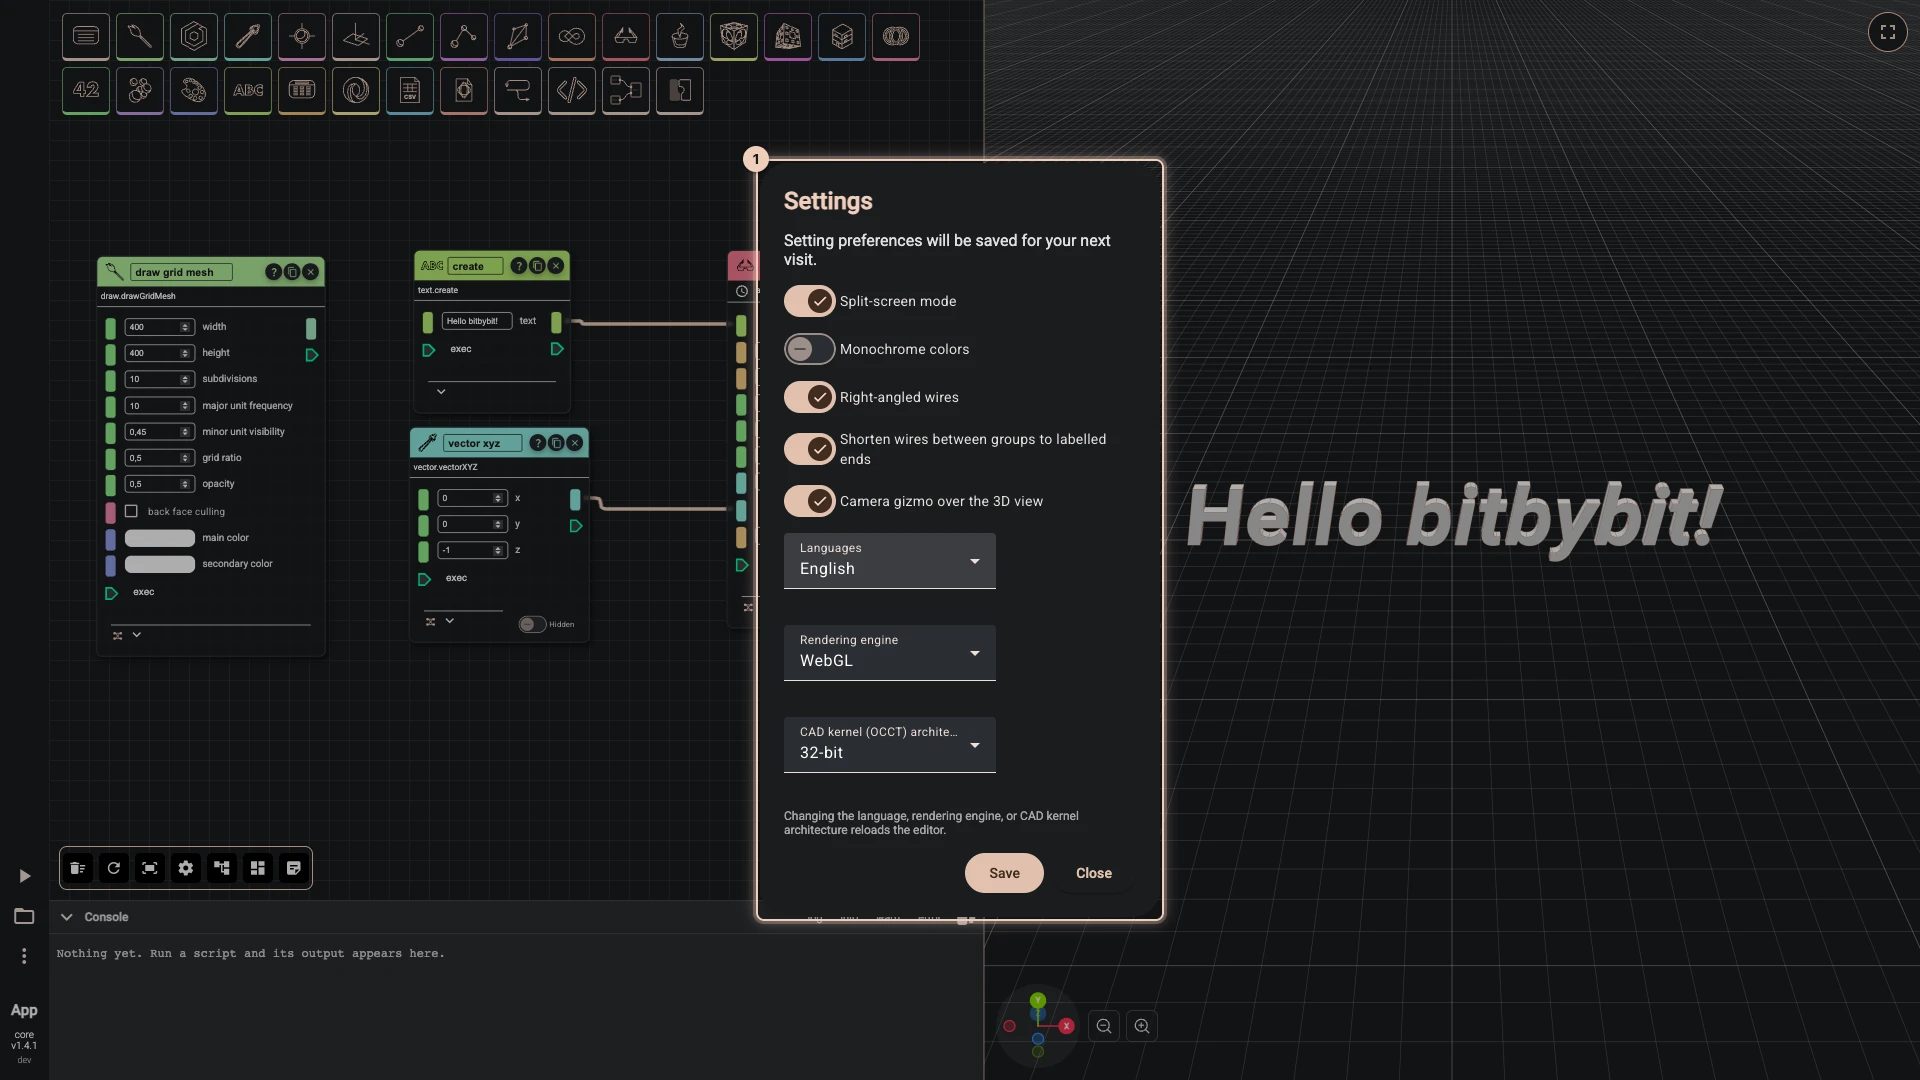
Work on the graph and the 3D view side by side, with a divider you can drag, or swap the canvas to give the model the whole screen. The Settings dialog holds split screen, monochrome colours, the camera gizmo, right-angled wires and labelled wire ends, the language, the rendering engine (WebGL or WebGPU) and the OCCT kernel. Settings are remembered on your device.
Blockly: functions that wait
Blockly functions could always return a shape, because every bitbybit block waits for the shapes it receives. What they could not do was wait for a value themselves: an await block inside a function failed when the script ran.
Now a function with an await block in it runs as async. A call of it as a block of its own waits for it to finish before the next block runs, a set block that keeps its result waits for it too, and a function that calls it becomes async too. Functions without await blocks run exactly as before, so existing scripts behave the same.
We also fixed a long-standing bug on the way: a function whose return was a bitbybit block, such as a cylinder plugged straight into its return, gave back nothing, because of where a line break fell in the generated code. Such functions now return their shape. And a block dragged from the toolbox no longer fills a number the API leaves unset with 0, which had tinted the edges of a shape drawn with the full drawing options. In the drone, async functions read each light's centre to sort the lights into green and red, and measure the canopy's faces to trace its honeycomb. Collapse functions once they work, and a large Blockly script reads like a list of parts.
TypeScript: scripts of many files
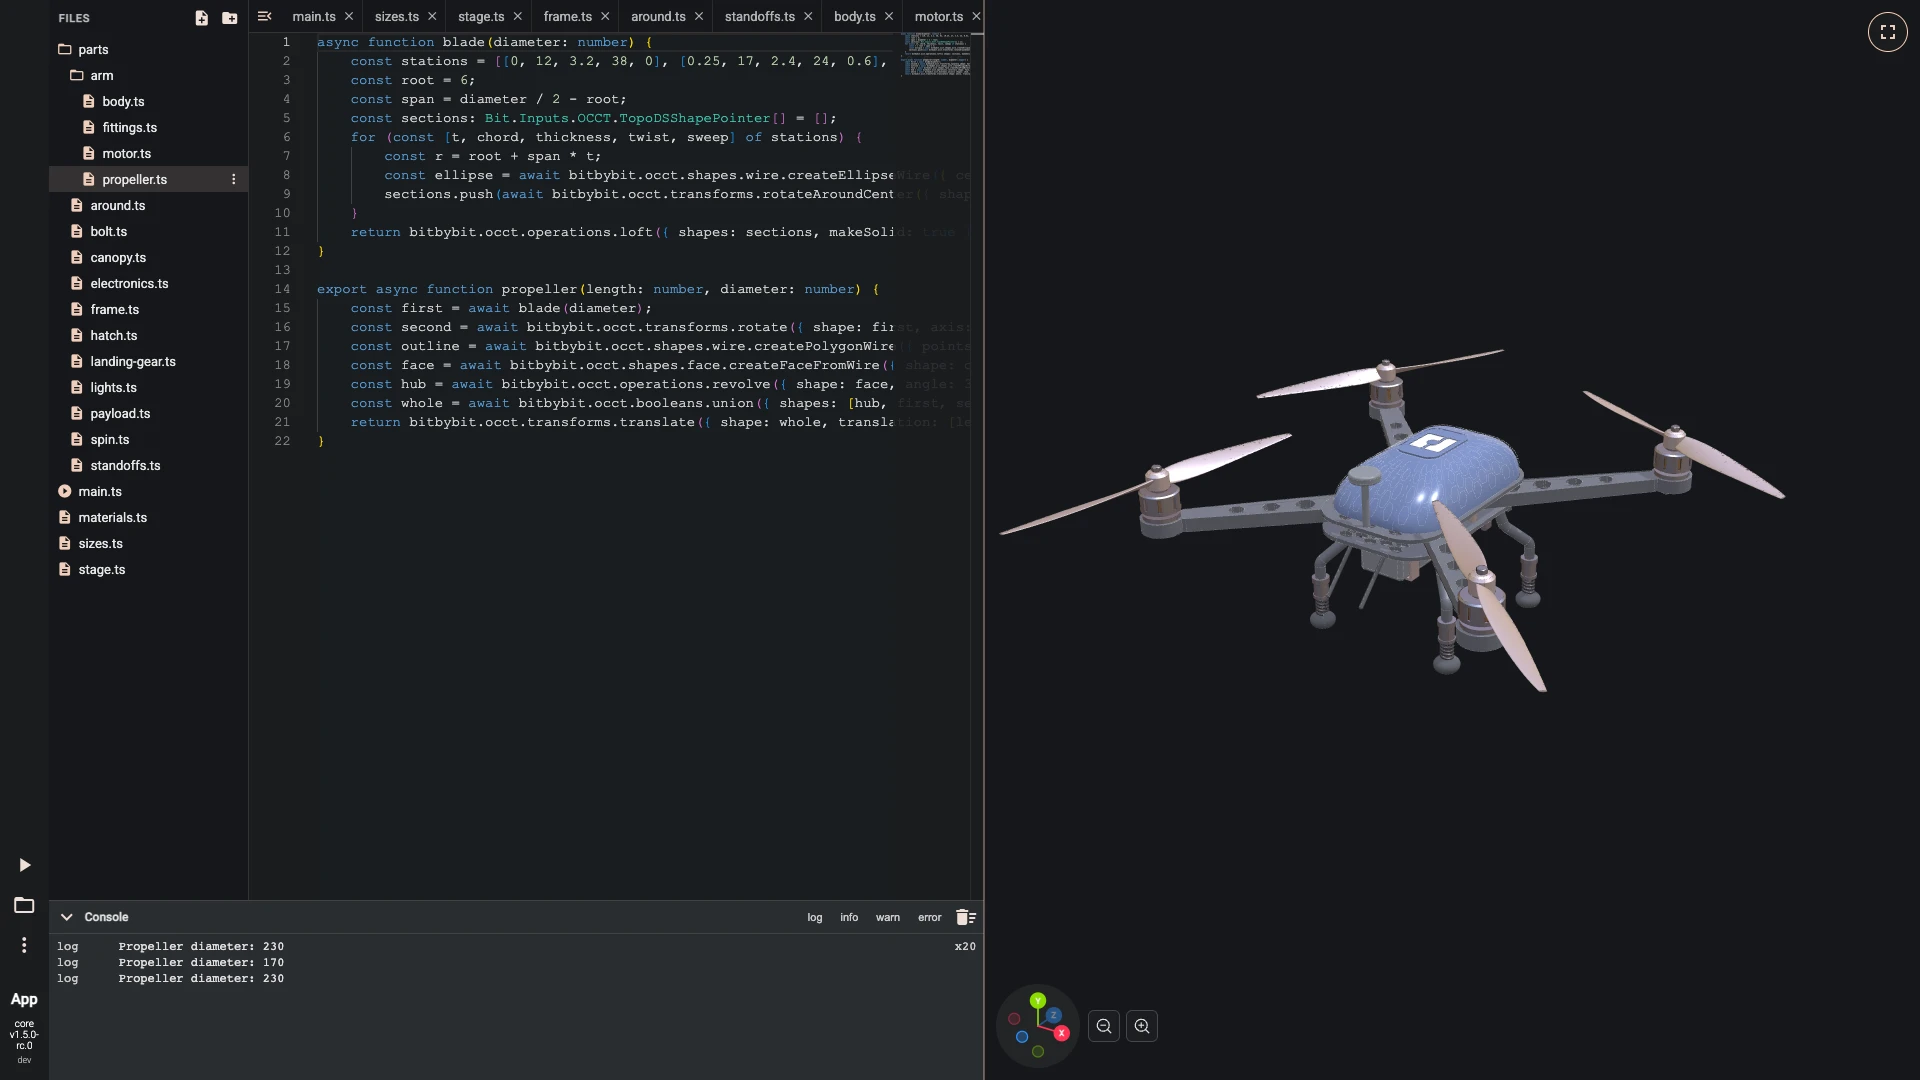
A TypeScript script can now be many files in folders, with main.ts as the file the run starts from. Files import each other by relative path, every file is checked as you type, and a mistake in a file you have closed still shows its count in the tree. The TypeScript drone keeps each part in a file of its own.
Agents can drive the editors
While an editor is open, it offers its tools to AI agents, through window.bitbybitEditor and through WebMCP in browsers that support it. An agent can search the components or blocks, read the graph or the files, apply a batch of changes that the editor checks first and that one undo takes back, run the script and read what failed, and capture the 3D view. The drone tutorials were built through these tools: each step is a checked batch of edits, played in the real editor and photographed.
Faster, and lighter on your machine
Under all of this, the editors were rebuilt. The 3D scene renders only when something changes instead of 60 times a second. Zoomed far out, Rete nodes simplify to placeholders so the canvas stays smooth. Rete keeps each node's last result and runs again only what a change affects. Large graphs like the drone's 202 nodes stay quick to pan, zoom and edit.
New pages on learn.bitbybit.dev
Each coding editor now has its own section in Getting Started: an introduction, a tour of the window, the showcases, tutorials with a picture after every step, a page for each area of the editor and its shortcuts. Start with Rete, Blockly or TypeScript.
Try it out
All of this is live in the Rete, Blockly and TypeScript editors. Open the drone from a showcase page, change its sizes, and take it apart. We'd love to hear what you build.